8
transmitter and model setup
Control throws
Aileron
Aileron
Rudder
Elevator
Elevator Rudder
Preight check
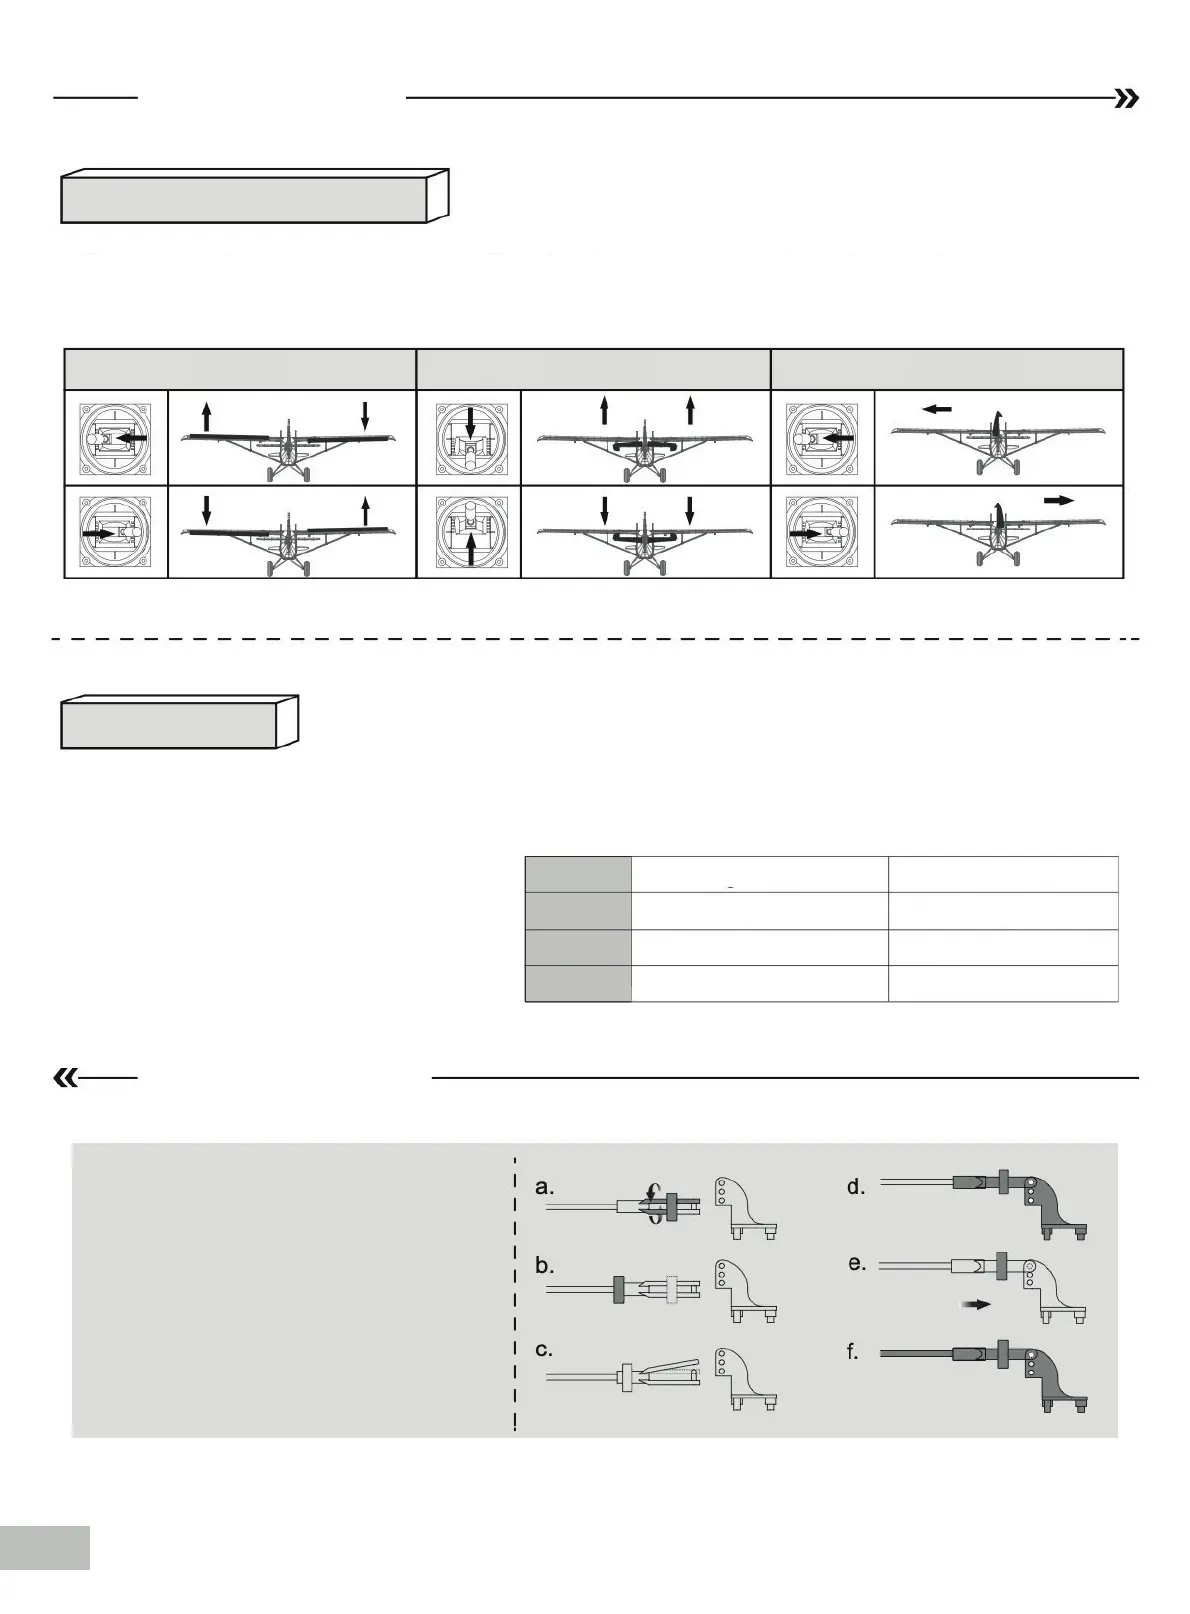
After assembly and prior to your rst ight, make sure all control surfaces respond correctly
to your transmitter by referring to the diagram below.
The suggested control throw setting for the Husky Special Edition are as follows (dual rate
setting):
1.Pull the tube from the clevis to the
linkage.
2.Carefully spread the clevis, then insert
the clevis pin into the desired hole in the
control horn.
3.Move the tube to hold the clevis on the
control horn.
Tips: The maiden flight should always be
flown using low rates, fly the aircraft until
you are famil- iar with its characteristics
prior to trying high rates. Make sure the air-
craft is flying at a decent altitude and speed
prior to using high rates, as the aircraft
will be sensitive to control inputs with the
larger control surface
movements.
High Rate
18mm up /down 14mm up /down
16mm up /down 12mm up /down
28mm left /right 20mm left /right
Low Rate
Clevis installation