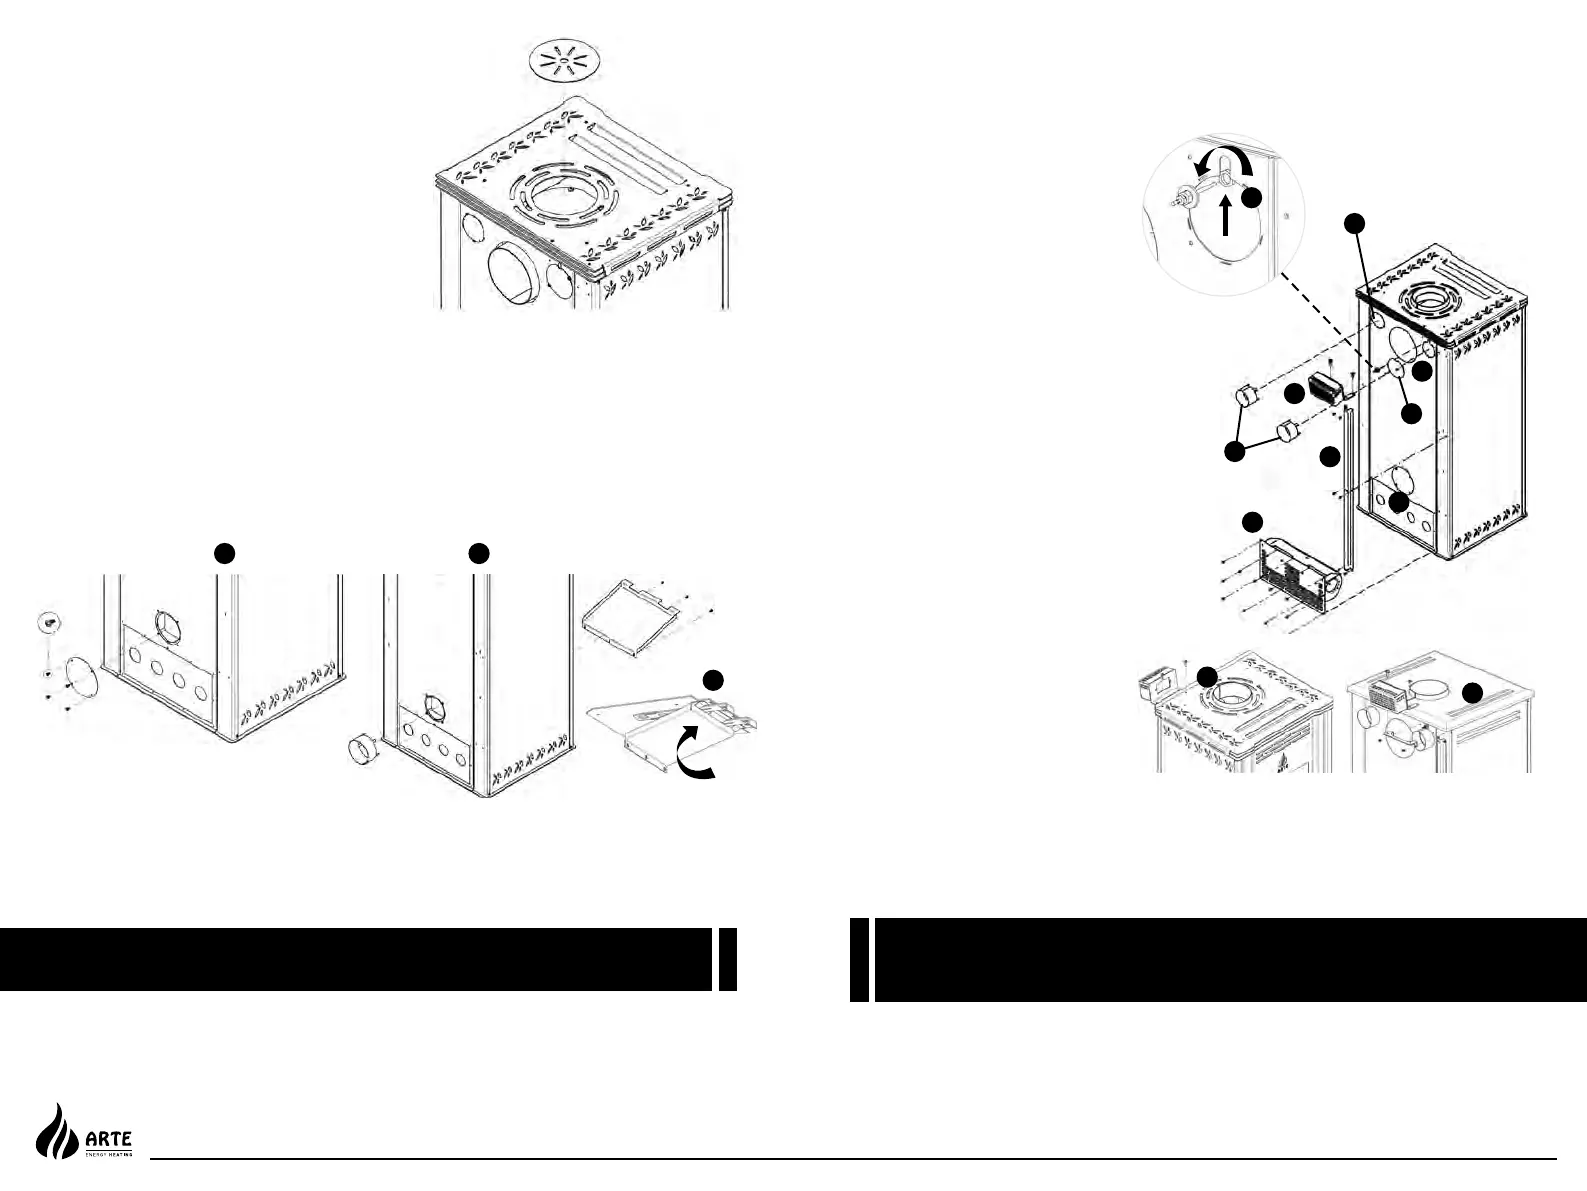
> Reassemble inverting the smoke outlet
flange and cap with respect to their original
positions and secure them with the screws
removed previously. Before closing the un-
used smoke outlet hole, check the correct
position of the cap’s fiber seal to avoid the
possibility of smoke coming through over
time.
> Then reassemble the buck cover, the two
sides, and the top cover
> Put the metallic cover on the top hole (Fig. 6)
> Knock out with a hammer, the
cut out cover (Fig. 8A)
> Knock out with a hammer, the
cut out cover (Fig. 8B)
> Attach the blower to the stove
with the eleven screws (Fig. 8C)
> Attach the wire column to the
stove with the six screws (Fig. 8D)
> Attach the electronic board to the
stove with the two screws (Fig.
8E & F). If your top cover is from
stone/marble attach it to the stove
with two more screws (Fig. 8G).
> Install the thermostat (Fig. 8H)
> Attach the closing cap to the stove
with the two screws (Fig. 8I)
> If you want two extra room to
heat. Knock out with a hammer,
the cut out cover (Fig. 8J)
> Install the pipe joints (Fig. 8K) (For
heating one or two more rooms)
> Plug the socket and is ready to
heat your room with the 280m
3
/h
blower
6.5 Kit for external air (optional)
Improve efficiency by pulling in fresh air from the outside of the house for the combustion.
Apollo gives you the opportunity to use the external air:
> Remove the closing cap (1) from the back of the stove unscrewing the 4 screws (Fig. 7A)
> Screw again only the 4 screws
> Install the pipe joint (2. (Fig. 7B)
> Install the frond cover (3) and secure it with 3 screws (Fig. 7 B&C)
The air heat ventilation kit is similar to a fireplace ventilation kit. It gives you the opportunity to redistribute the
hot air not only in the same room with the stove, but to other rooms of the house, too. In this way you heat
more efficient and equal all the rooms. The installation is very simple (Ready to install):
Do not exceed the maximum length of 7m in strait line for each output, figuring that every 90
o
angle
equivalent to 1m and every angle of 45
o
to 0.5m.
Make the pipe path horizontally or upwards, do not try to perform a run-down pipe installation. If pipe
penetrates flammable walls, insulate well the gap putting insulation thickness of 4cm.
6.6 Ventilation kit for air heating (optional)
A blower can be installed at the back of your stove. This option is necessary if you wish to redistribute into
the house or room the heat of your stove. By forcing hot air, the blower enables you to extend the radiation
and convection power of your stove.
DO NOT cut or removes the grounding prong from the plug.
DO NOT route the power cord beneath the heater.
Although it is ready to install, this appliances must be electrically
connected and grounded in accordance with local codes.
DUST FILTER: Apollo is equipped with dust filter. Clean it
with a vacuum cleaner and, where necessary, with water.
New filters can be obtained from your supplier.
38 | 39
APOLLO WOOD STOVE
Fig. 6
Fig. 7
Α B
1
2
3
C
F
G
K
J
E
D
Β
I
Α
C
Fig. 8
H