Aruba 340 Series Access Points |Installation Guide 7
are available as accessory kits, which may be purchased separately.
Use the steps in this section to install the 340 Series access point.
1. Pull the necessary cables through a prepared hole in the ceiling tile near where the AP will be placed.
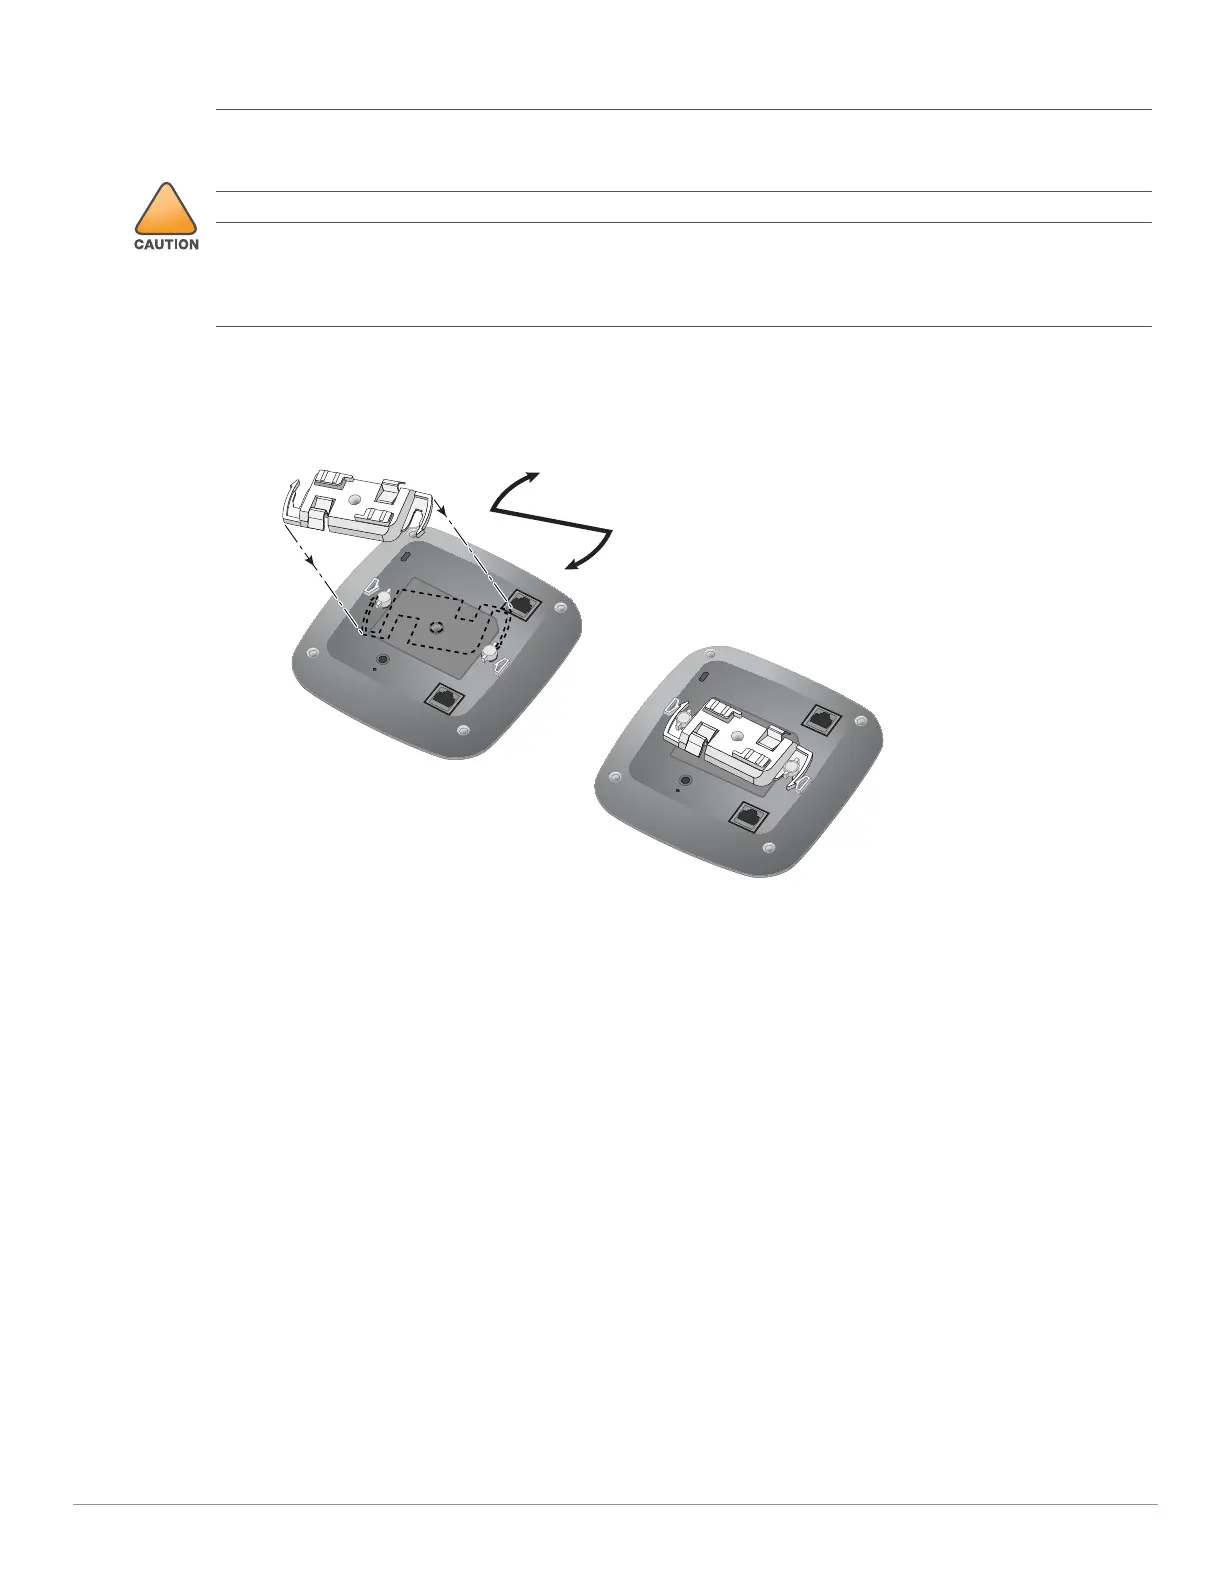
2. Place the adapter against the back of the AP with the adapter at an angle of approximately 30 degrees to the
tabs, then twist the adapter clockwise until it snaps into place onto the tabs (see Figure 6).
Figure 6 Attaching the Ceiling Rail Adapter
3. If necessary, connect the console cable to the console port on the back of the access point.
4. Hold the access point next to the ceiling tile rail with the ceiling tile rail mounting slots at approximately a 30-
degree angle to the ceiling tile rail (see Figure 5). Make sure that any cable slack is above the ceiling tile.
5. Pushing toward the ceiling tile, rotate the AP clockwise until the device clicks into place on the ceiling tile rail.
Ensure that the AP is locked into the ceiling rail mount before completing the installation.
6. (Optional) When installing the AP-344, connect the external antennas connectors on the front of the access
point.
All Aruba access points should be professionally installed by an Aruba-Certified Mobility Professional (ACMP).
The installer is responsible for ensuring that grounding is available and meets applicable national and electrical
codes. Failure to properly install this product may result in physical injury and/or damage to property.
Tous les points d'accès Aruba doivent impérativement être installés par un professionnel agréé. Ce dernier doit
s'assurer que l'appareil est mis à la terre et que le circuit de mise à la terre est conforme aux codes électriques
nationaux en vigueur. Le fait de ne pas installer correctement ce produit peut entraîner des blessures
corporelles et / ou des dommages matériels.
 Loading...