10
OAT Sensor Installation
1. Choose a location:
• Out of direct sunlight
• Above maximum snow level
• That is accessible should service be required
• Preferably on the north side of the house is preferable
2. Drill a 5/16” access hole through the exterior wall aligned with one of
the pre-drilled holes on the back of the enclosure body. If the sensor
wire is to run along the outside of the structure, use opening located
at the bottom of the enclosure.
3. Mount the sensor enclosure level over the access hole with the
sensor opening on the back plate aligned with the 5/16” opening.
Fasten with appropriate screws being cautious not to over tighten,
flexing the box out of square.
4. Route the sensor lead into the sensor enclosure and fasten with the provided wire tie.
5. ALTERNA
TIVE SENSOR MOUNTING
• Sensor can be mounted inside the control section of the outdoor condensing unit.
• Ensure sensor is mounted in a location where its temperature reading will not be
influenced by the equipment
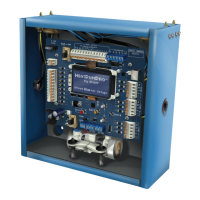
An OAT sensor enclosure is provided to protect the outdoor sensor from physical damage as well as snow,
ice and solar heat inuence.
LAT & OAT Sensor Installation
Installation Notes
• Both sensors are identical and can be used as either the Leaving Air Temperature (LAT) or Outside Air
Temperature (OAT).
• Both sensors must be connected to the board for proper functionality, non-heat pump applications do not
require the OAT sensor to be located outside.
• If additional wire length is required on a sensor, up to 50 ft of 18-3 thermostat wire can be added.
• Keep panel power “off” while connecting sensors to the board.
• The sensors have three conductors, (red, white, black) and must be wired to the appropriate (R, W, B)
terminals of the respective sensor terminals.
LAT Sensor Installation
• The
sensor must be located in the supply trunk, downstream of the heat exchanger and cooling coil and
before any trunk dampers.
• Do not locate the sensor in
an area that
is
in the direct line of site of the heat exchanger, cooling coil or UV
Lights. These locations can cause false readings.
Sensor location here
Cover
Outdoor
Air Sensor
<--slide -->