I&M No.V7533
50 Hanover Road, Florham Park, New Jersey 07932 www.ascovalve.com
Page 2 of 3
Periodic exercise of the valve should be considered if ambient or
fluid conditions are such that corrosion, elastomer degradation,
fluid contamination build up, or other conditions that could
impede solenoid valve shifting are possible. The actual frequency
of exercise necessary will depend on specific operating conditions.
A successful operating history is the best indication of a proper
interval between exercise cycles.
Depending on the medium and service conditions, periodic
inspection of internal valve parts for damage or excessive wear is
recommended. Thoroughly clean all parts. If parts are worn or
damaged, install a complete rebuild kit.
Causes Of Improper Operation
Incorrect Pressure: Check valve pressure. Pressure to valve must
be within range specified on nameplate.
Excessive Leakage: Disassemble valve and clean all parts. If parts
are worn or damaged, install a complete ASCO Rebuild Kit.
Valve Disassembly
1. Disassemble valve in an orderly fashion using exploded views for
identification of parts.
2. Remove solenoid, see separate instructions.
3. Unscrew solenoid base sub-assembly and remove body gasket,
core assembly, core spring and core guide (core guide not
present on all constructions).
4. All parts are now accessible to clean or replace. Replace worn
or damaged parts with a complete ASCO Rebuild Kit.
Valve Reassembly
1. Reassemble valve using exploded views for identification and
placement of parts.
2. Lubricate solenoid base gasket with DOW CORNING 111
Compound lubricant or an equivalent high-grade silicone
grease.
3. Replace body gasket and install core assembly,core spring and
core guide (if present) into solenoid base sub-assembly.
4. Replace solenoid base sub-assembly (with core assembly) into
valve body. Torque solenoid base sub-assembly to 175$25
in-lbs. [19,8$2,8 Nm].
5. Install solenoid, see separate instructions and make electrical
connections.
WARNING: To prevent the possibility of
death, personal injury or property damage, turn
off electrical power, depressurize valve, and vent
fluid to a safe area before servicing the valve.
6. Restore line pressure and electrical power supply to valve.
7. After maintenance is completed, operate the valve a few times
to be sure of proper operation. A metallic click signifies the
solenoid is operating.
ORDERING INFORMATION
FOR ASCO REBUILD KITS
Parts marked with an asterisk (*) in the exploded views are supplied
in Rebuild Kits. When Ordering Rebuild Kits for ASCO valves,
order the Rebuild Kit number stamped on the valve nameplate. If the
number of the kit is not visible, order by indicating the number of kits
required, and the Catalog Number and Serial Number of the valve(s)
for which they are intended.
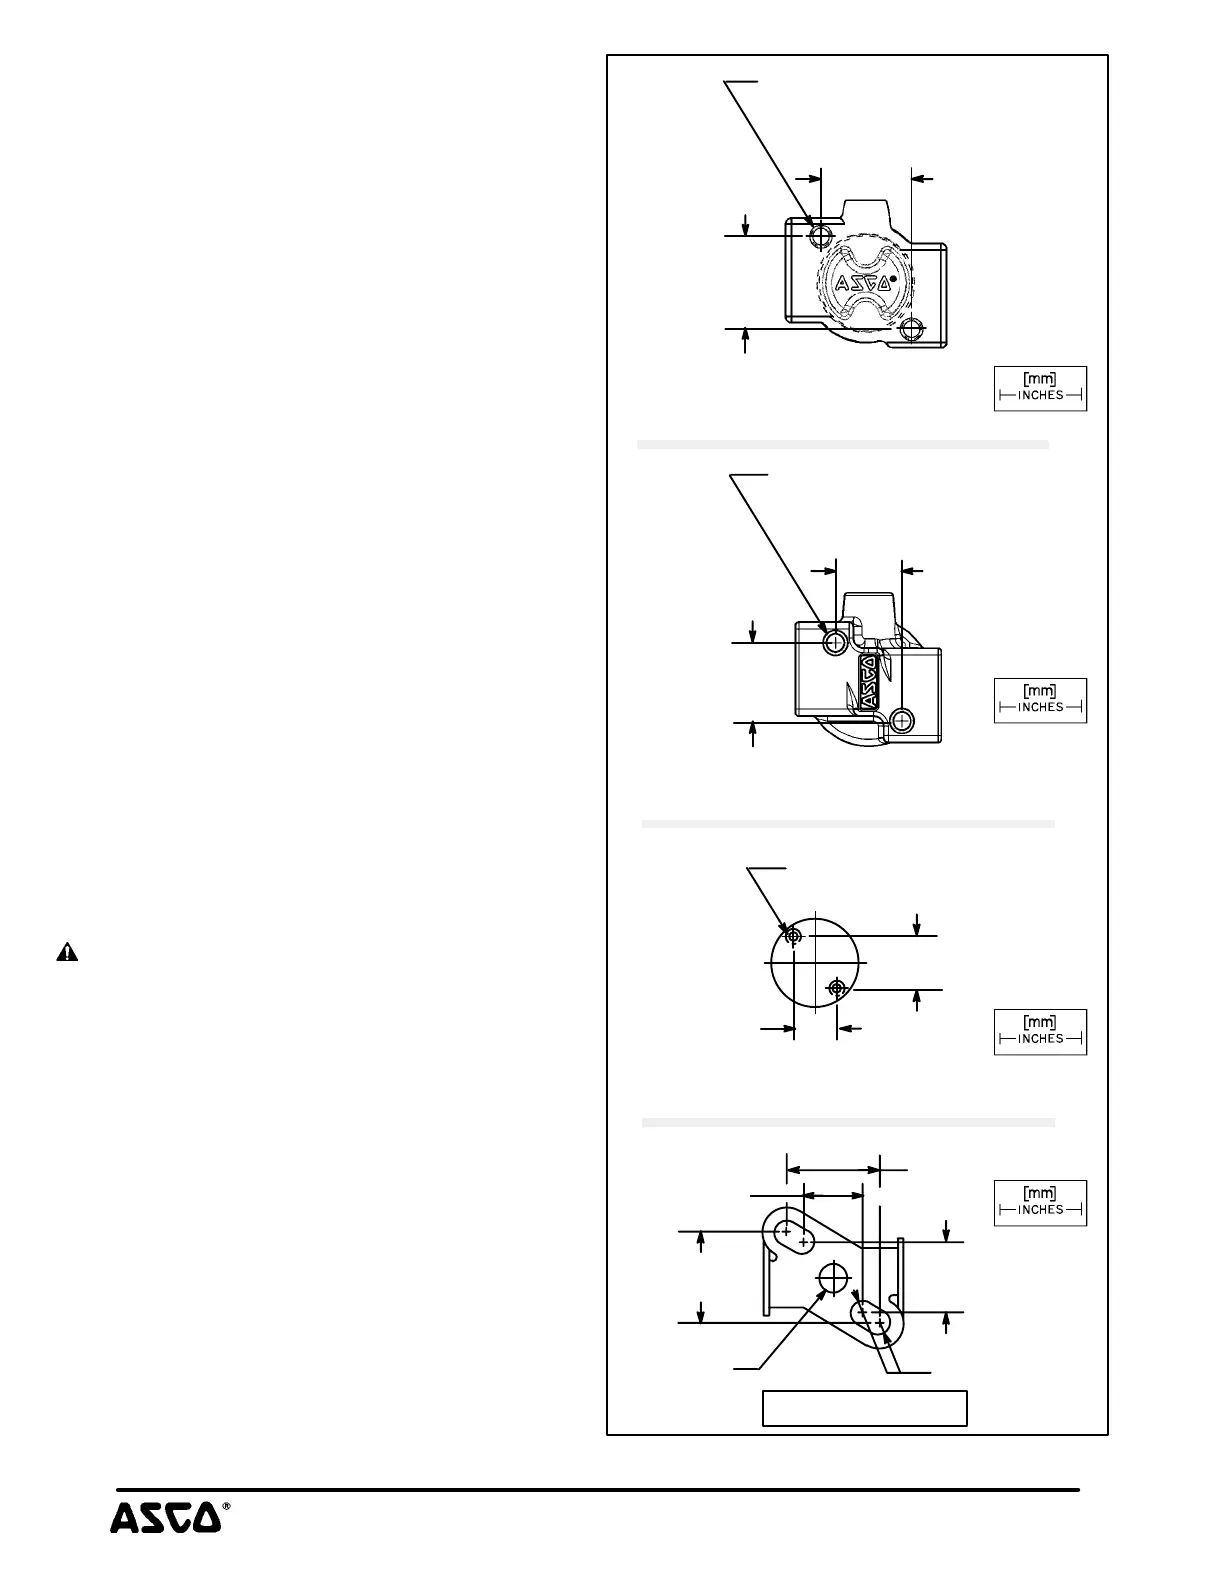
[3,2]
.125 R (4 places)
[Ø6,8]
.266 dia.
[22]
.88
[15]
.59
[17]
.68
[22]
.86
Mounting Bracket
.59
.69
1/4 NPT
1/8 NPT
[22,2]
[22,2]
.875
.875
brass & stainless steel
2 mounting holes .190-32
UNF-2B, .50 [12,7] deep
.31 [7,9] min. full thread
2 mounting holes .190-32
UNF-2B, .38 [9,7] deep
.25 [6,4] min. full thread
[15,1]
[17,5]
brass
1/8 NPT
stainless steel
[17]
.688
.190-32 UNF-2Bx.44 [11] deep
2 holes for mounting
[15,0]
.592
 Loading...