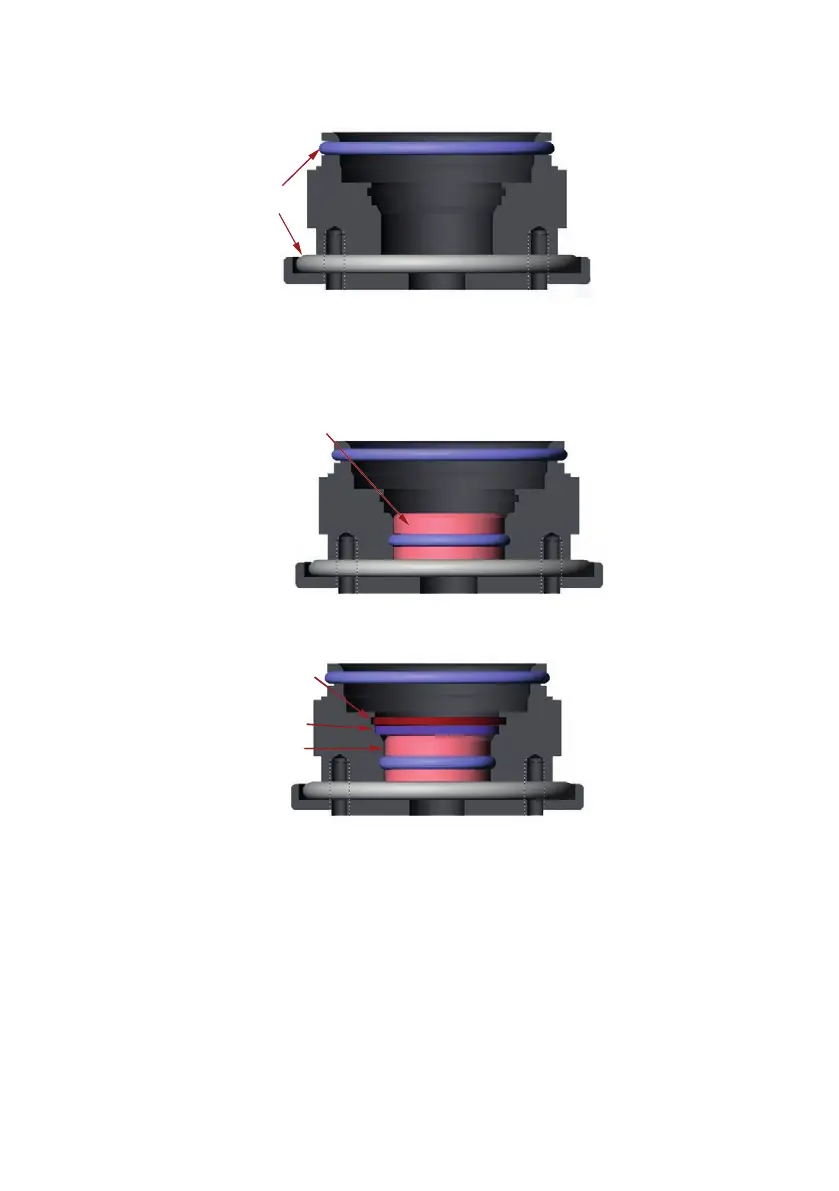
4. On the outer sides of the top, there are two large O-rings. Remove the O-rings and
replace with new ones.
5. On the inside, there is a guide bushing assembly (GBA). Using a small rod or similar
object (the back of a ballpoint pen should be sufficient), push the GBA and washer out
of the top.
6. Lubricate and press the new GBA into place with your thumb.
Apply silicone lubricant to inner and outer O-ring of
guide bushing
7. Place the washer on top of the guide bushing (purple), re-insert the snap ring on top
of the washer (red). This completes the top assembly
Snap
ring
Guide
bushing
Washer
m-radialdiaphragmvalve-en-02 25
 Loading...