8
© 2023 United States Stove Company
INSTALLATION
IMPORTANT:
INSTALLATION AND REPAIR SHOULD BE
THE APPLIANCE SHOULD BE INSPECTED
BEFORE USE AND AT LEAST ANNUALLY
FREQUENT CLEANING MAY BE REQUIRED
DUE TO EXCESSIVE LINT FROM CARPETING,
THAT CONTROL COMPARTMENTS, BURNERS
AND CIRCULATING AIR PASSAGEWAYS OF
WARNING:
FAILURE TO POSITION THE PARTS IN
ACCORDANCE WITH THESE DIAGRAMS, OR
FAILURE TO USE ONLY PARTS SPECIFICALLY
APPROVED WITH THIS APPLIANCE MAY
RESULT IN PROPERTY DAMAGE OR PERSONAL
HARDWARE PACKET CONTENTS
KEY DESCRIPTION ITEM QTY
i Medium Screw 3
ii Large Screw 4
iii Washer 4
iv Spacer Washer 4
v
Rubber
Grommet
2
vi Small Screw 8
INSTALLING THE APPLIANCE
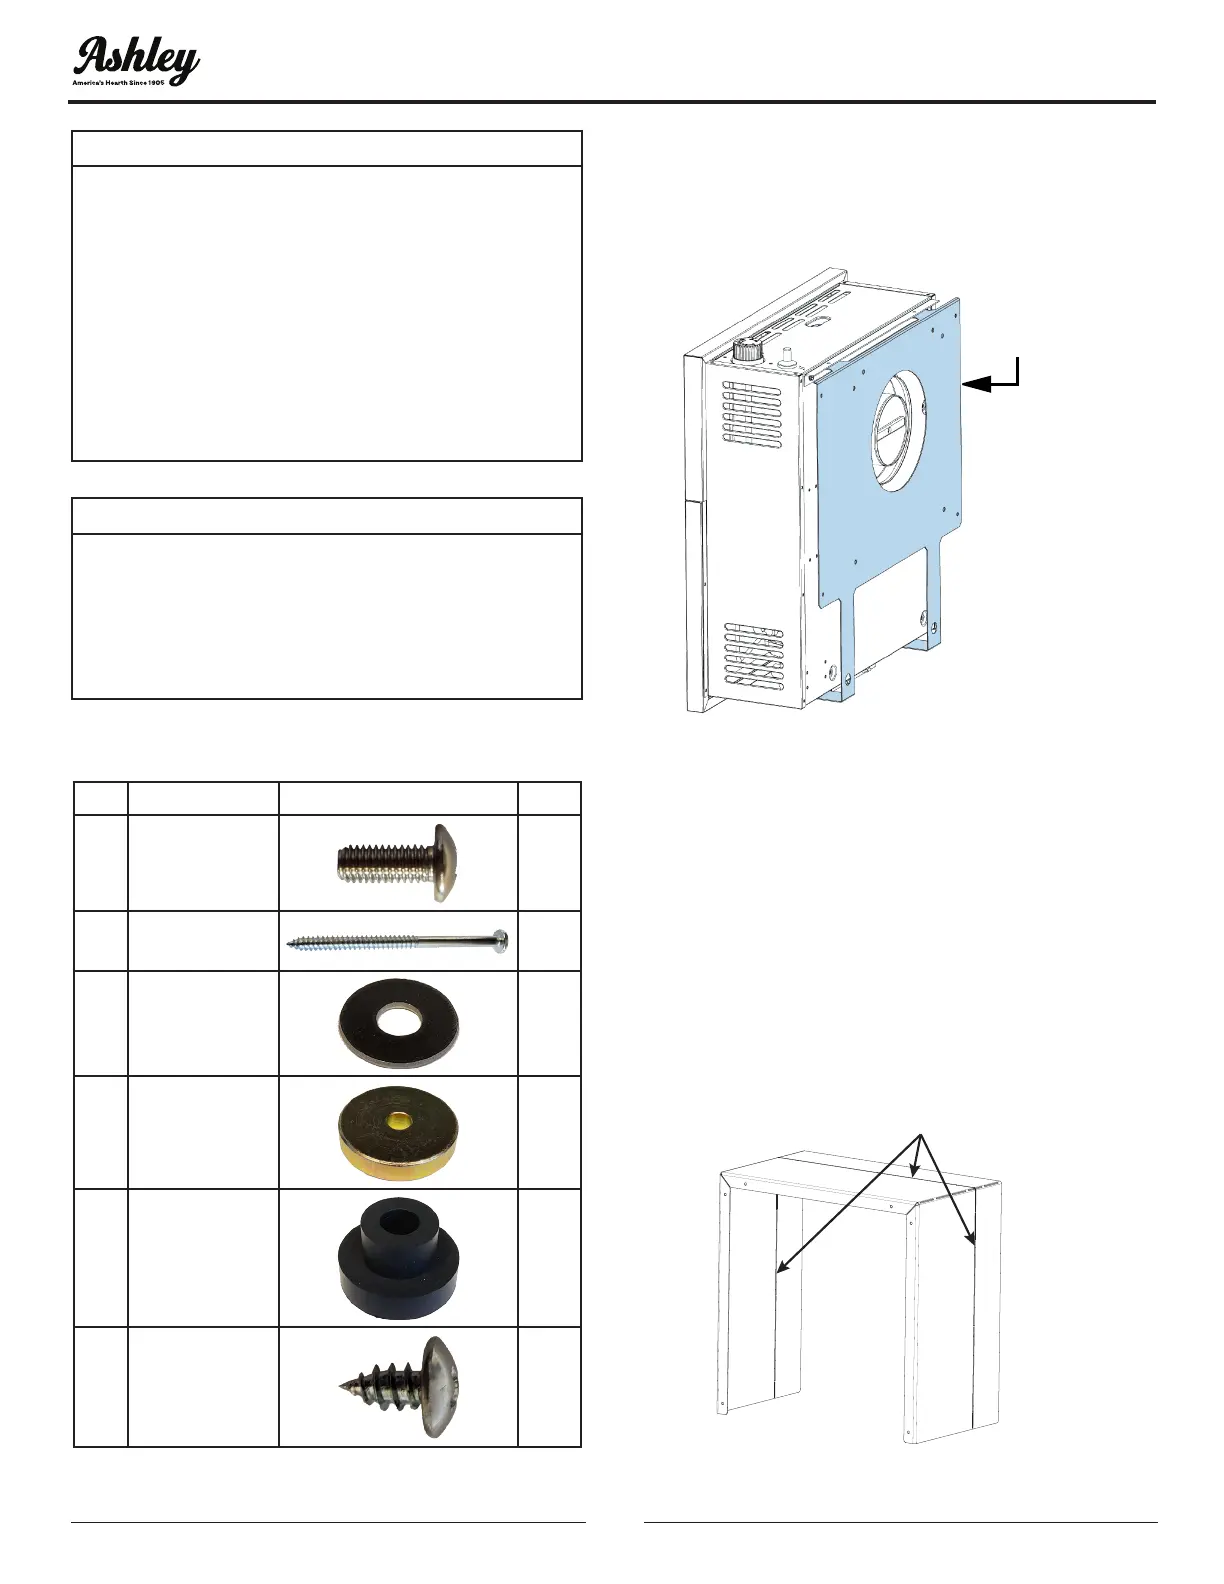
Separate the hanging bracket from the appliance
by removing two screws on the top and two nuts at
the bottom.
HANGING
BRACKET
Figure 8
INSTALLING THE HANGING BRACKET
1. Remove the required heat shield from the box
and fold it as indicated in the illustration (fold
along the perforated lines and break off when
installing in a 2 X 4 wall). Align the holes on the
heat shield with the holes on the mounting
bracket and attach using the six provided small
screws (vi).
HEAT SHIELD
Perforated Line for 2X4
Installation
Figure 9


 To Next Page
 Loading...