73
SERVICE
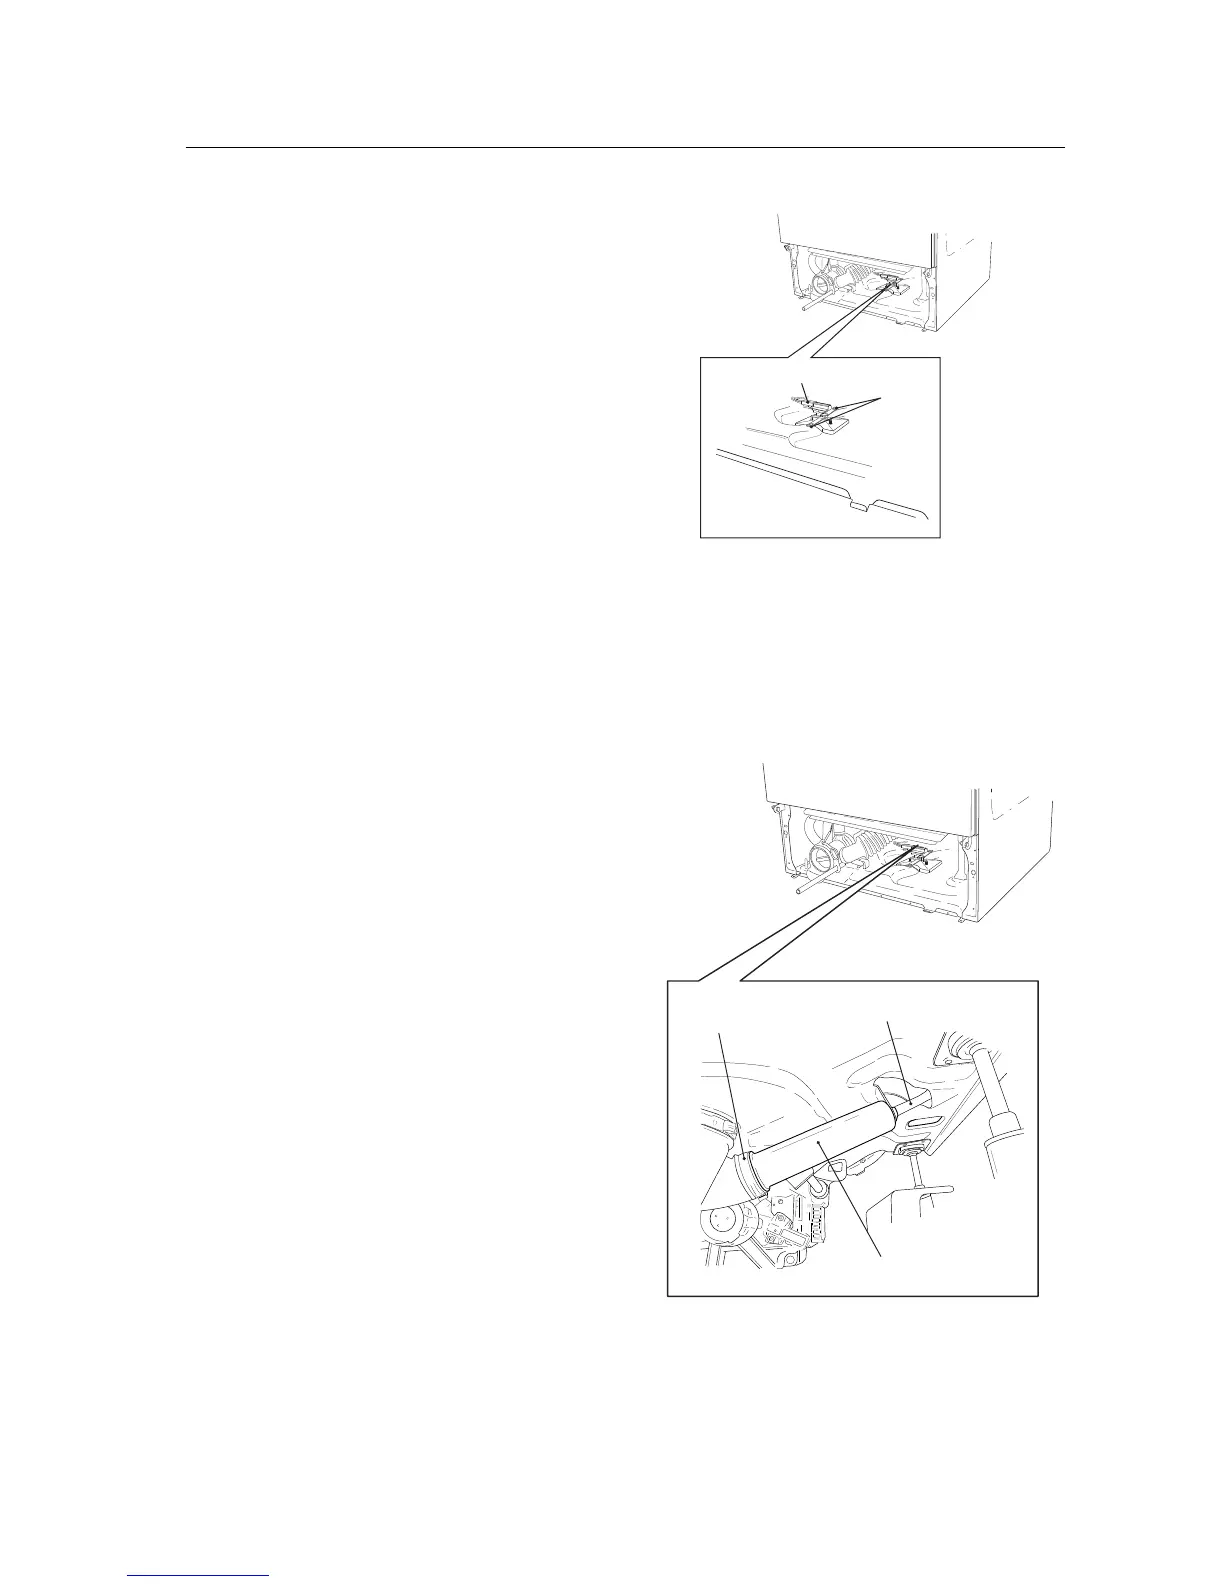
Changing the overflow protection device
(W660)
1. From the rear: Remove the rear panel by first
removing the 12 screws around it and then
lifting it off.
From the front: Remove the bottom cover
in accordance with the section
"Bottom co-
ver - Removing..."
.
2. Remove the protection device by squeezing
the 2 plastic clips that secure it to the bottom
plate.
3. Remove the wiring.
4. Connect the wiring to the new overfilling pro-
tection device.
5. Offer it up and press it into the clips.
6. From the rear: Install the rear panel by hang-
ing it on the 2 hooks on the top edge and
then securing its edges with the 12 screws.
From the front: Install the bottom cover in
accordance with the section
"Bottom cover -
Installing...".
Changing pressure chamber
1. Models with front-loading doors: Remove the
bottom cover in accordance with the section
"Bottom cover - Removing...".
Models without front-loading doors: Rem-
ove the front panel in accordance with the sec-
tion
"Front panel (models without front-loa-
ding doors) - Removing...".
2. Remove the hose clip securing the pressure
chamber to the corrugated hose and remove
the chamber.
3. Remove the rubber hose that leads to the le-
vel switch and level sensor.
4. Twist the pressure chamber 1/4 turn and take
it out of the bracket.
5. Secure the new chamber by inserting it into
the bracket and twisting it 1/4 turn.
6. Join the rubber hose and the corrugated hose
together with a hose clip. Tighten the hose
clip.
7. Models with front-loading doors: Install the
bottom cover in accordance with the section
"Bottom cover - Installing...".
Models without front-loading doors: Install
the front panel in accordance with the section
"Front panel (models without front-loading
doors) - Installing...".
2
3
4
2
3
 Loading...