17
:: :: Bag 9 - Step 6Bag 9 - Step 6
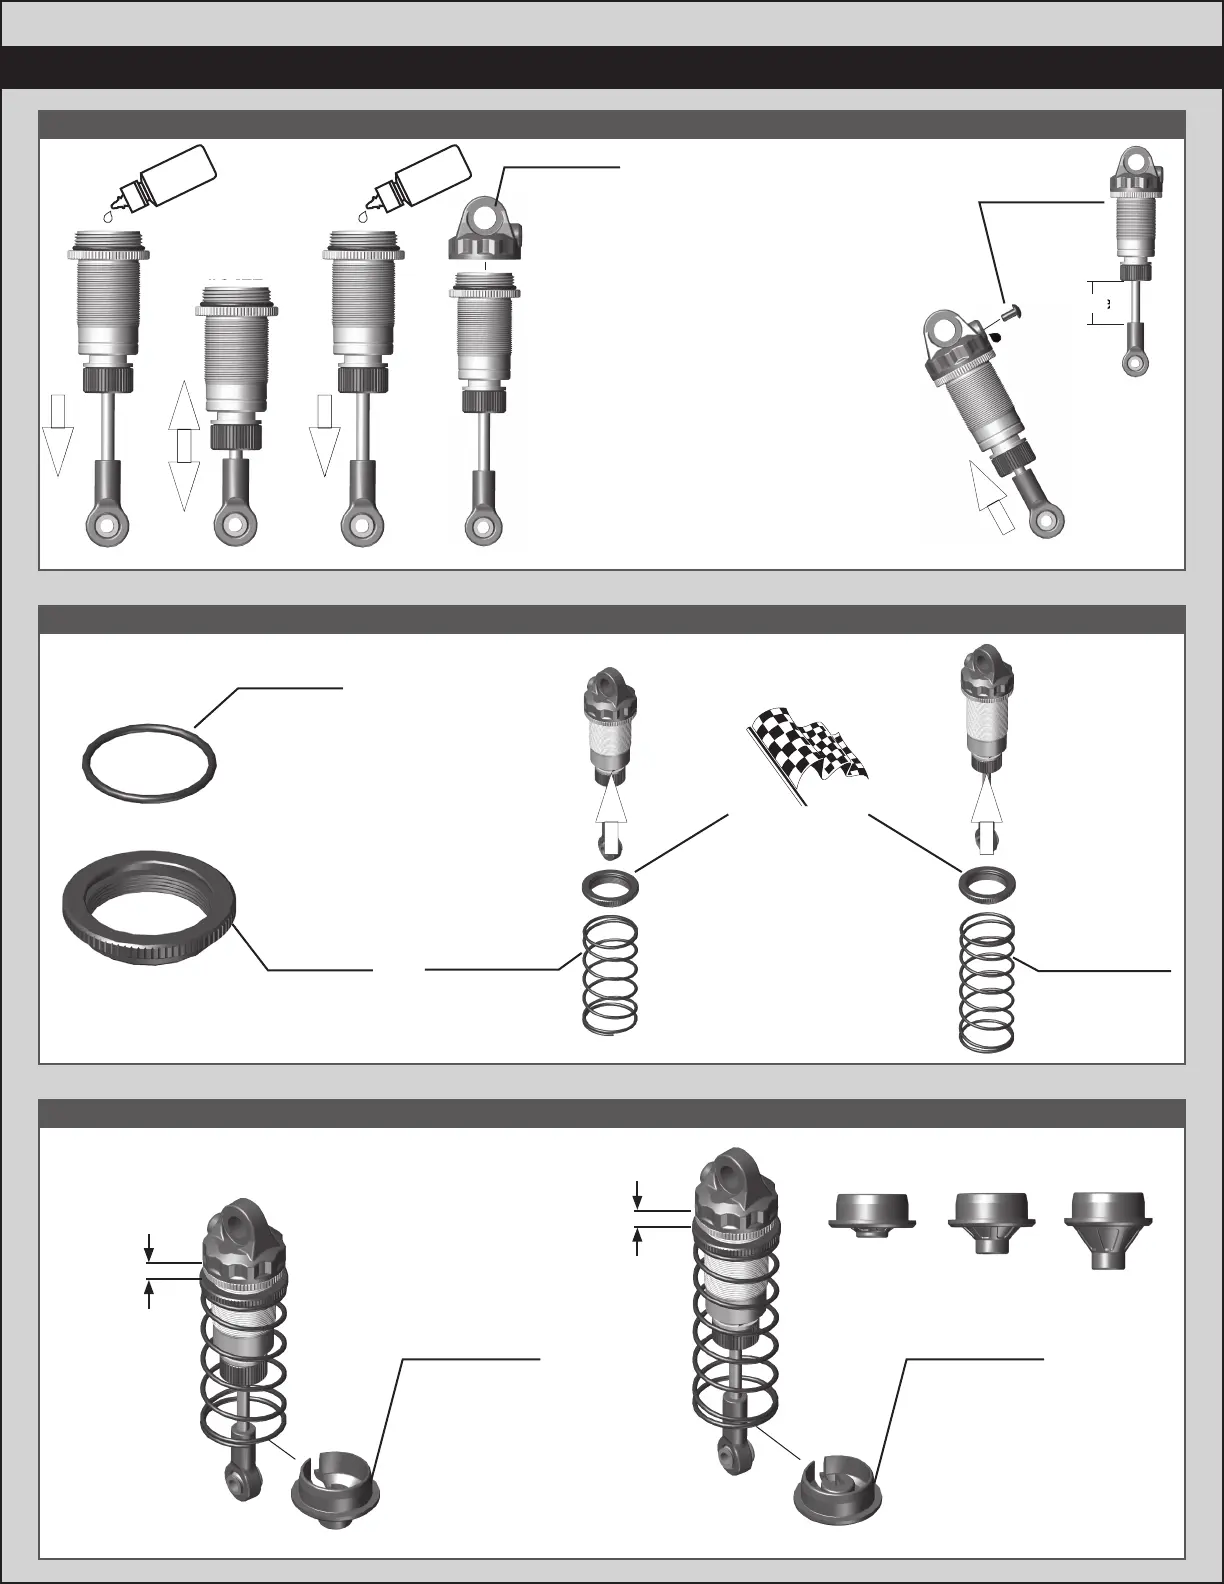
:: :: Bag 9 - Step 5Bag 9 - Step 5
:: :: Bag 9 - Step 4Bag 9 - Step 4
Front Shock: 30wt
#5422
Rear Shock: 30wt
#5422
Shock fluid
Shock fluid
Steps 9-10Step 8Steps 6-7Steps 4-5Steps 2-3
Shock Bleeding Steps:
1. Before assembly, get each bleed
screw and thread it 1-2 turns into
the shock cap, then remove the
screw. This will make it easier when
you are bleeding your shocks.
2. Pull shock shaft down.
3. Fill shock body 3/4 full with silicone
shock fluid.
4. Slowly move the shock shaft up and
down to remove air from under the
piston.
5. Wait for bubbles to come to surface.
6. Fill shock body to top with silicone
shock fluid.
7. Place a drop of oil in the cap and on
cap threads.
8. Install cap (without bleed screw) and
tighten completely.
9. Slowly compress shaft all the way to
bleed excess silicone shock fluid out
the hole in the cap (use rag around
shock to catch excess fluid).
10. Install M2x4mm button head
screw until snug while shaft is fully
compressed.
31510
M2 x 4mm
BHCS
91926
13mm
Shock Cap
Stroke
Front: 21mm
Rear: 27.5mm
Stroke
91928
13mm
Threaded
Collar
91996
13mm
Threaded
Collar
O-ring
x4x4
x4x4
Build x2 front shocks
Build x4
Build x2 rear shocks
91941
13mm Front
Spring, Gray
(3.40lb)
91948
13mm Rear
Spring, White
(1.90lb)
Racers Tip:
Use your finger to rub
shock fluid on the O-ring
for smoother
adjustment!
91926
13mm Shock
Spring Cup
“Rear - 0mm”
91926
13mm Shock
Spring Cup
“Front - 5mm”
Front:
4.50mm
Rear:
6.50mm
#91926 13mm Shock Spring Cups
0mm 5mm 9mm
 Loading...