0
Figs.
53
&
54
Si
ipthe#6577
1
efthandhubdown
onto the
bolt,
making sure the
hub
cen
ters
itself
onto the
drive rings.
THIS IS IMPORTANT.
Fig.
53
0
Fig.
54
Now
start
to tighten the
bolt
with the
Allen
wrench,
making
sure the hubs and drive rings stay cen-
tered. Do this very
slowl
y.
We want to make sure every-
thing stays centered.
We'
ll
finish the tightening in the next
step with f
igs
. 55 &
56
.
Fig.
54
0 Figs.
55
&
56
Contin
ue
ti
ghtening
slowly until
the spring is just about
completely
co
llapsed. DON'T
OVER-TIGHTEN!
Corr
ec
t adjustment is bottoming the
spri
ng
and
then
backing
off 1/8 to 1/4 turn.
0
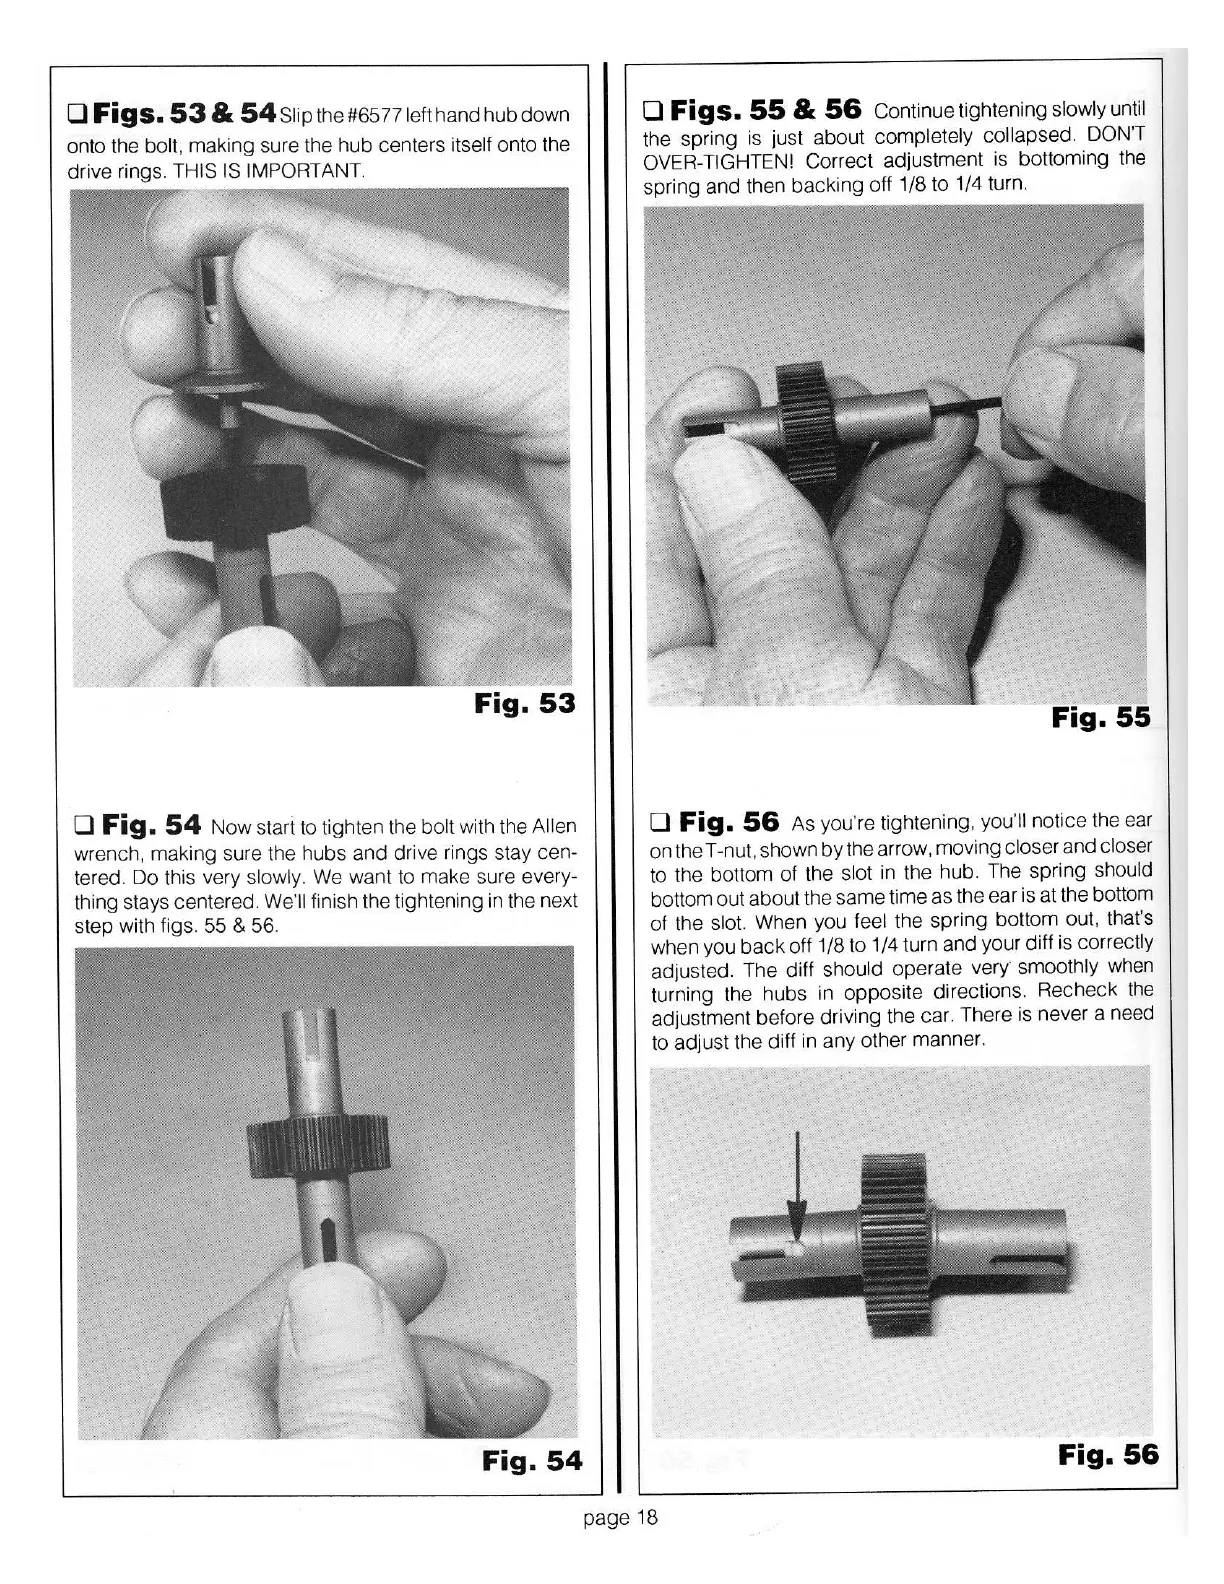
Fig.
56
As you're tightening,
you'
ll
n
otice
the ear
on the T-nut, shown
by
the arrow, moving
closer
and
closer
to the bottom of the
slot
in the
hub
. The
spring
should
bottom out
about
the same time as the ear is
at
t
he
bottom
of the
slot.
When you
feel
the
spr
ing bottom
out
. that's
when you
back
off
1/8 to 1/4 turn and your
diff
is
correctly
adjusted. The diff
should
operate
very·
smoot
hly
when
turning the hubs in opposite directions. Re
chec
k the
adjustment before driving the car. There is never a need
to adjust the diff in any
ot
her manner.
Fig.
56
page
18