0
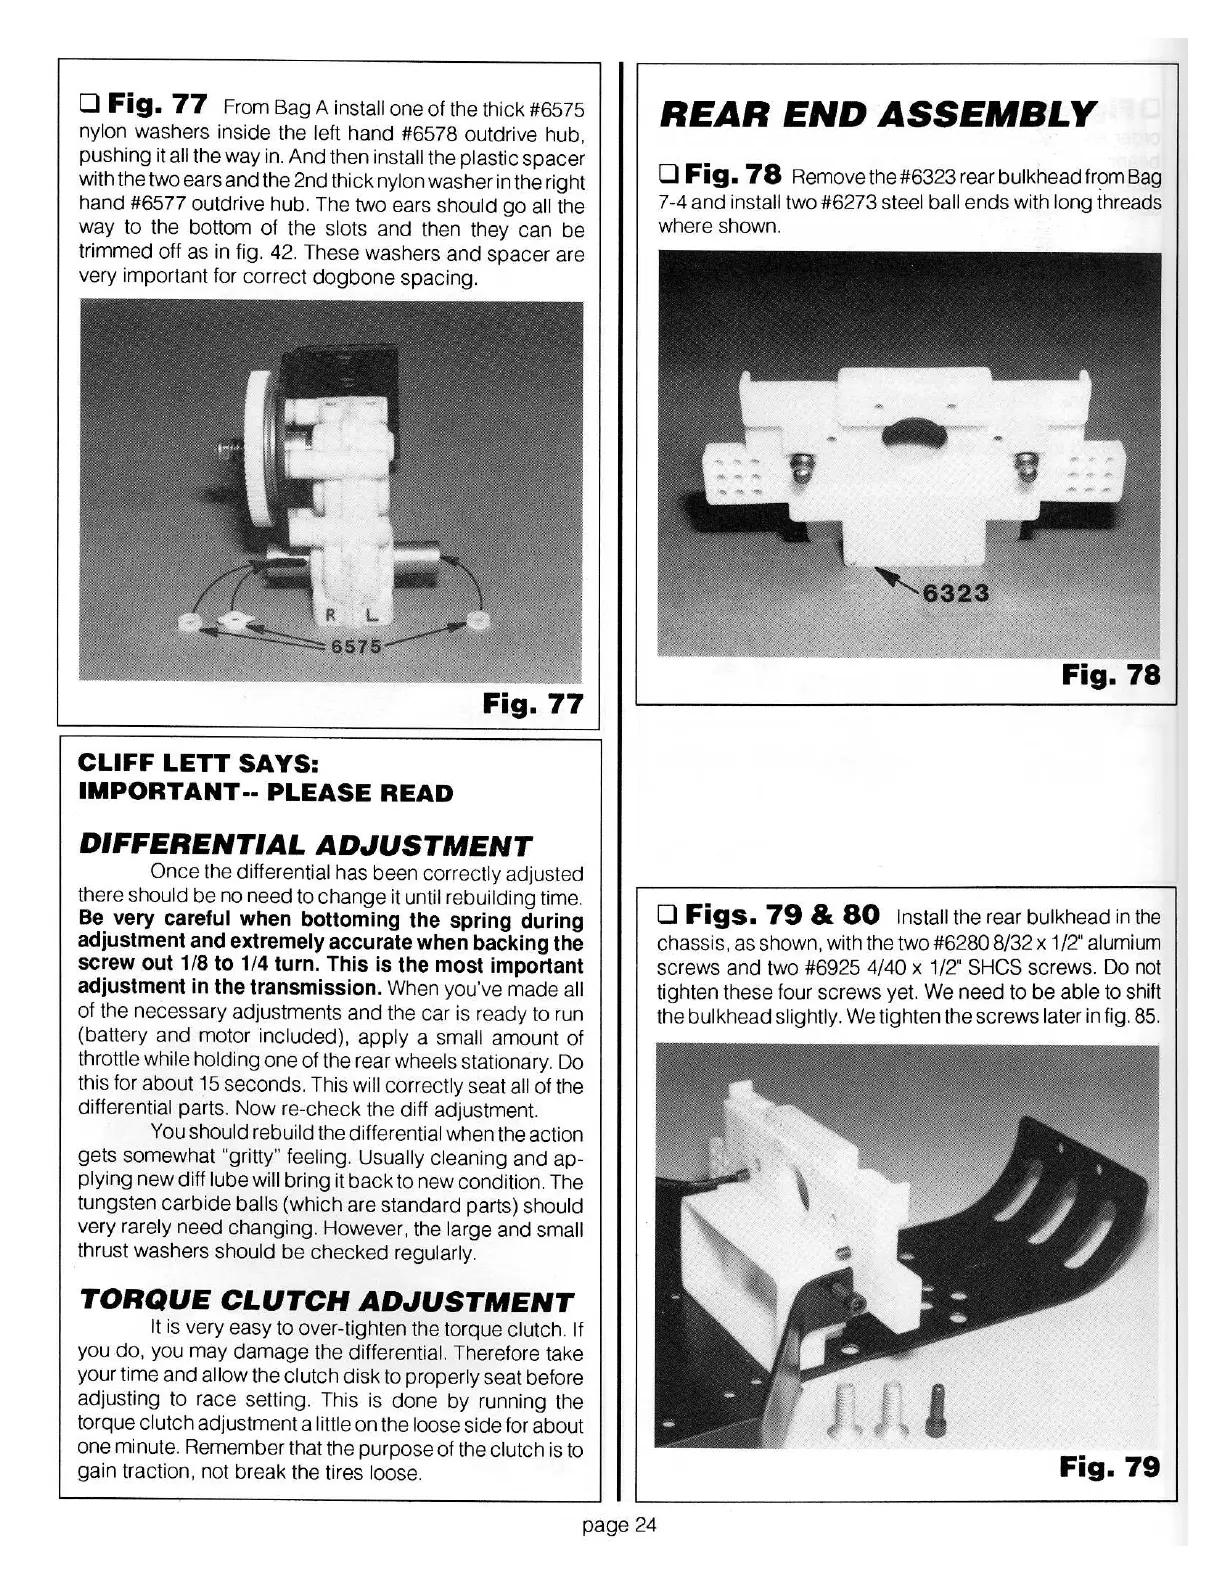
Fig.
77
From
Bag
A install one
of
the thick #6575
nylon washers inside the left hand #6578 outdrive hub,
pushing it all the way in.
And
then install the plastic spacer
with the two ears and the 2nd thick nylon washer in the right
hand #6577 outdrive hub. The two ears should
go
all the
way to the bottom
of
the slots and then they can be
trimmed
off
as in fig.
42
. These washers
and
spacer
are
very important for correct
dogbane
spacing.
Fig.
77
CLIFF
LETT
SAYS:
IMPORTANT··
PLEASE
READ
DIFFERENTIAL
ADJUSTMENT
Once the differential has been correctly adjusted
there should
be
no need to change it until rebuilding time.
Be
very careful when bottoming the spring during
adjustment and extremely accurate when backing the
screw out 1/8
to
1/4 turn. This is the most important
adjustment in the transmission.
When you've made all
of
the necessary adjustments
and
the
car
is ready to run
(battery and motor included),
apply
a small amount of
throttle while holding one
of
the rear wheels stationary. Do
this for about 15 seconds. This will correctly seat all of the
differential parts. Now re-check the diff adjustment.
You should rebuild the differential when the action
gets somewhat "gritty" feeling. Usually cleaning
and
ap-
plying
new
diff lube will bring it
back
to new condition. The
tungsten
carbide
balls (which are standard parts) should
very rarely need changing. However, the large and small
thrust washers should be checked regularly.
TORQUE
CLUTCH
ADJUSTMENT
It is very easy
to
over-tighten the torque clutch. If
you
do
, you may
damage
the differential. Therefore take
your time and allow the clutch
disk
to properly seat before
adjusting to race setting. This is done
by
running the
torque clutch adjustment a little on the loose si
de
for about
one minute. Remember that the purpose
of
the clutch is to
gain traction, not break the tires loose.
REAR
END
ASSEMBLY
0
Fig.
78
Removethe#6323rearbulkheadfr~mBag
7-4
and
install two #6273 steel ball ends with long threads
where shown.
-
-
""""""'
> •
v
Fig.
78
0
Figs.
79
&
80
Install the rear bulkhead in the
chassis, as shown, with the two #6280 8/32 x 1/2" alumium
screws and two #6925 4/40 x 1/2" SHCS screws. Do
not
tighten these four screws yet. We need to
be
able to shift
the bulkhead slightly. We tighten the screws later in fig. 85.
Fig.
79
page
24