0
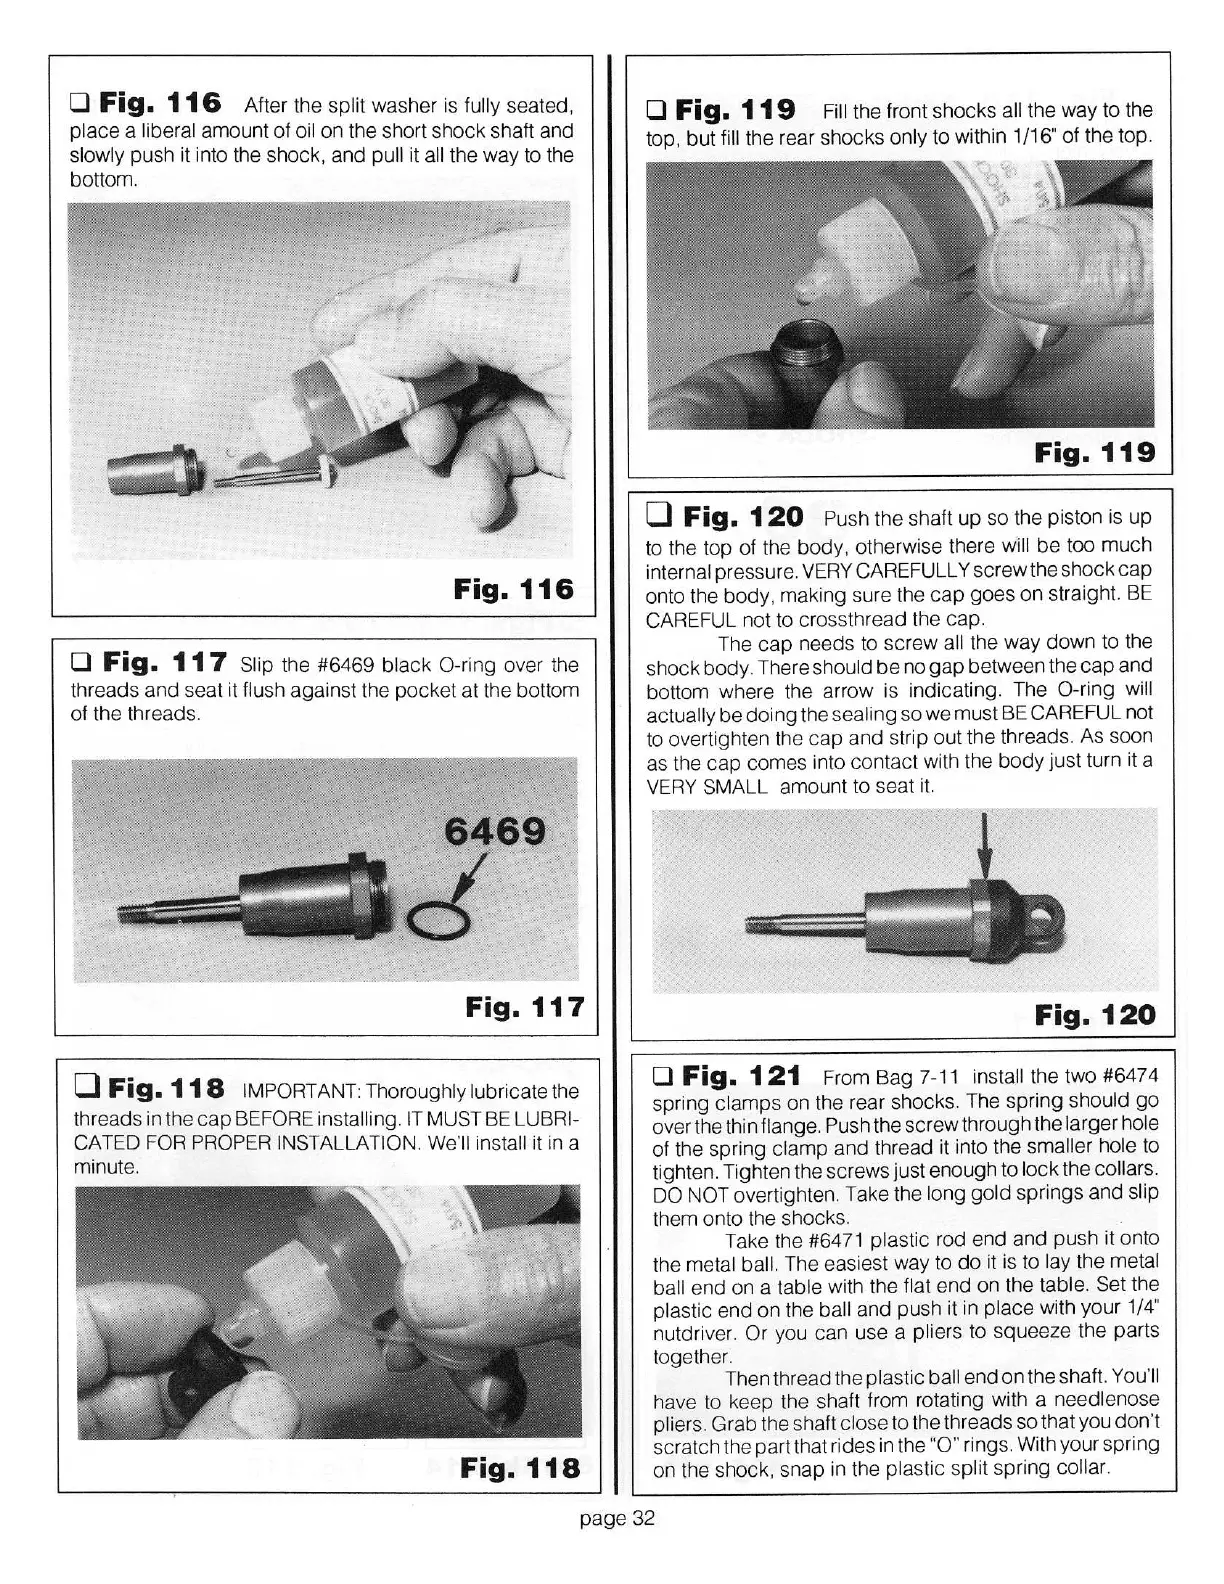
Fig.
116
After the
sp
lit
washer is
fu
ll
y seated,
place
a
li
beral
amoun
t
of
oil
on the short shock shaft and
sl
ow
ly
push it into the shock, and
pull
it
all
the way to the
bottom.
Fig.
116
0
Fig.
117
Slip
the #6469
black
0 -ring
over the
threads
and
seat
it
flush
against the pocket
at
the bottom
of
the threads.
6469
d
Fig.
117
0
Fig
.
118
IMPORT
ANT:
Thoroughly lubricate the
threads in the
cap
BEFORE installing. IT MUST BE LUBRI-
CATED
FOR PROPER INSTALLATION. We'll install
it in a
minut
e.
Fig.
118
0
Fig.
119
Fill
the front sh
oc
ks all the way
to
the
top, but fill the rear shocks
only
to
within
1 /1
6"
of the top.
Fig.
119
0
Fig.
120
Push
the shaft up so the piston is up
to the top of the body, otherwise there
will
be
too much
internal
pressure.
VERY
CAREFULLY
screw
the shock
cap
onto the body, making sure the
cap
goes
on
straight. BE
CAREFUL not to crossthread the cap.
The
cap
needs to screw all
the way down to the
shock
body
. There
should
be
no
gap
between the
cap
and
bottom where the arrow is indicating. The
0-ring
will
actua
ll
y
be doing the
sealing
so
we
must BE CAREFUL not
to overtighten the
cap
and
st
ri
p
out
the threads. As soon
as the
cap
comes into contact with the
body
just turn it a
VERY
SMALL
amount to seat it.
Fig.
120
0
Fig.
121
From Bag 7-11
install
the two #6474
spring
cl
amps
on the rear shocks. The spring
should
go
over the thin flange. Push
the
screw
through the
larger hole
of
the spring
clamp
and
thread it i
nt
o the
smaller hole to
tighten. Tighten the screws just
eno
u
gh
to
lock the
collar
s.
DO NOT
overtighten. Take the l
ong
go
ld
sp
rings and
slip
them onto the shocks.
Take the #6471
plastic
rod
end
and push
it
onto
the
metal
ba
l
l.
The easiest way to
do
it is to lay
the
me
tal
ball
end
on
a
table
with the
fl
at
end
on the
table. Set the
plas
ti
c
end on the
ball
and
push
it
in
place
with your
1/4"
nutdriver.
Or
you can use a
pliers
to
sq
ueeze the parts
together.
Then thread the
plastic
ba
ll
end
on
the shaft.
You'
ll
have to keep the shaft from rotating with a n
eed
lenose
plier
s.
Grab the shaft
close to the threads so that you
don't
scratch the part that rides in the
"0
" ring
s.
Wi
th your spring
on the shock, snap in the
plastic split
spr
i
ng
collar.
page
32