spin too fast,
ca
using
sc
rews to heat
up
when being driven
into
pla
stic
and
will
strip out.
Take your time
assembling
the truck.
It's
not
a
ra
ce
to see how fast you
put
it
together; it's how well
yo
u
put
it together that determines
ho
w fa
st
you
ca
n race.
Boxes at each step are
pr
ovided so you can put
a
check
mark for
each
assembly
after each step is
completed. So
when you s
top
during
asse
mbl
y
ti
me, you'll
be
able
to
come
back
and
start in the correct step.
To
help you identify certain parts, an
outline
drawing occasionally
will
accompany the step. Just
pl
ace
your part atop the
actual-size
drawing to
be
sure it's the
one referred to.
One final
note for you experienced builders and
racer
s:
please build
the truck our
way
first!!
The
RC
1
OT
is a
remarkably fast tru
ck
right out
of
the box. There's a
reason for everything
on
the truck, and very few
com
pr
o-
mises
we
re
mad
e in
it
s
de
sign. Work with the tru
ck
first
and
see what it can do before you experiment or make changes.
Clear
off yo
ur
wo
rkbench,
line
up
so
me paper
plates,
grab
a sandwich,
and
let's
beg
i
n.
..
6
gr-ryTEAM
ASSOCI~tt!~.._.
ASSOCIATED ELECTRICS, INC.
3585
CADILLAC AVE.
COSTA MESA,
CA
92626
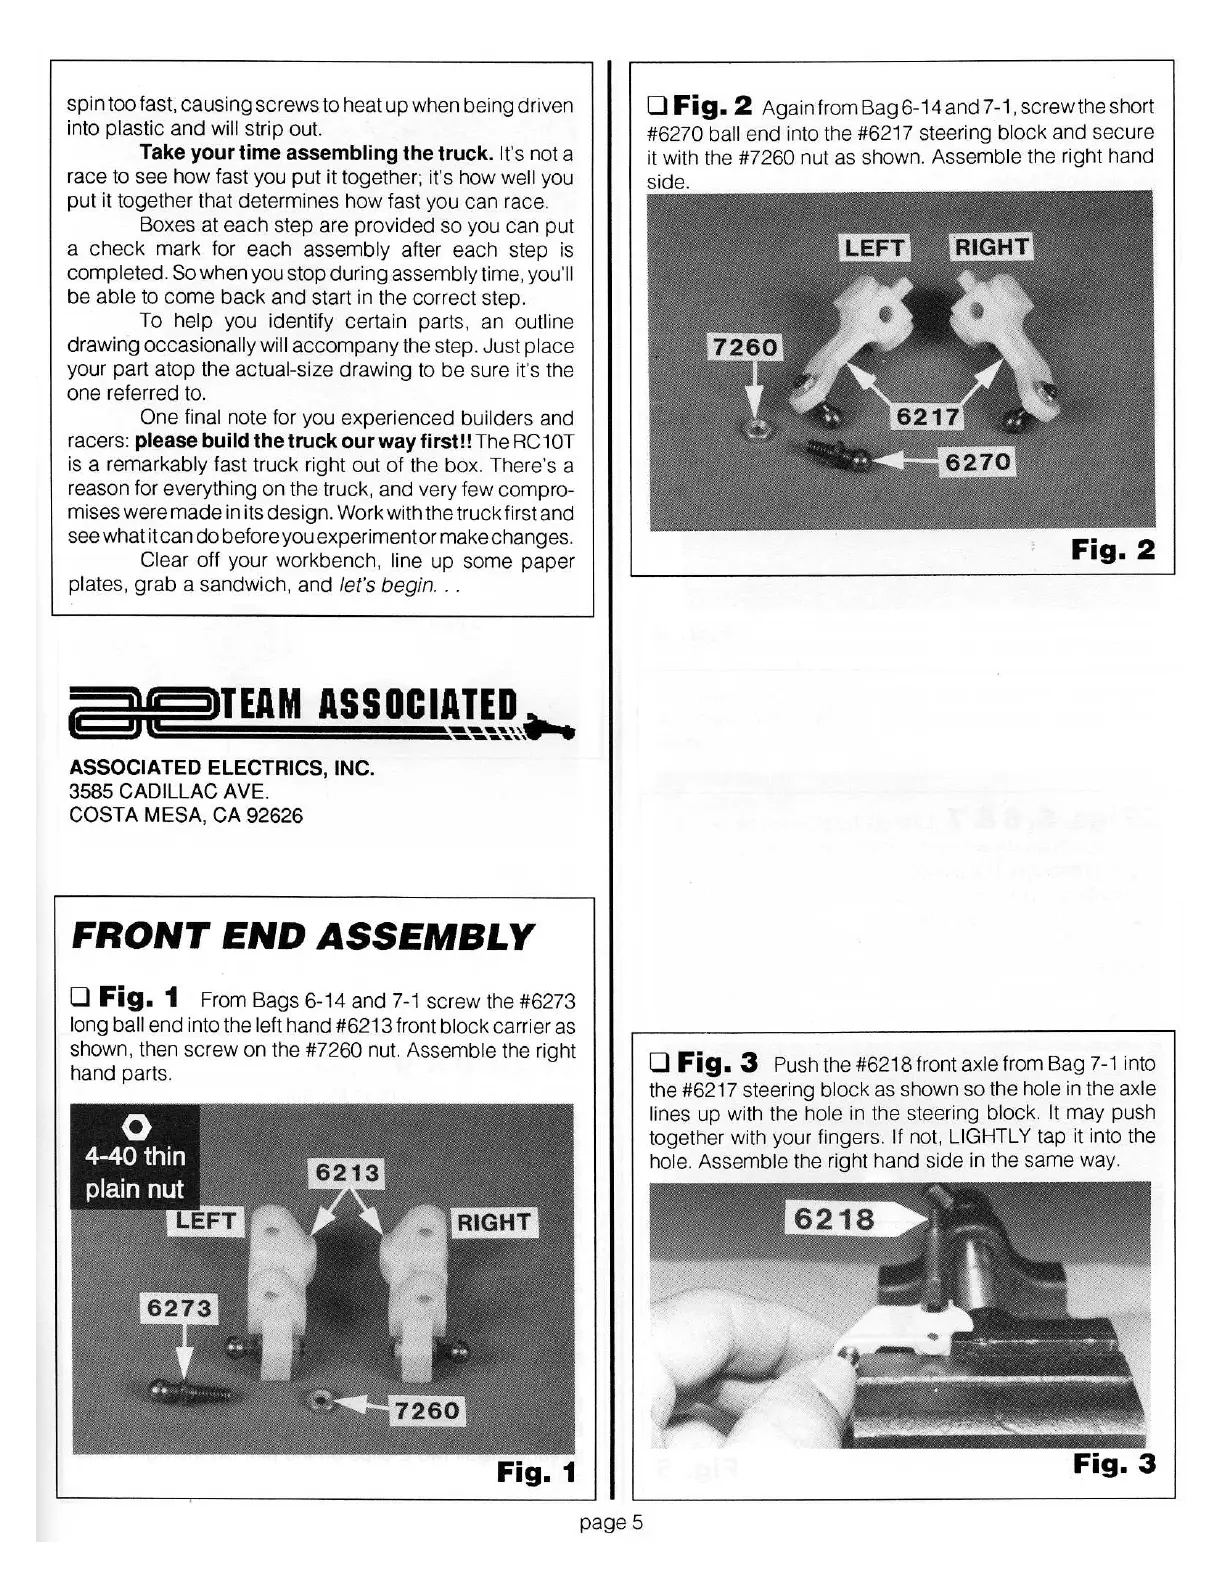
FRONT
END
ASSEMBLY
0
Fig.
1
From Bags
6-
14 and
7-1
sc
r
ew
the #6273
long ball
end into the
left
hand #6213 front
block
ca
rri
er as
shown, then screw on
th
e
#7260
nut.
Assemble
the
ri
ght
hand parts.
Fig.
1
page
5
0
Fig.
2
Again from
Bag
6-14
and
7-1,
sc
rew the short
#6270 ball
end into the #6217 steering
bl
ock
and
sec
ure
it
wi
th the #7260
nut as shown.
Assemble
the
right hand
side.
Fig.
2
0
Fig.
3
Push the #6218 fr
ont
axle
from Bag
7-1
into
the #6217 steering
blo
ck
as sho
wn
so the hole
in the axle
lines up with the
hole
in the steering
blo
c
k.
It
may push
t
oge
ther with your finger
s.
If
not,
LI
GHTLY
t
ap
it into the
hol
e.
Asse
mbl
e
the right hand s
id
e in
th
e same way.
Fig.
3