8
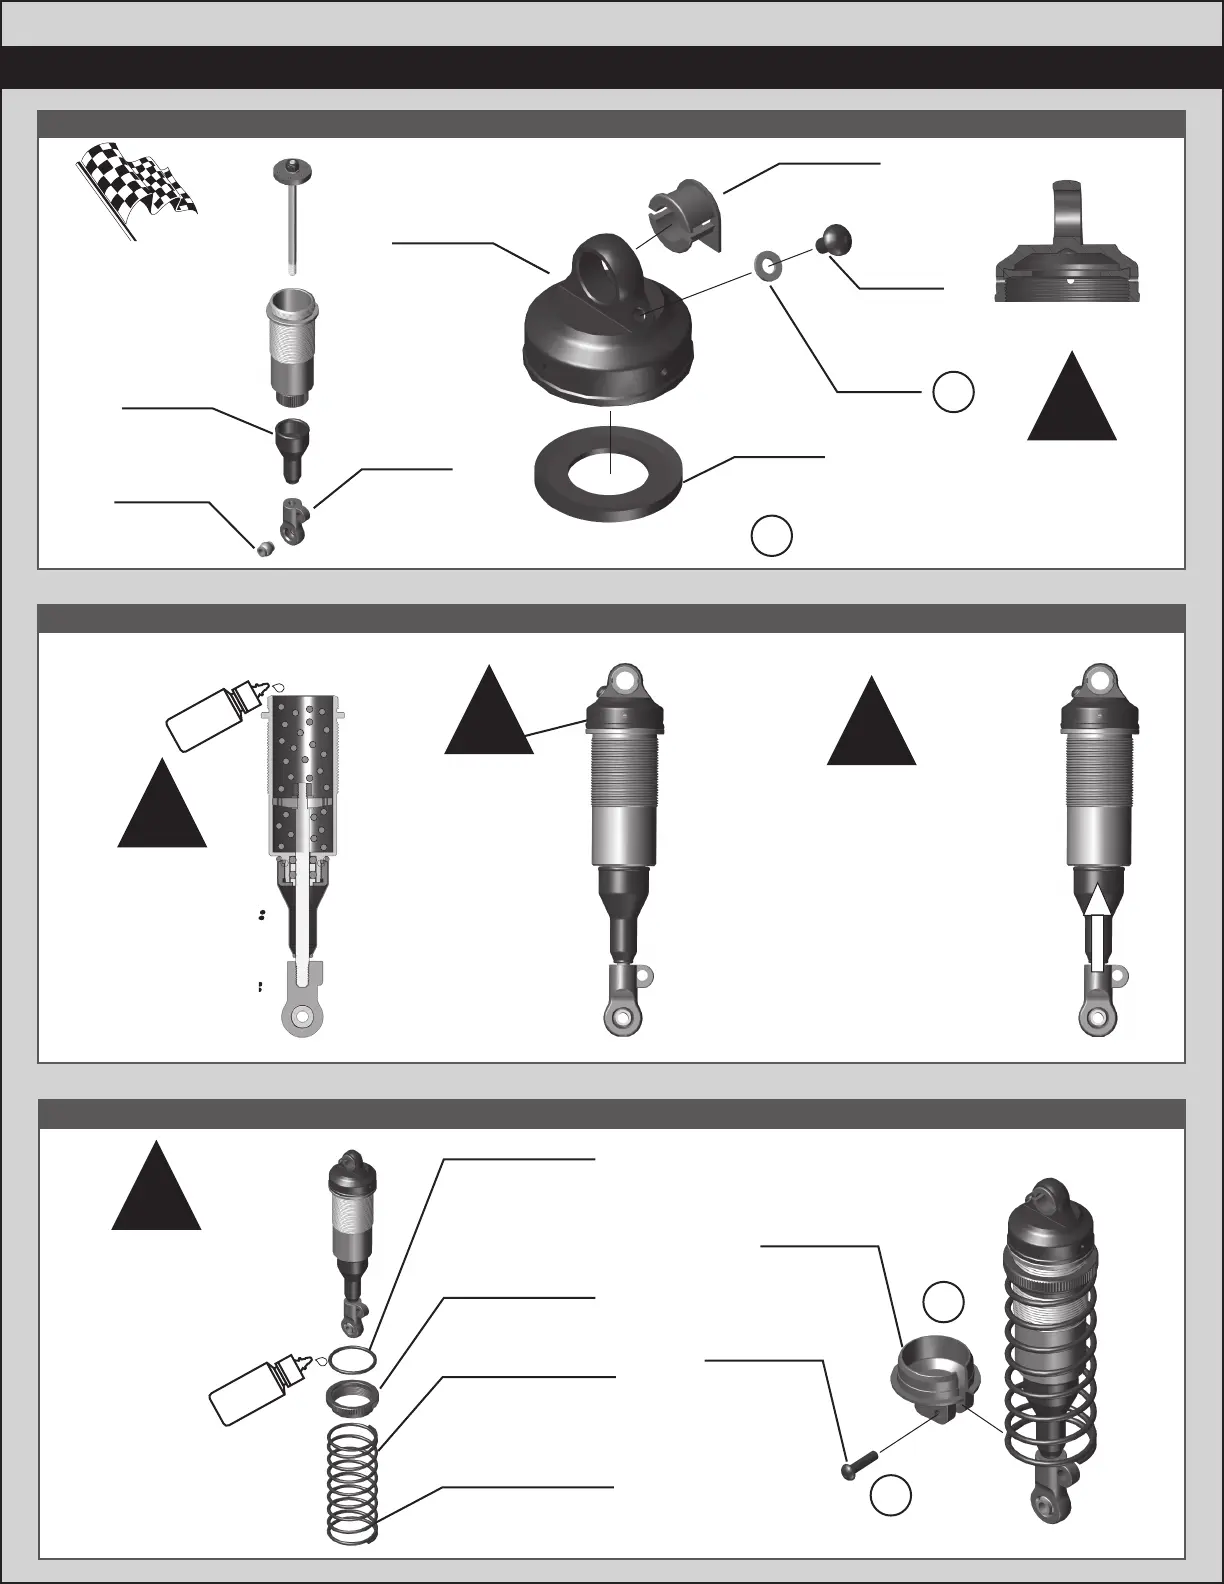
:: :: Shocks BuildShocks Build - - Bag Bag 2.12.1 - Step 4- Step 4
The springs come with
a colored marking
pre-installed for easy
identification
!
:: :: Shocks BuildShocks Build - - Bag Bag 2.12.1 - Step 3- Step 3
:: :: Shocks BuildShocks Build - - Bag Bag 2.12.1 - Step 2- Step 2
When installing the
emulsion seal, make
sure it is correctly
seated within the
shock cap as shown.
Fill to top of
shock body.
!
!
shock
fluid
Front Shock Fluid:
45wt #5430
Rear Shock Fluid:
30wt #5422
81452
RC8B3.2
Shock Cap
Racer’s Tip:
Use green slime
(#1105) to
lube the o-rings
before installation!
81562
Rod End
Ball
81190
Shock
Boots
81512
Spring
Cup
25211
3x10mm
BHCS
81221
Spring
Collar O-Ring,
20mm
81221
Spring
Collar, 20mm
shock
fluid
2
1
81184
Emulsion
Seal
81512
Shock Cap
Insert
91492
2x4mm
BHCS
91492
Gasket
2
1
81621
Shock
Rod End
Front: 0
Rear: +4
Tighten to snug,
may be a small gap
when sealed.
Pro Tip: Tune the
front fluid 40wt or
35wt in lower grip
conditions
!
Bleed Procedure:
Remove bleeder screw
Tilt shock so bleed hole is the
highest point and slowly com-
press the shaft.
Stop about 3mm from full
compressed, install the screw,
and check that the shock is not
pressurized.
If so, bleed out a small amount
more.
!
81223
V2 Front Spring,
White (5.10lb/in)
L70, 9.25T, 1.6D
81233
V2 Rear Spring,
Pink (3.70lb/in)
L86, 12.00T, 1.6D