Vendor Part No. Size
SS/
DS
Chip Brand Chip No.
Timing
DIMM
(BIOS)
Voltage
DIMM Support
A* B* C*
GEIL GX24GB5300LDC 2048MB DS GEIL Heat-Sink Package 5 • •
Kingston KVR667D2N5/ 512(low
prole modules)
512MB SS Elpida E5108AJBG-6E-E 5 1.8V • • •
Kingston KVR667D2N5/1G(low
prole modules)
1024MB SS Elpida E1108AEBG-8E-F 1.8V • • •
Kingston KVR667D2N5/1G(low
prole modules)
1024MB DS Elpida E5108AJBG-8E-E 5 1.8V • •
Kingston KVR667D2N5/2G(low
prole modules)
2048MB DS Elpida E1108ACBG-8E-E 5 1.8V • •
Micron MT8HTF12864AY-667E1 1024MB SS Micron D9HNL 7ZE17 5 • •
PSC AL6E8E63J-6E1 512MB SS PSC A3R12E3JFF717B9A00 5 • • •
PSC AL7E8F73C-6E1 1024MB SS PSC A3R1GE3CFF734MAA0J 5 • • •
PSC AL6E8E63J-6E1 1024MB DS PSC A3R12E3JFF717B9A01 5 • •
PSC AL8E8F73C-6E1 2048MB DS PSC A3R1GE3CFF733MAA00 5 • •
SAMSUNG M378T5263AZ3-CE6 4096MB DS Samsung K4T2G084QA-HCE6 • •
Super Talent T667UB1GV 1024MB DS Super Talent PG 64M8-800 0750 5 1.8V • •
Transcend JM667QLU-1G 1024MB SS Transced TQ243PCF8T0838 5 •
Transcend JM667QLJ-1G 1024MB DS Elpida E5108AJBG-6E-E 5 • •
Transcend JM667QLU-2G 2048MB DS Transced TQ243PCF8T0834 5 • •
Twinmos 8D-A3JK5MPETP 512MB SS PSC A3R12E3GEF633ACAOY 5 • • •
DDR2-667MHz capability
SS - Single-sided / DS - Double - sided
DIMM support:
• A*: Supports one module inserted into any slot as Single-channel memory conguration.
• B*: Supports one pair of modules inserted into either the yellow or black slots as one
pair of Dual-channel memory conguration.
• C*: Supports four modules inserted into both the yellow and black slots as two pairs of
Dual-channel memory conguration.
Visit the ASUS website at www.asus.com for the latest QVL.
1.5 Expansion slots
In the future, you may need to install expansion cards. The following sub-sections describe
the slots and the expansion cards that they support.
Unplug the power cord before adding or removing expansion cards. Failure to do so may
cause you physical injury and damage motherboard components.
1.5.1 Installing an expansion card
To install an expansion card:
1. Before installing the expansion card, read the documentation that comes with it and
make the necessary hardware settings for the card.
2. Remove the chassis cover (if your motherboard is already installed in a chassis).
3. Remove the bracket opposite the slot that you intend to use.
4. Align the card connector with the slot and press rmly until the card is completely
seated on the slot.
5. Secure the card to the chassis with the screw.
6. Replace the chassis cover.
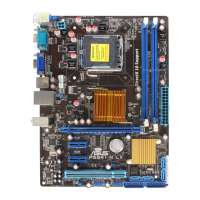
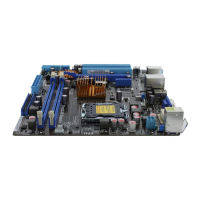
ASUS P5G41-M EVO 1-7
 Loading...