3-8 Chapter 3: BIOS setup
Chapter 3
4. Select Yes and press <Enter>. When BIOS update is done, press <ESC> to exit BIOS
Updater. Restart your computer.
DO NOT shut down or reset the system while updating the BIOS to prevent system boot
failure!
• For BIOS Updater version 1.04 or later, the utility automatically exits to the DOS
prompt after updating BIOS.
• Ensure to load the BIOS default settings to ensure system compatibility and stability.
Select the Load Setup Defaults item under the Exit BIOS menu. See Chaper 3 of
your motherboard user manual for details.
• Ensure to connect all SATA hard disk drives after updating the BIOS le if you have
disconnected them.
Updating the BIOS le
To update the BIOS le using BIOS Updater
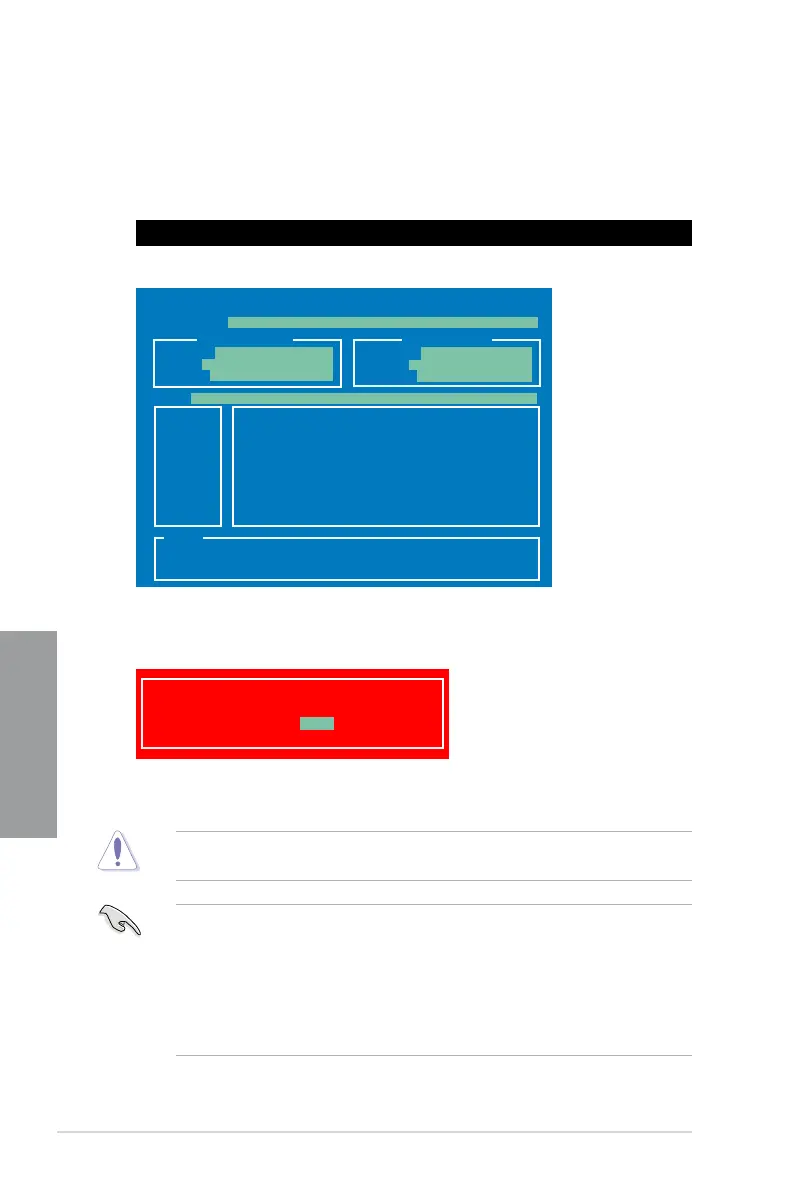
1. At the FreeDOS prompt, type
bupdater /pc /g and press <Enter>.
ASUSTek BIOS Updater for DOS V1.00b [09/06/22]
Current ROM
Update ROM
A:
Note
[Enter] Select or Load [Tab] Switch [V] Drive Info
[Up/Down/Home/End] Move [B] Backup [Esc] Exit
P7P55D.ROM 2097152 2009-08-06 17:30:48
FLASH TYPE: MXIC 25L1605A
PATH: A:\
BOARD: P7P55D-E EVO
VER: 0201
DATE: 11/04/2009
BOARD: Unknown
VER: Unknown
DATE: Unknown
D:\>bupdater /pc /g
2. The BIOS Updater screen appears as below.
3. Press <Tab> to switch between screen elds and use the <Up/Down/Home/End> keys
to select the BIOS le and press <Enter>. BIOS Updater checks the selected BIOS le
and prompts you to conrm BIOS update.
Are you sure to update BIOS?
Yes No



 To Next Page