Do you have a question about the Asus P7P55D-E - Premium Motherboard - ATX and is the answer not in the manual?
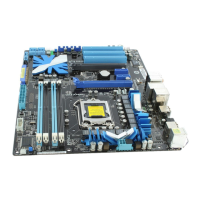
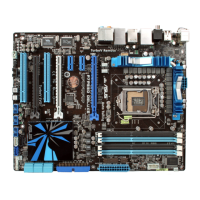
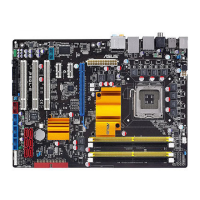
| Form Factor | ATX |
|---|---|
| Chipset | Intel P55 |
| CPU Socket | LGA 1156 |
| Maximum Memory | 16GB |
| Memory Type | DDR3 |
| Memory Standard | DDR3 2200(O.C.)/1600/1333/1066 |
| PCI Express x16 | 2 |
| PCI Express x1 | 2 |
| SATA 3Gb/s | 6 |
| SATA 6Gb/s | 2 |
| Audio Chipset | VIA VT2020 |
| LAN Chipset | Realtek 8112L |
| Max. LAN Speed | 10/100/1000Mbps |
| USB 2.0 | 12 |
| USB 3.0 | 2 |
| Memory Slots | 4 x DIMM |
| Audio Channels | 8 Channels |
| eSATA | 1 x eSATA 3Gb/s |
| Dimensions | 30.5 cm x 24.4 cm |
| Power Connector | 24-pin ATX |
| RAID Support | 0, 1, 5, 10 |
Details the unique technologies and advanced features of the motherboard.
Essential precautions before installing motherboard components or changing settings.
Information and procedures for installing and uninstalling the CPU.
Step-by-step instructions for safely installing the CPU into the socket.
Procedures for mounting the CPU heatsink and fan assembly.
Instructions on how to remove the CPU heatsink and fan assembly.
Information on installing and configuring DDR3 memory modules.
Describes the DDR3 DIMM sockets and their physical layout.
Details on supported memory sizes, types, and compatibility.
Step-by-step guide for inserting a memory module into a DIMM socket.
Instructions on how to safely remove a memory module from a DIMM socket.
Information on installing and configuring various expansion cards.
Procedures for physically installing an expansion card into a slot.
Description of onboard switches for performance tuning.
Identifies and describes all motherboard connectors.
Describes the internal headers and connectors on the motherboard.
Information and warnings regarding BIOS updating procedures.
Settings for overclocking and performance tuning.
Allows automatic CPU level adjustment for performance.
Selects CPU overclocking modes like Manual, Auto, D.O.C.P., X.M.P., or CPU Level Up.
Adjusts the ratio between CPU Core Clock and BCLK Frequency.
Allows setting the DDR3 operating frequency for memory.
Automatically overclocks CPU and DRAM for performance.
Allows detailed adjustment of DRAM timing parameters for performance.
Settings for CPU and other system devices.
Displays and allows configuration of CPU-related information and settings.
Displays system voltages, temperatures, and fan speeds.
Options for configuring system boot behavior and priorities.
Sets the sequence of devices for system boot-up.
Manages BIOS passwords and user access levels for system security.
Details on various software utilities provided.
Overview of the AI Suite for launching various ASUS utilities.
Information on using Intel Extreme Tuning Utility for overclocking.
Explains RAID configurations supported by the motherboard.
Definitions and advantages of RAID 0, RAID 1, RAID 5, and RAID 10.
Steps to enable RAID functionality in BIOS setup.
Procedures for creating a RAID driver disk for OS installation.
Guide for installing RAID drivers during OS setup.
Information on supporting ATI CrossFireX technology for multi-GPU setups.
Step-by-step guide for physically installing multiple graphics cards.
How to enable CrossFireX technology via the Catalyst Control Center.