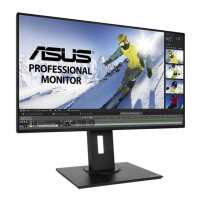
The ASUS PB238Q Series LCD Monitor is a widescreen display designed to provide a crisp, broad, and bright visual experience with a host of features to enhance user interaction. This user guide outlines the monitor's functions, usage, and maintenance.
Function Description
The monitor serves as a visual output device for computers and other compatible devices. It features multiple input options, including VGA, DVI, HDMI, and DisplayPort, allowing for versatile connectivity. The integrated USB upstream and downstream ports enable connection of USB devices like keyboards, mice, and flash drives, expanding the monitor's utility as a hub. Audio input and output capabilities are also provided, with an audio line-in port and built-in stereo speakers.
A key feature of the PB238Q Series is its On-Screen Display (OSD) menu, which allows users to customize various display settings. The OSD menu is accessible via dedicated buttons on the monitor's front panel. It includes several main functions:
- Splendid: This function offers six preset video modes (Scenery, Standard, Theater, Game, Night View, and sRGB) optimized for different content types. Each mode can be reset to its default settings.
- Color: Users can adjust brightness, contrast, saturation, color temperature (Cool, Normal, Warm, User Mode), and skin tone (Reddish, Natural, Yellowish) to suit their preferences. In User Mode, individual Red, Green, and Blue color levels can be configured.
- Image: This section provides controls for image sharpness, Trace Free (to speed up response time), Aspect Control (Full, 4:3, Over Scan for HDMI input), ASCR (dynamic contrast ratio), Position (horizontal and vertical adjustment for VGA input), and Focus (to reduce horizontal and vertical line noise for VGA input).
- Sound: Audio settings include volume control, mute function, and source selection (Line In, HDMI, or DisplayPort).
- Input Select: This allows users to manually choose the active input source from VGA, DVI, HDMI, or DisplayPort.
- System Setup: This menu offers general system settings such as Splendid Demo Mode, OSD Setup (horizontal and vertical position, timeout, DDC/CI, transparency), Language selection, Information display, and an All Reset option to revert all settings to factory defaults.
Another notable feature is the QuickFit function, activated by a dedicated button. QuickFit provides on-screen grid patterns, paper sizes, and photo sizes, which are useful for designers and photographers. The grid patterns help organize content and achieve consistent layouts, while the paper and photo sizes allow users to view documents and images at their real-world dimensions on the screen.
Usage Features
The PB238Q Series monitor is designed for user convenience and ergonomic flexibility.
- Power Control: A power button on the front panel allows users to turn the monitor on or off. The power indicator changes color (White for ON, Amber for Standby, OFF for OFF) to show the monitor's status. A separate power switch on the rear provides a hard power cut-off.
- Input Selection: A dedicated input select button allows quick switching between connected video sources. For HDMI/DisplayPort signals, pressing this button displays the available options.
- OSD Navigation: The OSD menu is navigated using directional buttons (left/down, right/up) and a MENU button for selection and activation. The left/down button also functions as a hotkey for volume adjustment, and the right/up button as a hotkey for brightness.
- Auto Adjustment: In VGA mode, pressing the S/A button for 2-4 seconds automatically adjusts the image to its optimized position, clock, and phase, simplifying setup.
- Ergonomic Adjustments: The monitor stand offers significant adjustability for optimal viewing comfort:
- Tilt: The screen can be tilted from +20° to -5°.
- Swivel: The monitor can swivel 60° to either the left or right.
- Height Adjustment: The height can be adjusted within a range of +/- 10cm.
- Pivot: The monitor can be pivoted clockwise to a portrait orientation, which is particularly useful for document viewing or specific design tasks. To pivot, the monitor must first be lifted to its highest position and tilted to its maximum angle.
- VESA Wall Mount Compatibility: The detachable stand allows the monitor to be mounted on a VESA-compatible wall mount kit (100 x 100 mm, purchased separately). This provides flexibility for various installation scenarios.
Maintenance Features
Proper care and maintenance are essential for the longevity and optimal performance of the monitor.
- Cleaning: Before cleaning, the monitor should be turned off and unplugged. The surface should be cleaned with a lint-free, non-abrasive cloth. Stubborn stains can be removed with a cloth dampened with a mild cleaner. It is crucial to avoid cleaners containing alcohol or acetone and never to spray cleaner directly onto the screen to prevent damage or electric shock.
- Handling: When lifting or repositioning the monitor, users should grasp its edges and avoid lifting it by the stand or the cord. Disconnecting cables and the power cord before moving the monitor is recommended.
- Environmental Considerations: The monitor should be protected from dust, humidity, and extreme temperatures. It should not be placed in areas where it may get wet and should always be on a stable surface. Adequate ventilation is necessary, and the ventilation slots on the cabinet should not be blocked.
- Power Management: The monitor should be operated from the specified power source (100-240V AC). Overloading power strips and extension cords should be avoided to prevent fire or electric shock. Unplugging the unit during lightning storms or prolonged periods of disuse protects it from power surges.
- Troubleshooting: The manual provides a troubleshooting guide for common issues such as the power LED not being ON, no screen image, image quality problems (too light/dark, not centered, bouncing, color defects, blurry), and no sound. Solutions often involve checking cable connections, adjusting OSD settings (Brightness, Contrast, H/V-Position, Phase, Clock, Color Temperature, Volume), or performing a factory reset.
- Professional Service: Users are advised not to attempt to open the monitor cabinet or repair the power supply themselves due to dangerous high voltages. In case of technical problems or if the screen becomes black, flashes, or stops working, contacting a qualified service technician or retailer is recommended. The product warranty may be voided if unauthorized repairs or modifications are made.