This document is a user guide for the ASUS VL249 Series LCD Monitor, providing instructions for setup, operation, and maintenance.
Function Description
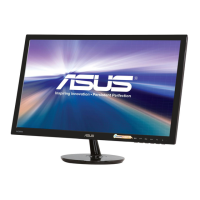
The ASUS VL249 Series LCD Monitor is a widescreen display designed to offer a crisp, broader, and brighter viewing experience. It includes a variety of features aimed at enhancing user interaction and visual quality. The monitor supports multiple input sources, including VGA, HDMI, and DisplayPort (VL249Q only), allowing for versatile connectivity with various devices. It incorporates ASUS's SPLENDID™ Video Intelligence Technology, which offers eight preset display modes optimized for different content types such as document editing, photo viewing, scenery display, movie watching, gaming, night view, reading, and darkroom environments. The monitor also features a Blue Light Filter to reduce harmful blue light emissions, aiming to alleviate eye strain and prevent conditions like Age-Related Macular Degeneration (AMD) and Computer Vision Syndrome (CVS). For gamers, the GamePlus function provides a toolkit with features like Crosshair, Timer, FPS Counter, and Display Alignment to enhance the gaming experience. The QuickFit function offers grid, paper size, and photo size patterns to assist designers and users with content organization and layout. EyeCheck includes Snellen Chart, Amslter Grid, and Astigmatism patterns for eye health checks. The ECO Mode is available for power saving.
Important Technical Specifications
The ASUS VL249 Series LCD Monitor comes in two models: VL249Q and VL249HE.
- Panel Size: 23.8"W for both models.
- Max. Resolution: 1920x1080 for both models.
- Brightness (Typ.): 250cd/m² for both models.
- Intrinsic Contrast Ratio (Typ.): 1000:1 for both models.
- Viewing Angle (CR>10): 178°(V) / 178°(H) for both models.
- Display Colors: 16.7 M (6bit+FRC) for both models.
- Response Time: 5ms (G To G) for both models.
- Satellite Speaker: 1.5W x 2 stereo for VL249Q; No for VL249HE.
- Sound from HDMI: Yes for VL249Q; No for VL249HE.
- HDMI input: Yes for both models.
- D-Sub input: Yes for both models.
- DisplayPort: Yes for VL249Q; No for VL249HE.
- Audio Line-in: Yes for VL249Q; No for VL249HE.
- Power ON Consumption: < 13W for both models.
- Note: Based on Energy Star 7.0 standard for VL249Q; Based on Energy Star 8.0 standard for VL249HE.
- Chassis Colors: Black for both models.
- Power saving mode: < 0.5W for both models.
- Power off mode: < 0.5W for both models.
- Tilt: -10° ~ +20° for both models.
- VESA Wall Mounting: Yes (100mm x 100mm) for both models.
- Phys. Dimension with stand (WxHxD): 541.7mm x 394.9mm x 208.4mm for both models.
- Phys. Dimension without stand (WxHxD) (For VESA Wall Mount): 541.7mm x 322.9mm x 40.5mm for both models.
- Box Dimension (WxHxD): 602mm x 466mm x 145mm for both models.
- Net Weight (Esti.): 4kg for both models.
- Gross Weight (Esti.): 6.8kg for both models.
- Voltage Rating: AC 100~240V (Built-in) for both models.
Usage Features
The monitor is assembled by attaching the base to the arm and securing it with a screw. The monitor's angle can be adjusted from -10° to +20° for optimal viewing comfort. The On-Screen Display (OSD) menu is navigated using control buttons located on the back of the monitor.
- Menu Button: Powers the monitor on/off and enters the OSD menu. It also selects highlighted icons/functions within the OSD.
- Input Select Item / Increase Value: Increases values or acts as a hotkey for input source selection.
- Brightness Item / Decrease Value: Decreases values or acts as a hotkey for brightness adjustment.
- Close / Return Button: Returns to the previous menu or exits the OSD menu.
- Power Button: Activates the "Power Off" OSD when the monitor is on.
The OSD menu offers comprehensive control over various settings:
- Splendid: Eight preset modes (Standard, sRGB, Scenery, Theater, Game, Night View, Reading, Darkroom) for different viewing scenarios. Some functions (Saturation, SkinTone, Sharpness, ASCR, Color Temp., Brightness, Contrast) may be non-configurable in certain modes.
- Blue Light Filter: Adjusts blue light emission levels from 0 (no change) to 4 (maximum reduction). Levels 1-3 allow brightness configuration, while Level 4 is optimized for TUV Low Blue Light Certification and has fixed brightness.
- Color: Adjusts Brightness, Contrast, Saturation (range 0-100), Color Temp. (Cool, Normal, Warm, User Mode), and Skin Tone (Reddish, Natural, Yellowish). In User Mode, R, G, B colors are configurable (0-100).
- Image: Adjusts Sharpness (0-100), Trace Free (response time 0-100), Aspect Control (Full, 4:3, Overscan for HDMI), VividPixel (0-100), ASCR (ON/OFF), FreeSync (dynamically adjusts refresh rate), Position (H-Position, V-Position 0-100 for VGA only), Focus (Phase, Clock 0-100 for VGA only), and Auto Adjust (for VGA only).
- Sound (VL249Q only): Adjusts Volume, Mute, and Audio Source (Line In, HDMI, DisplayPort).
- Input Select: Allows selection of input source (VGA, HDMI, DisplayPort for VL249Q only).
- System Setup: Contains Splendid Demo Mode, GamePlus, QuickFit, EyeCheck, ECO Mode, OSD Setup (Timeout, DDC/CI, Transparency), Language, More, Back, Key Lock, Information, Power Indicator, Power Key Lock, and All Reset.
- GamePlus: Provides Crosshair, Timer, FPS Counter, and Display Alignment.
- QuickFit: Offers Grid, Paper Size (B5, Letter), and Photo Size (8x10, 5x7, 4x6, 3x5, 2x2) patterns.
- EyeCheck: Includes Snellen Chart, Amslter Grid, and Astigmatism.
- Shortcut: Allows setting two shortcut keys from options like Blue Light Filter, Splendid, Brightness, Auto Adjust, Contrast, Input Select, Color Temp., Volume (VL249Q Only), QuickFit, and GamePlus.
Maintenance Features
- Cleaning: Before cleaning, disconnect cables and power cord. Use a lint-free, non-abrasive cloth. For stubborn stains, use a cloth dampened with mild cleaner. Avoid alcohol or acetone cleaners, and never spray cleaner directly on the screen.
- Troubleshooting (FAQ): The manual provides a list of common problems and their possible solutions, such as the power LED not turning on, no screen image, image being too light/dark, image bouncing/wave patterns, color defects, and low/no sound (VL249Q only).
- Detaching Arm/Stand: For VESA wall mounting, the arm/stand can be detached by loosening a screw at the base, removing the hinge cover, and then removing two screws from the arm. It is recommended to cover the table with a soft cloth to prevent damage during this process. A UL Listed Wall Mount Bracket (100 x 100 mm, M4 x 10 mm screws, minimum load 12 kg) is required and purchased separately.
- Safety Information: Includes warnings about fire/shock hazards, not opening the monitor cabinet, contacting qualified service technicians for power supply issues, ensuring correct cable connections, proper ventilation, using the correct power source/plug, avoiding overloading power strips, protecting against dust/humidity/temperature extremes, unplugging during lightning storms, not spilling liquids into slots, using UL listed computers (100-240V AC), ensuring the socket-outlet is easily accessible, and providing an earthing connection. It also warns against hearing loss from using other than specified head- or earphones.
- Eye Strain Alleviation: Recommends taking short breaks (at least 5 minutes after 1 hour of work), resting eyes by focusing on distant objects, and performing eye exercises (looking up/down, rolling eyes, moving eyes diagonally).