Do you have a question about the Asus WS C246M PRO and is the answer not in the manual?
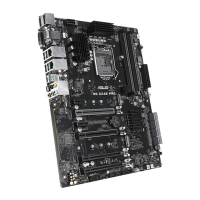
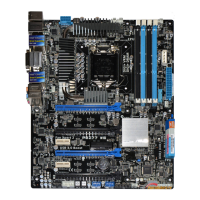
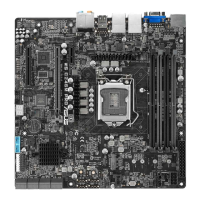
Provides an overview of the motherboard and its features.
Safety precautions to take before installing components or changing settings.
Details utilities for BIOS management: CrashFree BIOS 3, EzFlash, and BUPDATER.
Explains how to navigate and use the BIOS Setup utility, including screen elements.
Accesses advanced settings for CPU, system devices, and peripherals.
Provides access to platform settings related to System Agent and PCH-IO.
Defines RAID levels and guides on installing disks and setting up RAID in BIOS.
Managing RAID configurations within the Windows operating system.
Precautions to prevent electrical shock hazard during system operation and maintenance.
Guidelines for safe handling and operation of the motherboard and components.
Describes DDR4 DIMM slots and compatibility.
Details PCI Express slots and their operating modes.
Steps for assembling a PC system using the motherboard.
Detailed instructions for installing the CPU into the socket.
Steps for mounting the motherboard into the PC chassis.
Details on connecting ATX power supply cables to the motherboard.
Instructions for installing M.2 devices.
Details utilities for BIOS management: CrashFree BIOS 3, EzFlash, and BUPDATER.
Auto recovery tool for restoring corrupted BIOS files.
Utility to update BIOS in DOS mode using a USB flash disk.
Allows setting system date, time, and language.
Settings for C6DRAM, SGX, EPOCH input, SGX Launch Control Policy.
Controls boot performance mode, SpeedStep, RTH, Speed Shift, HDC, Turbo Mode, C-States.
Settings for Legacy USB, XHCI Hand-off, Mass Storage, Port 60/64 Emulation.
Settings for Memory Configuration: Warm Boot Test, Frequency, ECC, Scrambler, Fast Boot.
Configuration for PCI Express, SATA, HD Audio.
Covers HD Audio advanced settings and LAN wake features.
Displays system temperature, fan speed, power status, and fan settings.
Utility to run ASUS EZ Flash BIOS ROM Utility.
Covers BMC wait, FRB-2 Timer, OS Watchdog Timer, Serial Mux, BMC Warm Reset.
Saves or discards BIOS changes and exits setup.
Explains RAID 0, RAID 1, RAID 5, and RAID 10 configurations.
Utility to create RAID sets from SATA drives.
Steps to delete a RAID volume and reset disks to non-RAID.
Creating a RAID driver disk for Windows OS installation.
Steps to create a RAID set using the Windows utility.
| Memory channels | Dual-channel |
|---|---|
| Memory slots type | DIMM |
| Number of memory slots | 4 |
| Supported memory types | DDR4-SDRAM |
| Maximum internal memory | 64 GB |
| Supported memory clock speeds | 2133, 2400, 2666 MHz |
| Quick installation guide | Yes |
| PCI Express x4 (Gen 3.x) slots | 1 |
| Processor socket | LGA 1151 (Socket H4) |
| Processor manufacturer | Intel |
| Compatible processor series | Intel Celeron, Intel Core i3, Intel Core i5, Intel Core i7, Intel Pentium, Intel Xeon |
| Component for | PC |
| Motherboard chipset | Intel C246 |
| Audio output channels | 8.0 channels |
| Motherboard form factor | micro ATX |
| Number of M.2 (M) slots | - |
| Wi-Fi | No |
| LAN controller | Intel I210-AT, Intel I219LM |
| USB 2.0 connectors | 2 |
| USB 3.2 Gen 2 (3.1 Gen 2) connectors | 0 |
| USB 2.0 ports quantity | USB 2.0 ports have a data transmission speed of 480 Mbps, and are backwards compatible with USB 1.1 ports. You can connect all kinds of peripheral devices to them. |
| Cables included | SATA |
| Harmonized System (HS) code | 84733020 |
| Supported storage drive interfaces | SATA III |
| Package depth | 353 mm |
| Package width | 367 mm |
| Package height | 300 mm |
| Width | 244 mm |
|---|