Do you have a question about the ASUSTOR AS3102T v2 and is the answer not in the manual?
Statement regarding FCC compliance and interference conditions.
Warning about CE marking compliance for specific device types.
Guidelines for safe electrical connection and usage of the NAS.
Precautions for safe operation, environment, and handling of the NAS.
Lists the essential tools required for installing hard disk drives.
Step-by-step instructions for physically installing hard disk drives into the NAS.
Guide for installing software using the ASUSTOR Download Center.
Specific installation instructions for Windows operating system users.
Explains the meaning and state of various LED indicators on the NAS.
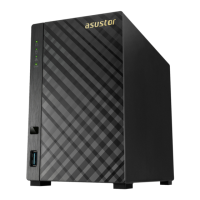
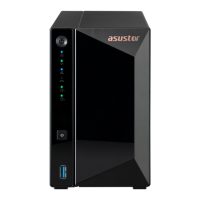
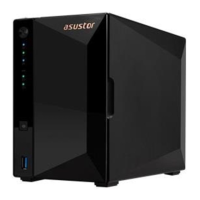
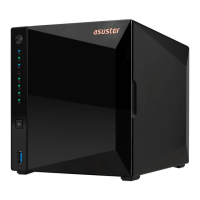
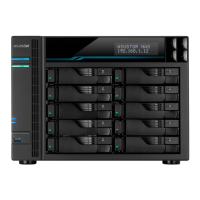
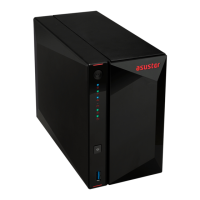
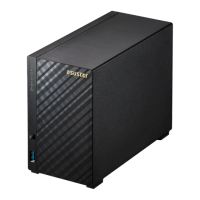
This document is a Quick Installation Guide for ASUSTOR NAS devices, specifically covering models AS3102T, AS3102T v2, AS3104T, AS3202T, AS3204T, and AS3204T v2. It provides comprehensive instructions for setting up and maintaining these network-attached storage systems.
The primary function of these ASUSTOR NAS devices is to provide centralized data storage, management, and sharing capabilities within a network environment. They are designed for both home and small office users who need a reliable and accessible solution for storing large amounts of data, backing up computers, and serving media content. The devices support multiple hard drives, allowing for various RAID configurations to enhance data redundancy and performance.
The installation process begins with hardware setup, which involves installing hard disks into the NAS enclosure. The guide details how to remove the rear screws and slide open the cover for both 2-bay (AS3102T/AS3102T v2/AS3202T) and 4-bay (AS3104T/AS3204T/AS3204T v2) models. Users are instructed to slide 3.5-inch SATA hard disks all the way into the disk bay until they are firmly seated and connected to the SATA connector. For 3.5" drives, the guide specifies using either 3 or 2 screw holes on each side, depending on the model, to secure the drives. It is emphasized that for initialization, the hard disk must be inserted into the HDD 1 slot. For users planning to utilize RAID functions, it is recommended to use hard disks of the same capacity to maximize storage efficiency. After installing the hard disks, the cover is replaced, and the screws are tightened.
A crucial usage feature is the securing of the power cord. The guide provides instructions on how to use the provided power cord bracket to secure the power cord, preventing accidental disconnections, especially if the NAS is moved. This involves attaching the bracket over the hole for the fan screw and then replacing the fan screw to secure the bracket.
Connecting and powering on the NAS is straightforward. Users connect the NAS to its power supply and then to their router, switch, or hub using an Ethernet cable. The power button, located on the back of the device, needs to be pressed and held for 1-2 seconds until the yellow power LED indicator lights up. The NAS is ready for operation once the yellow system status LED indicator stops flashing and remains steadily lit, accompanied by a 'beep' from the system buzzer.
The software installation guide offers multiple methods to configure the system settings. Users can choose from Download Center Installation (for Windows users), Web Installation, or Installation Using a Mobile Device.
For Windows users, installing ASUSTOR Control Center allows it to automatically scan the network for ASUSTOR NAS devices. Users then select their NAS from the list and follow the installation wizard.
Web Installation is an alternative for users who know their NAS's IP address. They can enter the IP address into a web browser to initiate the initialization process and follow the on-screen instructions.
Installation Using a Mobile Device leverages the "AiMaster" app, available on Google Play and the Apple App Store. Users download and install the app, ensure their mobile device is on the same local network as the NAS, and then use the app's "Auto Discovery" feature to find the NAS. Once detected, they select the NAS and proceed with "Start Initialization" to complete the setup.
The guide includes important safety precautions to increase the life of the NAS. These include unplugging the product from the power source before cleaning, using only the bundled power adapter, and ensuring the power adapter is plugged into the correct input rating.
Operation safety guidelines advise against placing the product in wet locations, recommending a flat and stable surface. The device should be used in environments with ambient temperatures between 0°C and 40°C. Proper ventilation is crucial, and users are warned not to block air vents or insert objects/spill liquid into them. In case of technical problems, users are advised to contact a qualified service technician or retailer rather than attempting repairs themselves.
The guide also provides information on LED indicators, which serve as a diagnostic tool for monitoring the NAS's status. Different colors and states of the Power, System Status, Network, and Hard Disk LEDs indicate various conditions such as power on, LED night mode, powering on, system ready, system or hard disk abnormality, fan or system temperature abnormality, network port connected, hard disk ready, and data access in progress. This allows users to quickly identify potential issues.
The rear panel diagram labels key components like the Power Button, Reset Button, USB 3.0 Port, HDMI Port, Network Port, DC Input, K-Lock, and System Fan, which are essential for understanding the physical connections and basic troubleshooting.
Troubleshooting tips are provided for common issues, such as the NAS not being detected by ASUSTOR Control Center. The guide suggests checking network connections, ensuring the computer and NAS are on the same local area network, and verifying that the network LED indicator is lit. If the indicator is not lit, users are advised to try a different Ethernet cable or network port. Disabling firewalls on the computer is also recommended. For persistent detection issues, users are instructed to connect the NAS directly to their computer using an RJ-45 cable and adjust the computer's IP settings (setting IP address to 169.254.1.1 and subnet mask to 255.255.0.0).
For shutting down the NAS, the guide explains how to configure the power button behavior through the ADM (ASUSTOR Data Master) interface. Users can access "Settings" > "Hardware" > "Power" to choose whether holding the power button for 1.5 seconds will shut down the NAS or put it into sleep mode. After configuration, holding the power button for 1.5 seconds will trigger the selected action, accompanied by a "beep" from the system buzzer.
Finally, the document directs users to ASUSTOR's customer service and knowledge base for further support, emphasizing the importance of proper installation and maintenance for optimal device performance and longevity.
| RAID levels | 0, 1, JBOD |
|---|---|
| RAID support | Yes |
| Storage drive size | 3.5 \ |
| Hot-swap drive bays | - |
| Storage drive capacity | 0 GB |
| Supported file systems | FAT32, HFS+, NTFS, exFAT, ext3, ext4 |
| Storage drive interface | Serial ATA III |
| Storage drives installed | No |
| Supported storage drive types | HDD |
| Total installed storage capacity | - TB |
| Maximum supported storage capacity | 24 TB |
| Number of storage drives installed | 0 |
| Number of storage drives supported | 2 |
| Processor family | Intel® Celeron® |
| Processor frequency | 1.6 GHz |
| Ethernet LAN data rates | 10, 100, 1000 Mbit/s |
| Supported network protocols | CIFS / SMB, SMB 2.0 / 3.0, AFP, NFS, FTP (Unicode Supported), TFTP, WebDAV, Rsync, SSH, SFTP, iSCSI/IP-SAN, HTTP, HTTPS, Proxy, SNMP, Syslog |
| HDMI version | 1.4b |
| USB 2.0 ports quantity | USB 2.0 ports have a data transmission speed of 480 Mbps, and are backwards compatible with USB 1.1 ports. You can connect all kinds of peripheral devices to them. |
| USB 3.2 Gen 1 (3.1 Gen 1) Type-A ports quantity | 3 |
| Cooling type | Active |
| Fan diameter | 70 mm |
| Product color | Black |
| Number of fans | 1 fan(s) |
| Type | NAS |
| Noise level | 18.6 dB |
| Device class | Home & Home Office |
| Backup features | Cloud |
| Number of users | 4096 user(s) |
| Security algorithms | 256-bit AES |
| Operating system version | 3.1 |
| Operating system installed | ADM |
| Mac operating systems supported | Mac OS X 10.10 Yosemite, Mac OS X 10.11 El Capitan, Mac OS X 10.12 Sierra, Mac OS X 10.13 High Sierra, Mac OS X 10.6 Snow Leopard, Mac OS X 10.7 Lion, Mac OS X 10.8 Mountain Lion, Mac OS X 10.9 Mavericks |
| Server operating systems supported | Windows Server 2003, Windows Server 2003 R2, Windows Server 2003 x64, Windows Server 2008, Windows Server 2008 R2, Windows Server 2008 R2 x64, Windows Server 2008 x64, Windows Server 2012, Windows Server 2012 R2, Windows Server 2012 R2 x64, Windows Server 2012 x64 |
| Windows operating systems supported | Windows 10, Windows 10 Education, Windows 10 Education x64, Windows 10 Enterprise, Windows 10 Enterprise x64, Windows 10 Home, Windows 10 Home x64, Windows 10 IOT Core, Windows 10 Pro, Windows 10 Pro x64, Windows 7, Windows 7 Enterprise, Windows 7 Enterprise x64, Windows 7 Home Basic, Windows 7 Home Basic x64, Windows 7 Home Premium, Windows 7 Home Premium x64, Windows 7 Professional, Windows 7 Professional x64, Windows 7 Starter, Windows 7 Starter x64, Windows 7 Ultimate, Windows 7 Ultimate x64, Windows 8, Windows 8 Enterprise, Windows 8 Enterprise x64, Windows 8 Pro, Windows 8 Pro x64, Windows 8 x64, Windows 8.1, Windows 8.1 Enterprise, Windows 8.1 Enterprise x64, Windows 8.1 Pro, Windows 8.1 Pro x64, Windows 8.1 x64, Windows Vista, Windows Vista Business, Windows Vista Business x64, Windows Vista Enterprise, Windows Vista Enterprise x64, Windows Vista Home Basic, Windows Vista Home Basic x64, Windows Vista Home Premium x64, Windows Vista Ultimate, Windows Vista Ultimate x64, Windows Vista x64, Windows XP Home, Windows XP Home x64, Windows XP Professional, Windows XP Professional x64 |
| Operating temperature (T-T) | 0 - 40 °C |
| Operating relative humidity (H-H) | 5 - 95 % |
| AC input voltage | 100 - 240 V |
| Power supply location | External |
| Power consumption (sleep) | 0.89 W |
| Power consumption (typical) | 14.6 W |
| Internal memory | - GB |
| Internal memory type | DDR3L |
| Cables included | AC, LAN (RJ-45) |
| Number of screws | 8 |
| Certification | FCC, CE, VCCI, BSMI, C-TICK |
| Depth | 218 mm |
|---|---|
| Width | 102 mm |
| Height | 165 mm |
| Weight | 1170 g |