Do you have a question about the ASUSTOR AS5202T and is the answer not in the manual?
Device complies with FCC Rules Part 15, ensuring reasonable protection against harmful interference.
CE marking indicates compliance with EEC directives for electromagnetic compatibility and safety.
Unplug before cleaning. Use only the correct bundled power adapter for device safety.
Operate in a dry, stable environment within 0-40°C, ensuring ventilation and avoiding liquids.
Optional items can be purchased from the ASUSTOR Accessories Store online.
Requires a Phillips head screwdriver and compatible SATA hard disks (2.5 or 3.5 inch).
Steps to remove the front panel, pull the disk tray, and mount the hard disk.
Instructions to secure a 2.5-inch hard drive with M3 screws after removing rails.
Push the disk tray into the bay using the latch until it clicks securely into place.
Re-attach the front panel after the disk tray has been properly secured.
Connect the NAS to its power supply using the provided adapter and power cord.
Connect the NAS to your router, switch, or hub using an Ethernet cable.
Read precautions carefully before adding/removing memory modules to avoid damage or warranty issues.
Ground yourself by touching metal, avoid static electricity, and do not touch internal metal parts.
Shutdown NAS, disconnect cables, and use a screwdriver to loosen screws to remove the cover.
Use a screwdriver to loosen three specific screws on the rear of the NAS as shown.
Grip the cover with two hands and gently push it back to remove it from the chassis.
Slide module diagonally into slot, push down and back until it clicks into place.
Download software from ASUSTOR website. ASUSTOR Control Center scans network for NAS devices.
Install ASUSTOR Control Center. It scans the network for ASUSTOR NAS devices.
Open a web browser and enter the NAS IP address (e.g., http://192.168.1.168:8000) to start.
Follow the instructions provided by the installation wizard to complete the configuration process.
Search for 'AiMaster' in app stores or scan QR codes. Download and install the mobile app.
Ensure your mobile device is connected to the same local network as your NAS.
Open AiMaster, select the '+' icon, then select [Auto Discovery] to find your NAS.
Select your NAS from the list and choose [Start Initialization] to begin the setup.
Set power button function (shut down/sleep mode) via ADM settings.
Hold the power button for 1.5 seconds. The NAS will shut down or enter sleep mode based on configuration.
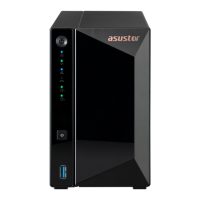
Details on Power, System Status, Network, USB, and Hard Disk LED indicators and their states.
Table describing LED indicator colors (Blue, Orange, Green, Red) and their meanings.
Identifies ports on the rear panel of the AS5202T model: USB, HDMI, RJ-45, Reset, DC Input.
Identifies ports on the rear panel of the AS5304T model: USB, HDMI, RJ-45, Reset, DC Input.
Steps to resolve NAS detection problems: check network, disable firewall, configure IP, and contact support.
| RAID levels | 0, 1, JBOD |
|---|---|
| RAID support | Yes |
| Storage drive size | 2.5/3.5 \ |
| Storage drive capacity | 0 GB |
| Supported file systems | BTRFS, FAT32, HFS+, NTFS, exFAT, ext3, ext4 |
| Storage drive interface | Serial ATA III |
| Storage drives installed | No |
| Storage drive sizes supported | 2.5, 3.5 \ |
| Supported storage drive types | HDD & SSD |
| Total installed storage capacity | 0 TB |
| Number of storage drives installed | 0 |
| Number of storage drives supported | 2 |
| Ethernet LAN data rates | 10, 100, 1000, 2500 Mbit/s |
| Supported network protocols | CIFS / SMB, SMB 2.0 / 3.0, AFP, NFS, FTP (Unicode Supported), TFTP, WebDAV, Rsync, SSH, SFTP, iSCSI/IP-SAN, HTTP, HTTPS, Proxy, SNMP, Syslog |
| Type | NAS |
| Device class | Home & Home Office |
| Browser supported | Internet Explorer 11, FireFox, Chrome, Safari, Microsoft Edge |
| Noise level (idle) | 18.6 dB |
| Security algorithms | 256-bit AES |
| Operating system version | 3.4 |
| Operating system installed | ADM |
| Server operating systems supported | Windows Server 2003, Windows Server 2008, Windows Server 2012 |
| Windows operating systems supported | Windows 10, Windows 7, Windows 8, Windows Vista, Windows XP |
| Flash memory | 4096 MB |
| Memory slots | 2x SO-DIMM |
| Internal memory | 2 GB |
| Internal memory type | DDR4 |
| Maximum RAM supported | 8 GB |
| Tjunction | 105 °C |
| Processor cache | 4 MB |
| Processor model | J4005 |
| System bus rate | - GT/s |
| Processor family | Intel® Celeron® |
| Processor socket | BGA 1090 |
| Processor codename | Gemini Lake |
| Processor frequency | 2 GHz |
| Processor lithography | 14 nm |
| Processor manufacturer | Intel |
| Processor package size | 25 x 24 mm |
| CPU configuration (max) | 1 |
| PCI Express slots version | 2.0 |
| Processor boost frequency | 2.7 GHz |
| Processor operating modes | 64-bit |
| PCI Express configurations | 1x2, 1x2+2x1, 1x4, 2x1, 4x1 |
| Thermal Design Power (TDP) | 10 W |
| On-board graphics card model | Intel® UHD Graphics 600 |
| USB 2.0 ports quantity | USB 2.0 ports have a data transmission speed of 480 Mbps, and are backwards compatible with USB 1.1 ports. You can connect all kinds of peripheral devices to them. |
| USB 3.2 Gen 1 (3.1 Gen 1) Type-A ports quantity | 3 |
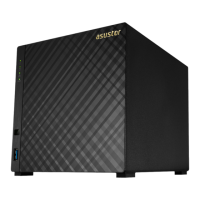
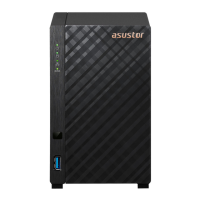
| Chassis type | Desktop |
| Cooling type | Active |
| Fan diameter | 70 mm |
| Product color | Black |
| LED indicators | Status |
| Number of fans | 1 fan(s) |
| AC input voltage | 100 - 240 V |
| Power supply location | Built-in |
| Power consumption (sleep) | 1.3 W |
| Power consumption (typical) | 17 W |
| Power consumption (HDD standby) | 10.5 W |
| Operating temperature (T-T) | 0 - 40 °C |
| Operating relative humidity (H-H) | 5 - 95 % |
| Package type | Box |
| Number of execution units | 12 |
| Maximum number of PCI Express lanes | 6 |
| Memory types supported by processor | DDR4-SDRAM, LPDDR4-SDRAM |
| Intel Smart Response Technology version | 0.00 |
| Intel Identity Protection Technology version | 1.00 |
| On-board graphics card ID | 0x3185 |
| On-board graphics card base frequency | 250 MHz |
| On-board graphics card DirectX version | 12.0 |
| On-board graphics card dynamic frequency (max) | 700 MHz |
| Processor ARK ID | 128992 |
| Harmonized System (HS) code | 84714100 |
| Depth | 230 mm |
|---|---|
| Width | 114 mm |
| Height | 170 mm |
| Weight | 1600 g |