Do you have a question about the ASUSTOR AS1002T and is the answer not in the manual?
Instructions for safe power connection, using bundled adapters, and cleaning.
Covers safe placement, temperature, ventilation, and proper disposal of electronic waste.
Details tools needed for hard disk installation and initial steps for removing the NAS cover.
Step-by-step guide on inserting 3.5-inch hard disks into the NAS drive bay.
Instructions on securing installed hard disks with screws and replacing the NAS cover.
Guide on connecting power and network cables and powering on the NAS device.
Addresses issues with ASUSTOR Control Center detecting the NAS, covering network and firewall checks.
This document is a Quick Installation Guide for ASUSTOR NAS devices, specifically models AS1002T and AS1004T. It provides comprehensive instructions for setting up and maintaining these network-attached storage systems.
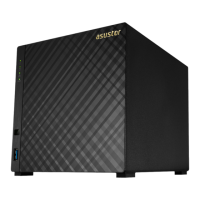
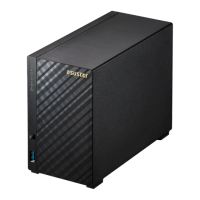
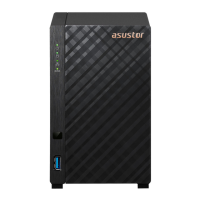
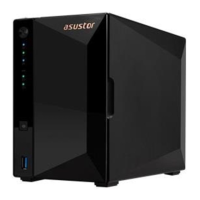
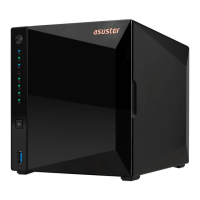
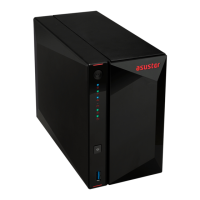
The ASUSTOR NAS devices (AS1002T and AS1004T) are designed to provide a centralized storage solution for digital assets, offering data protection and accessibility across a network. These devices function as personal cloud servers, allowing users to store, share, and manage files, as well as run various applications. They are equipped to house 3.5-inch SATA hard disks, which form the core of their storage capacity. The NAS supports RAID configurations, enabling users to enhance data redundancy and performance by utilizing multiple hard disks.
The primary function of these NAS devices is to provide reliable and secure data storage. They connect to a network via an Ethernet cable, making them accessible from various devices within the local network or remotely, depending on the configuration. The system is powered by an external adapter and includes a power button for turning the device on and off. Status indicators (LEDs) provide visual feedback on the device's operational state, including power, system status, network activity, and hard disk activity.
The ASUSTOR NAS offers multiple methods for initial setup and ongoing management, catering to different user preferences and technical skill levels.
The guide details the process of installing hard disks into the NAS. Users need to remove screws from the rear panel, slide open the cover, and then insert 3.5-inch SATA hard disks into the disk bays until they are firmly seated and connected to the SATA connector. It emphasizes securing the hard disks with provided screws. For optimal performance and data redundancy in RAID setups, it is recommended to use hard disks of the same capacity. After hard disk installation, the cover is replaced and secured.
Connecting the NAS involves plugging it into a power supply and connecting it to a router, switch, or hub using an Ethernet cable. The device is powered on by pressing and holding the power button for 1-2 seconds. The yellow power LED indicator lights up, followed by the system status and network LED indicators, which flash or remain steadily lit to indicate the boot process and readiness for operation. A "beep" from the system buzzer signals that hardware installation is complete and the device is ready for software configuration.
The guide outlines four different software installation methods:
http://192.168.1.168:8000). This method also leads to an installation wizard for configuration.All software installation methods guide users through a setup wizard, which typically offers a "1-Click Setup" for optimized settings or a "Custom Setup" for manual configuration.
The guide includes important safety precautions and troubleshooting information to ensure the longevity and proper functioning of the NAS.
A detailed table explains the meaning of the LED indicators on the front panel:
The rear panel includes:
The guide provides steps for troubleshooting issues with detecting the NAS using ASUSTOR Control Center:
Start > Control Panel > Network and Sharing Center > Change adapter settings. Right-click on "Local Area Connection," select "Properties," and under the "Networking" tab, select "Internet Protocol Version 4 (TCP/IPv4)." Click "Properties," choose "Use the following IP address," and set the IP address to 169.254.1.1 and the Subnet mask to 255.255.0.0. After applying these changes, open ASUSTOR Control Center to scan for the NAS again.The guide concludes by directing users to ASUSTOR's customer service and knowledge base for further support if troubleshooting steps do not resolve the issue.
| RAID levels | 0, 1, JBOD |
|---|---|
| RAID support | Yes |
| Storage drive size | 3.5 \ |
| Storage drive capacity | 0 GB |
| Supported file systems | FAT32, HFS+, NTFS, ext3, ext4 |
| Storage drive interface | Serial ATA II, Serial ATA III |
| Storage drives installed | No |
| Supported storage drive types | HDD |
| Total installed storage capacity | 0 TB |
| Maximum supported storage capacity | 16 TB |
| Number of storage drives installed | 0 |
| Number of storage drives supported | 2 |
| Processor model | Armada 385 |
| Processor family | Marvell |
| Processor frequency | 1 GHz |
| Internal memory | 0.5 GB |
| DHCP client | - |
| Ethernet LAN data rates | 10, 100, 1000 Mbit/s |
| Supported network protocols | CIFS / SMB, SMB 2.0, AFP, NFS, FTP, TFTP, WebDAV, Rsync, SSH, SFTP, iSCSI, HTTP, HTTPS, Proxy, SNMP, Syslog |
| USB 2.0 ports quantity | USB 2.0 ports have a data transmission speed of 480 Mbps, and are backwards compatible with USB 1.1 ports. You can connect all kinds of peripheral devices to them. |
| Ethernet LAN (RJ-45) ports | 1 |
| Cooling type | Active |
| Fan diameter | 70 mm |
| Product color | Black |
| Number of fans | 1 fan(s) |
| AC input voltage | 100-240 V |
| Power supply location | External |
| Power consumption (sleep) | 6.6 W |
| Power consumption (typical) | 13.2 W |
| Certification | FCC, CE, VCCI, BSMI, C-TICK |
| Type | NAS |
| Noise level | 33 dB |
| Device class | Home & Home Office |
| Backup features | Cloud |
| Number of users | 1024 user(s) |
| Security algorithms | 256-bit AES |
| Operating temperature (T-T) | 5 - 35 °C |
| Operating relative humidity (H-H) | 5 - 95 % |
| Operating system version | 2.5 |
| Operating system installed | ADM |
| Mac operating systems supported | Mac OS X 10.6 Snow Leopard, Mac OS X 10.7 Lion, Mac OS X 10.8 Mountain Lion, Mac OS X 10.9 Mavericks |
| Other operating systems supported | FreeBSD |
| Server operating systems supported | Windows Server 2003 R2, Windows Server 2003 x64, Windows Server 2008, Windows Server 2008 R2, Windows Server 2008 R2 x64, Windows Server 2008 x64, Windows Server 2012, Windows Server 2012 R2, Windows Server 2012 R2 x64, Windows Server 2012 x64 |
| Windows operating systems supported | Windows 7 Enterprise, Windows 7 Enterprise x64, Windows 7 Home Basic, Windows 7 Home Basic x64, Windows 7 Home Premium, Windows 7 Home Premium x64, Windows 7 Professional, Windows 7 Professional x64, Windows 7 Starter, Windows 7 Starter x64, Windows 7 Ultimate, Windows 7 Ultimate x64, Windows 8, Windows 8 Enterprise, Windows 8 Enterprise x64, Windows 8 Pro, Windows 8 Pro x64, Windows 8 x64, Windows 8.1, Windows 8.1 Enterprise, Windows 8.1 Enterprise x64, Windows 8.1 Pro, Windows 8.1 Pro x64, Windows 8.1 x64, Windows Vista Business, Windows Vista Business x64, Windows Vista Enterprise, Windows Vista Enterprise x64, Windows Vista Home Basic, Windows Vista Home Basic x64, Windows Vista Home Premium, Windows Vista Home Premium x64, Windows Vista Ultimate, Windows Vista Ultimate x64, Windows XP Home, Windows XP Home x64, Windows XP Professional, Windows XP Professional x64 |
| Cables included | AC, LAN (RJ-45) |
| Number of screws | 8 |
| Depth | 218 mm |
|---|---|
| Width | 102 mm |
| Height | 165 mm |
| Weight | 990 g |