Do you have a question about the ASUSTOR AS6510T and is the answer not in the manual?
Crucial safety and compatibility guidelines before installing M.2 SSDs.
Lists essential tools like a Phillips head screwdriver for installation.
Step-by-step instructions to safely remove the NAS chassis cover.
Insert M.2 SSD Drive at a 45° angle and gently push into slot.
Replace the cover and tighten the three screws that were removed previously.
Resolves common issues like the NAS not starting after M.2 SSD installation.
Provides contact information including email, support form, and community forum.
This document serves as an installation guide for M.2 SSD drives within ASUSTOR AS65 Series NAS devices, providing comprehensive instructions and important precautions to ensure a smooth and safe upgrade process. The guide is structured to walk users through each step, from initial preparation and safety considerations to the physical installation of the M.2 SSDs and subsequent system startup.
The primary function of this guide is to enable users of ASUSTOR AS65 Series NAS devices to successfully install M.2 SSD drives. These drives can enhance the performance of the NAS, potentially by serving as a cache for frequently accessed data, thereby speeding up read and write operations, or by providing additional high-speed storage capacity. The installation process involves opening the NAS chassis, carefully inserting the M.2 SSDs into designated slots, and then reassembling the device. The guide emphasizes the importance of proper installation to avoid damage to the NAS or the SSDs and to ensure the continued functionality of the system. It also addresses potential issues that might arise during or after installation, offering troubleshooting steps to help users resolve common problems. The overall goal is to empower users to expand their NAS capabilities with M.2 SSD technology, leveraging its benefits for improved data management and system responsiveness.
The guide outlines several key usage features related to the installation and subsequent operation of M.2 SSDs in ASUSTOR NAS devices. Before commencing the installation, users are advised to shut down the NAS properly through the ADM User Menu, ensuring all operations are ceased and data integrity is maintained. Disconnecting all cables, including the power cord, is a critical step to prevent electrical hazards and allow for safe handling of the internal components. The guide details the physical removal of the NAS cover by loosening specific screws and then gently sliding the cover back. This step grants access to the internal M.2 SSD slots.
When installing the M.2 SSDs, the guide specifies inserting the drive at a 45-degree angle, which is a common practice for M.2 installations to ensure proper seating in the slot. Users are then instructed to gently push the drive down until it is flush with the standoff, which must be adjusted to match the length of the SSD. Securing the drive with an included thumbscrew is essential to prevent it from dislodging. If installing two drives, the process is repeated for the second drive. The guide recommends using M.2 SSDs of the same model for optimal performance, especially if they are intended to work together in a RAID configuration or as a cache. It also warns against mixing PCIe NVMe and SATA AHCI SSDs in the M.2 slots, as this can prevent the NAS from booting. After installation, the cover is replaced, and the screws are tightened. Finally, all cables are reconnected, and the NAS is started up. The guide implicitly suggests that once installed, the M.2 SSDs will be recognized by the ASUSTOR ADM (ASUSTOR Data Master) operating system, allowing users to configure them for various purposes, such as creating an SSD cache or a new storage volume.
The document provides crucial maintenance features primarily focused on preventing damage during installation and ensuring the longevity of both the NAS and the M.2 SSDs. A significant portion of the guide is dedicated to "Notes and Precautions," which are essential for proper maintenance and avoiding warranty invalidation. Users are strongly advised to read these precautions thoroughly before starting the installation.
One key maintenance aspect is the recommendation to purchase compatible M.2 SSDs, either from local dealers or by consulting ASUSTOR's compatibility list. This ensures that the installed drives will work seamlessly with the NAS, reducing the risk of system instability or failure. The guide explicitly states that ASUSTOR does not guarantee the functionality of third-party M.2 SSDs, highlighting the importance of using verified components.
To prevent electrostatic discharge (ESD), which can damage sensitive electronic components, users are instructed to avoid working on surfaces that easily generate static electricity, such as carpets. Before handling the M.2 SSD or internal NAS components, users should ground themselves by touching an external metal object. This simple step is a critical maintenance practice to protect the hardware.
The guide also emphasizes careful handling of the M.2 SSDs and internal NAS components, warning against injuring hands or fingers on sharp edges and circuit boards. It cautions against inserting the M.2 SSD into the slot in the wrong direction, as this can cause damage to the module or slot and potentially lead to a fire. Using a screwdriver that matches the size of the screws is another small but important detail that prevents stripping screw heads, which can complicate future maintenance or repairs.
Furthermore, the document addresses troubleshooting, which is a form of reactive maintenance. If the NAS fails to start after installation, users are guided to check LED indicators, system buzzers, and the LCD display panel. Reinstalling the M.2 SSD to confirm proper seating is suggested, as is removing the newly installed module to see if the NAS operates normally without it. These steps help diagnose whether the issue lies with the SSD itself, the installation, or another part of the system. The guide also provides contact information for ASUSTOR Technical Support (email, online support form, and online community), ensuring users have resources for further assistance if troubleshooting steps are insufficient. This comprehensive approach to precautions, proper installation techniques, and troubleshooting contributes significantly to the long-term maintenance and reliability of the ASUSTOR NAS with M.2 SSDs.
| RAID levels | 0, 1, 5, 6, 10, JBOD |
|---|---|
| RAID support | Yes |
| Storage drive capacity | 0 GB |
| Supported file systems | BTRFS, FAT32, HFS+, NTFS, exFAT, ext3, ext4 |
| Storage drive interface | - |
| Storage drives installed | No |
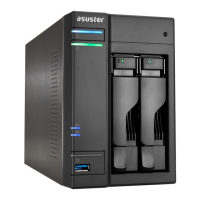
| Number of M.2 (M & B) slots | 2 |
| Storage drive sizes supported | 2.5, 3.5, M.2 \ |
| Supported storage drive types | HDD & SSD |
| Total installed storage capacity | 0 TB |
| Number of storage drives installed | 0 |
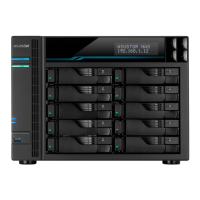
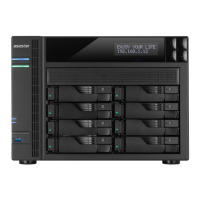
| Number of storage drives supported | 10 |
| Supported storage drive interfaces | Serial ATA III |
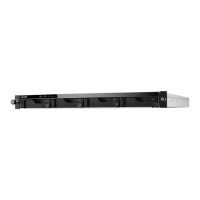
| Chassis type | Tower |
| Cooling type | Active |
| Display type | LCD |
| Fan diameter | 120 mm |
| Product color | Black |
| Number of fans | 2 fan(s) |
| Type | NAS |
| Device class | Home & Home Office |
| Share folder | Windows ACL |
| Backup features | Cloud, iSCSI LUN |
| Number of users | 4096 user(s) |
| Browser supported | Internet Explore 11+, FireFox, Chrome, Safari, Microsoft Edge |
| Noise level (idle) | 22 dB |
| Security algorithms | 256-bit AES, HTTPS, SSH, SSL/TLS |
| Tcase | 87 °C |
| Stepping | B1 |
| Tjunction | 100 °C |
| Processor code | SR3L7 |
| Processor cache | 8 MB |
| Processor cores | 4 |
| Processor model | C3538 |
| System bus rate | - GT/s |
| Processor family | Intel Atom® |
| Processor socket | BGA 1310 |
| Processor codename | Denverton |
| Processor frequency | 2.1 GHz |
| Processor cache type | Smart Cache |
| Processor lithography | 14 nm |
| Processor manufacturer | Intel |
| Processor package size | 34 x 28 mm |
| CPU configuration (max) | 1 |
| PCI Express slots version | 3.0 |
| Processor operating modes | 64-bit |
| Thermal Design Power (TDP) | 15 W |
| Maximum internal memory supported by processor | 256 GB |
| Flash memory | 4096 MB |
| Internal memory | 8 GB |
| Memory clock speed | 2133 MHz |
| Memory form factor | SO-DIMM |
| Internal memory type | DDR4 |
| Maximum RAM supported | 64 GB |
| Operating system version | 3.4 |
| Operating system installed | ADM |
| Mac operating systems supported | Mac OS X 10.6 Snow Leopard, Mac OS X 10.7 Lion, Mac OS X 10.8 Mountain Lion, Mac OS X 10.9 Mavericks, Mac OS X 11.0 Big Sur, Mac OS X 12.0 Monterey |
| Other operating systems supported | Linux |
| Server operating systems supported | Windows Server 2003, Windows Server 2008, Windows Server 2012 |
| Windows operating systems supported | Windows 10, Windows 7, Windows 8, Windows Vista, Windows XP |
| Ethernet LAN data rates | 100, 1000, 2500, 10000 Mbit/s |
| Supported network protocols | TCP/IP (IPv4 & IPv6), CIFS / SMB, SMB 2.0 / 3.0, AFP, NFS, FTP, TFTP, WebDAV, Rsync, SSH, SFTP, iSCSI/IP-SAN, HTTP, HTTPS, Proxy, SNMP |
| Ethernet LAN data rate supported (max) | 10000 Mbit/s |
| AC input voltage | 100 - 240 V |
| Power supply location | Built-in |
| Power consumption (typical) | 76.8 W |
| Power consumption (HDD standby) | 41.1 W |
| Power supply unit (PSU) capacity | 250 W |
| USB 2.0 ports quantity | USB 2.0 ports have a data transmission speed of 480 Mbps, and are backwards compatible with USB 1.1 ports. You can connect all kinds of peripheral devices to them. |
| Cables included | AC, LAN (RJ-45) |
| Number of screws | 66 |
| Operating temperature (T-T) | 0 - 40 °C |
| Operating relative humidity (H-H) | 5 - 95 % |
| Certification | FCC, CE, VCCI, BSMI, C-TICK |
| Intel Secure Key Technology version | 1.00 |
| Maximum number of PCI Express lanes | 12 |
| Memory types supported by processor | DDR4-SDRAM |
| Processor ARK ID | 97929 |
| Harmonized System (HS) code | 84714100 |
| Depth | 230 mm |
|---|---|
| Width | 293 mm |
| Height | 215.5 mm |
| Weight | 6400 g |