This document provides instructions for use of the ATAG KD5188C upright freezer.
Function Description
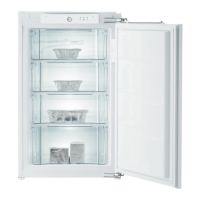
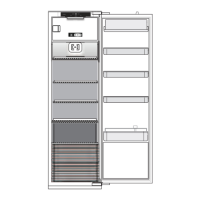
The ATAG KD5188C is an upright freezer designed for household use. Its primary functions include freezing fresh food and long-term storage of frozen food for up to one year, depending on the food type. The appliance features a control unit for temperature settings and activating a super freeze function. It includes freezing and storage compartments, with drawers protected against accidental extraction.
Important Technical Specifications
The freezer operates within specific ambient temperature ranges depending on its climate class, indicated on the rating plate. For example:
- SN (subnormal): from +10°C to +32°C
- N (normal): from +16°C to +32°C
- ST (subtropical): from +16°C to +38°C
- T (tropical): from +16°C to +43°C
The appliance requires a grounded wall outlet for connection to the mains power, with nominal voltage and frequency as indicated on the rating plate. It can accommodate minor temporary voltage tolerances of -6% to +6%. The maximum quantity of fresh food that can be introduced at a time is specified on the appliance's label.
Usage Features
Switching On/Off and Temperature Control
- Switching On: Rotate the thermostat knob (A) clockwise towards the thicker end of the sign. A 24-hour delay in temperature alarm operation is normal upon first startup to prevent unnecessary alarms while the appliance reaches the adequate temperature.
- Switching Off: Rotate the thermostat knob (A) back to the position where the arrow aligns with the symbol (appliance remains powered, but cooling stops).
- Temperature Settings: The recommended setting for the thermostat knob (A) is halfway between the thinner and thicker ends of the sign. Rotating towards the thicker part of the sign results in a lower (cooler) temperature, while rotating towards the thinner part results in a higher (warmer) temperature. Adjust settings based on ambient temperature.
- Signal Lights:
- B (Signal light on): Indicates that the super freeze function is activated.
- C (Signal light on): Indicates that the appliance is powered.
- D (Signal light flashing): Indicates a high temperature alarm in the freezer. This light will go off once the temperature drops to a safe level.
Freezing and Storing Food
- Super Freeze Function: Activate this function 24 hours before freezing fresh food by rotating knob (A) to the
* position (signal light B will illuminate). After 24 hours, place fresh food in the freezing compartment, ensuring it does not exceed 5 kilograms per compartment and does not touch already frozen food.
- Smaller Quantities: For 1-2 kilograms of food, activating the super freeze function is not required.
- Moving Food: After 24 hours of freezing, food can be moved to other parts of the freezer. The freezing process can be repeated by rotating knob (A) back to the middle position, then after 5 seconds, to the
* position.
- Deactivating Super Freeze: After the freezing process, rotate knob (A) back to the desired setting. If not manually deactivated, the freezer boost will automatically switch off after approximately 2 days, returning the compartment temperature to the most recently set value.
- Maximizing Capacity: Drawers can be removed to place food packages directly onto the shelf, utilizing the entire freezer volume.
- Food Quality: Only freeze food appropriate for freezing, ensuring it is fresh and of adequate quality. Use airtight and watertight packaging to prevent humidity and vitamin loss. Label packages with food type, quantity, and freezing date. Cool food before freezing, and prefer smaller packages for quicker freezing.
- Storing Pre-frozen Food: Adhere to manufacturer's instructions and best-before dates. Choose food with undamaged packaging stored at -18°C or lower. Avoid packages covered with frost, as this indicates partial thawing. Prevent defrosting/thawing during transport to maintain quality.
- Storage Times: Recommended storage times vary by food type:
- Fruit, beef: 10-12 months
- Vegetables, veal, poultry: 8-10 months
- Venison: 6-8 months
- Pork: 4-6 months
- Chopped, diced, or ground meat: 4 months
- Bread, pastry, ready-to-eat meals, lean fish: 3 months
- Tripes/innards: 2 months
- Smoked sausage, fatty fish: 1 month
- Defrosting Frozen Food: Thawed food should be used quickly as microorganisms resume activity. Partial thawing reduces the nutritive value, especially for fruits and vegetables.
- Icemaker Function (if applicable): Fill the ice mold with cold water or other suitable fluid up to the marking, close it, and place it on the freezer shelf mold-side down. To extract cubes, pour some cold water over the mold, shake it, open the cover, and shake the cubes out.
Maintenance Features
Defrosting the Appliance
- Traditional Freezer: Defrost 2-3 times a year, or more often if the door is opened frequently. Placing cold accumulators (if available) directly on frozen food in the upper compartment may reduce defrosting frequency.
- Preparation: 24 hours before defrosting, activate the freezer power boost to cool food further. After 24 hours, remove frozen food and protect it from thawing.
- Process:
- Disconnect the appliance by rotating knob (A) to the
O position and unplugging the power cord.
- Place absorbent cloths at the bottom to soak up melting water and replace as needed.
- Do not use electrical appliances (e.g., hairdryer) or defrosting sprays, as these can damage plastic surfaces or harm health.
- Clean and dry the interior.
- Before returning food, reconnect the appliance and rotate knob (A) to the desired setting.
Cleaning the Appliance
- Preparation: Unplug the appliance from the power mains by rotating knob (A) to the
O position and unplugging the power cord.
- Surfaces: Use a soft cloth and avoid abrasive particles, acids, or solvents.
- Exterior: Clean with water or a mild solution of suds. Lacquer-coated and aluminum surfaces can be cleaned with lukewarm water and mild detergent. Cleaning agents with minor alcohol content (e.g., window cleaners) are acceptable for non-plastic parts.
- Interior: Clean with lukewarm water, optionally adding some vinegar.
- Frost Layer: A thick frost layer increases power consumption; defrost as soon as possible. Do not use sharp objects, solvents, or sprays.
- Condenser Unit: The condenser unit on the exterior back wall should always be kept clean, free of dust. Clean occasionally with a soft non-metal brush or vacuum cleaner.
- Post-Cleaning: After cleaning, switch on the appliance and return the food.
Troubleshooting
- Appliance not operating: Check if the wall outlet is powered and the appliance is plugged in.
- Continuous cooling system operation: Could be due to high ambient temperature, frequent/long door openings, improper door closure (dirt, tilt, seal issues), too much fresh food inserted, or insufficient compressor/condenser cooling (check air circulation and clean condenser).
- Ice accumulation: Caused by poor door sealing (dirty/damaged seal), frequent/long door openings, or placing warm food inside.
- Flashing signal light D (high temperature alarm): Indicates frequent/long door openings, improper door closure (gasket issues, sagged door), excessively long power failure, or too much fresh food inserted at once.
- Door hard to open: A temporary sub-pressure builds up after closing the door, making it hard to open immediately. This normalizes after a few minutes.
- Murmur after closing door: Normal phenomenon due to pressure equalization.
If problems persist, contact the service center with the appliance type, model, and serial number from the label.
Cooling systems with compressors (and sometimes fans) produce noise. The noise level depends on installation, proper use, and appliance age.
- Startup Noise: The compressor may be louder initially (fluid noise from refrigerant flow), which is normal and will reduce over time.
- Sudden/Louder Noise: Can occur due to improper installation:
- Ensure the appliance is placed horizontally and firmly on a solid base.
- Ensure the appliance is not in contact with walls or adjacent elements.
- Check that interior equipment is properly fitted and that noise is not caused by vibrating cans, bottles, or other containers.