P-OQ0612-5291-E03
Qualification (OQ
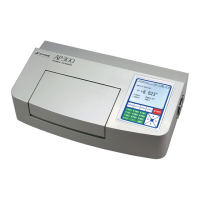
AP-300
displayed. It can also export signals to a printer. This chapter explains how to test such functions.
The function examination should be performed by a regular user of the AP-300 who is familiar
with the operation. The examination process includes unusual operations, such as displaying
error messages intentionally. Carefully follow the instructions in this manual.
1. Preparation of Instrument
1) If u sing an exclusive printer, connect it to the AP-300.
2) Turn on the power of the AP-300. The opening message will be printed out.
3) Leave the instrument on for at least 30 minu tes.
4) Make sure that “MODE-1” is set.
5) Check the date and time on the display screen of the AP-300.
6) Check the settings on the printer.
Set the date, time, average values, sample numbers, etc.
Measurement values displayed on the LCD will be printed out.
2. Items to Prepare
1) Standard quartz control plate(with traceability certificate)
Part number RE-72045 Quartz control plate 34°
Part number RE-72044 Quartz control plate 17°
Part number RE-72043 Quartz control plate 8°
※ Use a Quartz control plate whose angle is close to the angle of rotation usually measured .
2) If a quartz control plate is not available, fill a 200mm observation tube with a prepare a
standard sucrose solution of 100°Z
3. Function Examination
After a performance test in MODE-1, the measurement screen will be displayed .
3-1. Key Fu n ctions in Each Mode
1) Press the MENU key to d isp lay "SET UP MENU 1/ 2."
Press the cursor keys (↓,↑) to check if the pointer moves from the menu items (1) through
(6).
Select a number, using the cursor keys (↓,↑), and press the ENTER key to enter the
selected menu item. Check the display and set the values.
2) Press the MENU key in the “SET UP MEN U 1/ 2” screen to display “SET UP MEN U 2/ 2.”
Press the cursor keys (↓,↑) to check if the pointer moves from the menu items (1) through
(8).
Select a number, using the cursor keys (↓,↑), and press the ENTER key to enter the
selected menu item. Check the display and set the values. Press the ENTER key to return
to the "SET UP MEN U 2/ 2" screen. Check all the menu item s (1) through (6) in the same
manner except for the item s (7) and (8). These are the password functions and will be
 Loading...