Do you have a question about the ATAGO DR-M2 and is the answer not in the manual?
Details how to inspect the DR-M2 using a test piece and distilled water for accuracy.
Table for recording results from periodical inspections of the refractometer.
Steps to check for technical malfunctions by performing checks and measurements.
Guidance on how to correct operational malfunctions based on their cause.
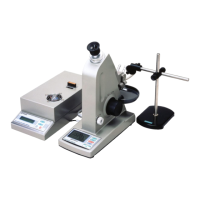
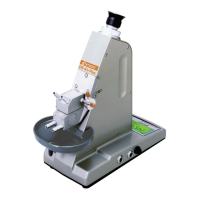
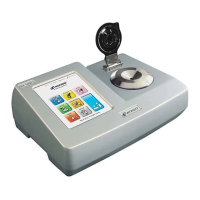
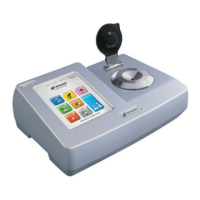
The Multi-Wavelength Abbe Refractometer DR-M2 is a sophisticated instrument designed for precise refractive index measurements of various samples, including liquids and solids. Its primary function is to determine the refractive index by observing the critical angle of total internal reflection, a fundamental principle in optics. The device is engineered to provide accurate and consistent results, making it suitable for a wide range of applications in research, quality control, and industrial settings.
The DR-M2 operates by illuminating a sample placed on a main prism surface with a light source. For liquid samples, a small amount (approximately 0.1ml) is placed on the main prism, and the secondary prism is gently closed. For solid samples, the sample piece, which must be cut and/or polished to specifications, is placed on the main prism surface using a contact liquid, without closing the secondary prism onto the sample. The light guide from the light source unit is positioned to direct light into the lighting window of the secondary prism for liquids, or the main prism for solids.
The core of the measurement process involves observing a boundary line through an eyepiece. This boundary line represents the critical angle of total internal reflection. By turning a measurement knob, the user adjusts this boundary line to be centered at the intersection point of cross hairs visible in the eyepiece. The instrument's display then indicates the refractive index of the sample. The DR-M2 is capable of multi-wavelength measurements, allowing for the use of different interference filters to select specific wavelengths of light, which is crucial for dispersion studies and more comprehensive optical characterization. The device also features a temperature indicator, ensuring that measurements are taken under controlled thermal conditions, typically 20.0(±0.2℃), which is essential for accurate refractive index determination as it is temperature-dependent.
The instrument includes a mode indicator and a SELECT key, allowing users to navigate through different function modes. For instance, a specific mode can be used for reference point adjustment with distilled water, ensuring the instrument's calibration and accuracy. The "LAMP" key controls the light source, turning it ON or OFF as needed for measurement. The display provides real-time information on the refractive index and temperature, facilitating user interaction and data acquisition.
The DR-M2 is designed for user-friendly operation, with a clear sequence of steps for both liquid and solid sample measurements. Before any measurement, it is crucial to connect a circulating constant temperature bath to the refractometer and power it on, ensuring the instrument reaches the desired temperature (e.g., 20.0℃). The AC power supply cable must be connected, and both the DR-M2 and light source unit powered on. The initial display typically shows a mode indicator and the current temperature.
For liquid samples, after placing the sample and positioning the light guide, the user presses the LAMP key to turn on the light source. The SET key on the DR-M2 is then pressed, and the user looks through the eyepiece to adjust the measurement knob, centering the boundary line at the cross hairs' intersection. The display will then show the refractive index. A critical step for maintaining accuracy is the reference point adjustment using distilled water. This involves placing distilled water on the prism, adjusting the boundary line, and confirming the temperature. This adjustment ensures consistent and accurate measurements. The instrument also allows for setting function mode numbers, which can be used for various operational adjustments or checks.
For solid samples, the preparation involves cutting and polishing the sample piece to specific dimensions. A contact liquid is used to ensure good optical contact between the solid sample and the main prism. The light guide is positioned in front of the main prism's lighting window, slightly higher than the prism surface. Similar to liquid measurements, the LAMP key is pressed, and the measurement knob is adjusted to center the boundary line in the eyepiece, after which the refractive index is displayed. The ability to use different interference filters for specific wavelengths adds to its versatility, allowing users to tailor measurements to their specific analytical needs.
Maintaining the DR-M2 is essential for its longevity and continued accuracy. Regular cleaning of the prism surface is paramount. After each measurement, any sample residue on the prism surface and surrounding areas must be completely wiped off using a soft, lint-free tissue paper moistened with water, followed by drying with a clean tissue. For solid samples, after removing the sample, the contact liquid must be wiped off, and the prism cleaned with ethyl alcohol and a soft, lint-free tissue to remove all traces.
The instrument's body should be wiped with a dry tissue or cloth if it becomes dirty. Proper storage is also crucial; if the refractometer is not to be used for an extended period, it should be stored in a location with relative humidity less than 75%. The DR-M2 incorporates a desiccant case within its body to manage internal humidity. The desiccant's indicator changes color from blue to pink when it needs replacement, signaling that the desiccant, indicator, and cushion should be replaced with new ones.
Calibration is a key aspect of maintenance, recommended annually. This involves performing calibration according to the performance test method of Operational Qualification (OQ). The data and other relevant information from this calibration should be recorded in a performance test report, and confirmed by the operator and a manager. Alternatively, users can request the manufacturer to perform the calibration, especially given the strict conditions and potential expenses involved in in-house calibration.
Daily checks are recommended to ensure consistent and accurate operation. This involves turning on the power supply, confirming the temperature display, and performing a reference point adjustment with distilled water. While not necessary after every measurement, it is advised to perform this check if the refractometer has not been used for more than two hours. Periodical inspection, typically once a month, involves checking the DR-M2 with a test piece to verify that it indicates the correct measured value. This also requires connecting a constant temperature bath and setting the temperature to 20.0(±0.2℃). The checked data should be recorded and saved.
In the event of a malfunction, a structured check procedure is outlined. This includes turning the DR-M2 off and on again, performing a reference point adjustment with distilled water, and measuring a solution of known concentration (e.g., Brix 10%=nD 1.3478). Malfunctions can stem from operational mistakes, such as leaving sample or distilled water on the prism, or from mechanical trouble or degradation of internal parts. For mechanical issues, users are advised to consult with the refractometer supervisor, record the trouble, and contact the trading company or manufacturer for repair. A clear record of revisions to the standard operating procedure document is also maintained, ensuring that all users are aware of the latest operational and maintenance guidelines.
| Model | DR-M2 |
|---|---|
| Resolution (Brix) | 0.1% |
| Minimum Indication (RI) | 0.0001 |
| Measurement Accuracy (RI) | ±0.0002 |
| Light Source | LED |
| Wavelength | 589 nm |
| Display | LCD |
| Output | USB |
| Category | Refractometer |
| Sample Volume | 0.3 mL |
| Power Supply | Rechargeable battery |
| Temperature Compensation | Automatic |