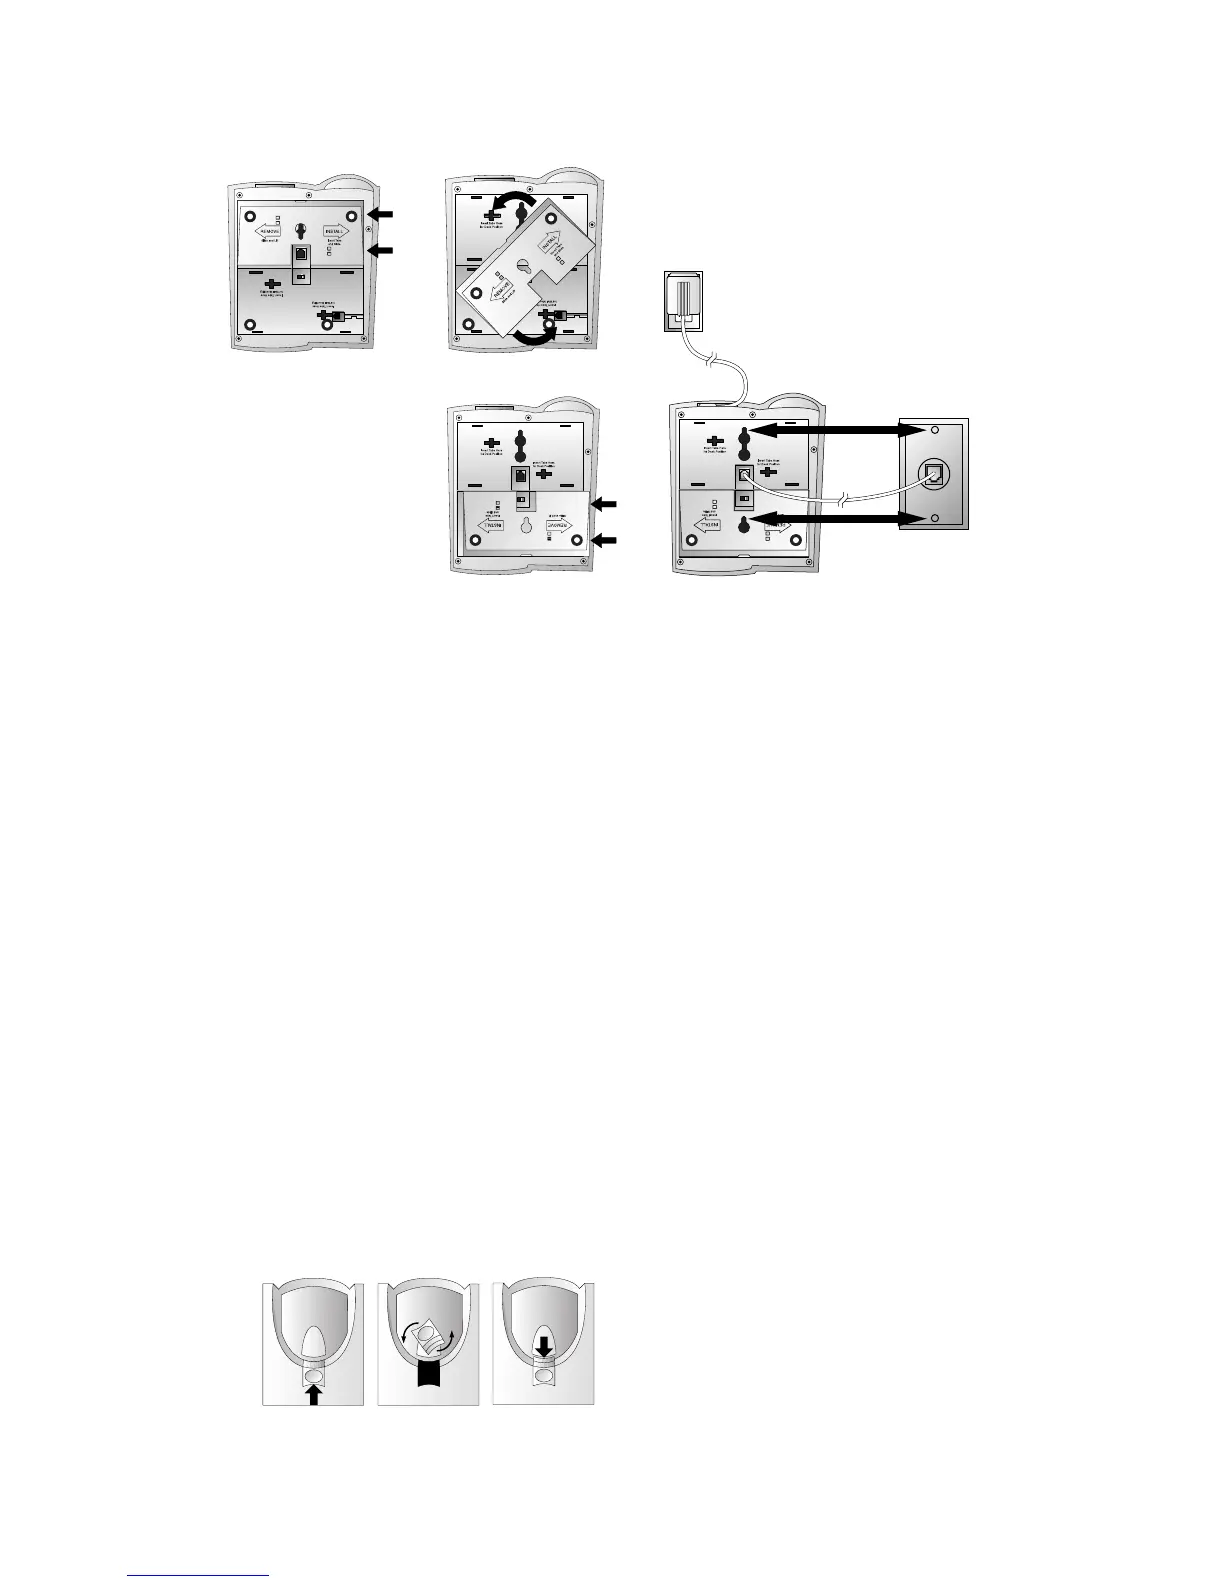
Wall Installation
1 Remove the base.
Slide the base sideways as shown by
the REMOVE arrow (Figure 1).
2 Connect the short line cord to the
telephone.
Plug the five inch line cord into the
LINE jack in the center of the bottom
of the set.
3 Reinstall the base.
Turn the base so that the larger end is
toward the bottom of the telephone
(Figure 2). Insert the base tabs into
the slots. Then slide sideways in the
direction of the INSTALL arrow to lock
the base into the phone (Figure 3).
4 Reverse the handset tab.
To mount the telephone on a wall,you
must reverse the handset tab. This tab
holds the handset when you hang up.
Hold down the switchhook,and slide
the tab up and out of its slot (Figure 5).
Turn the tab so that the end with the
“hook”is up (Figure 6). Then insert
the tab back into its slot (Figure 7).
5 Connect the line cord to the modu-
lar jack and mount the phone onto the
wall jack.
Plug the free end of the line cord into
a modular wall jack. Make sure the
cord snaps firmly into place. Place
the phone on the wall jack mounting
studs and pull down until it is held
securely (Figure 4).
6 Follow Steps 5–7 under
Table/Desk Installation.
2
INSTALLATION
Figure 5 Figure 6 Figure 7
Figure 1 Figure 2
Figure 3 Figure 4
 Loading...