Attach the extender to the gateway by connecting one end of the YELLOW Ethernet cable to one of the
YELLOW Ethernet ports on the back of the gateway. Attach the other end of the cable to any one of the
YELLOW Ethernet ports on the back of the extender.
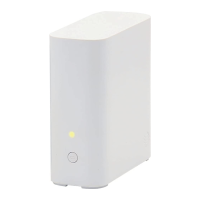
Connect the power supply to the extender and plug it into an electrical outlet (not controlled by a light
switch). The power jack LED on the back of the extender should turn SOLID GREEN. Once you see the
SOLID WHITE light on the front of the extender indicating you’re paired, you’re all set.
1.
2.
Tip: Make sure the Ethernet cable is rmly connected.
Once both ends are properly connected, the Ethernet
port LED will turn SOLID GREEN. Aer the extender
has been paired and the front LED is SOLID WHITE,
you can connect another device by Ethernet.
You need to have AT&T Internet service for your new Wi-Fi extender to work. Check the compatibility with your Wi-Fi gateway
at att.com/wiextender The extender needs to be in the room next to the gateway during setup.
Tip: The power light should turn GREEN within one
second and the extender front light will begin to blink
WHITE within 5 seconds. Then, it will begin to boot.
3.
Unplug the extender and move it to the room you want the extender in.
2
Option 2: Connect with ethernet
 Loading...