Tetris
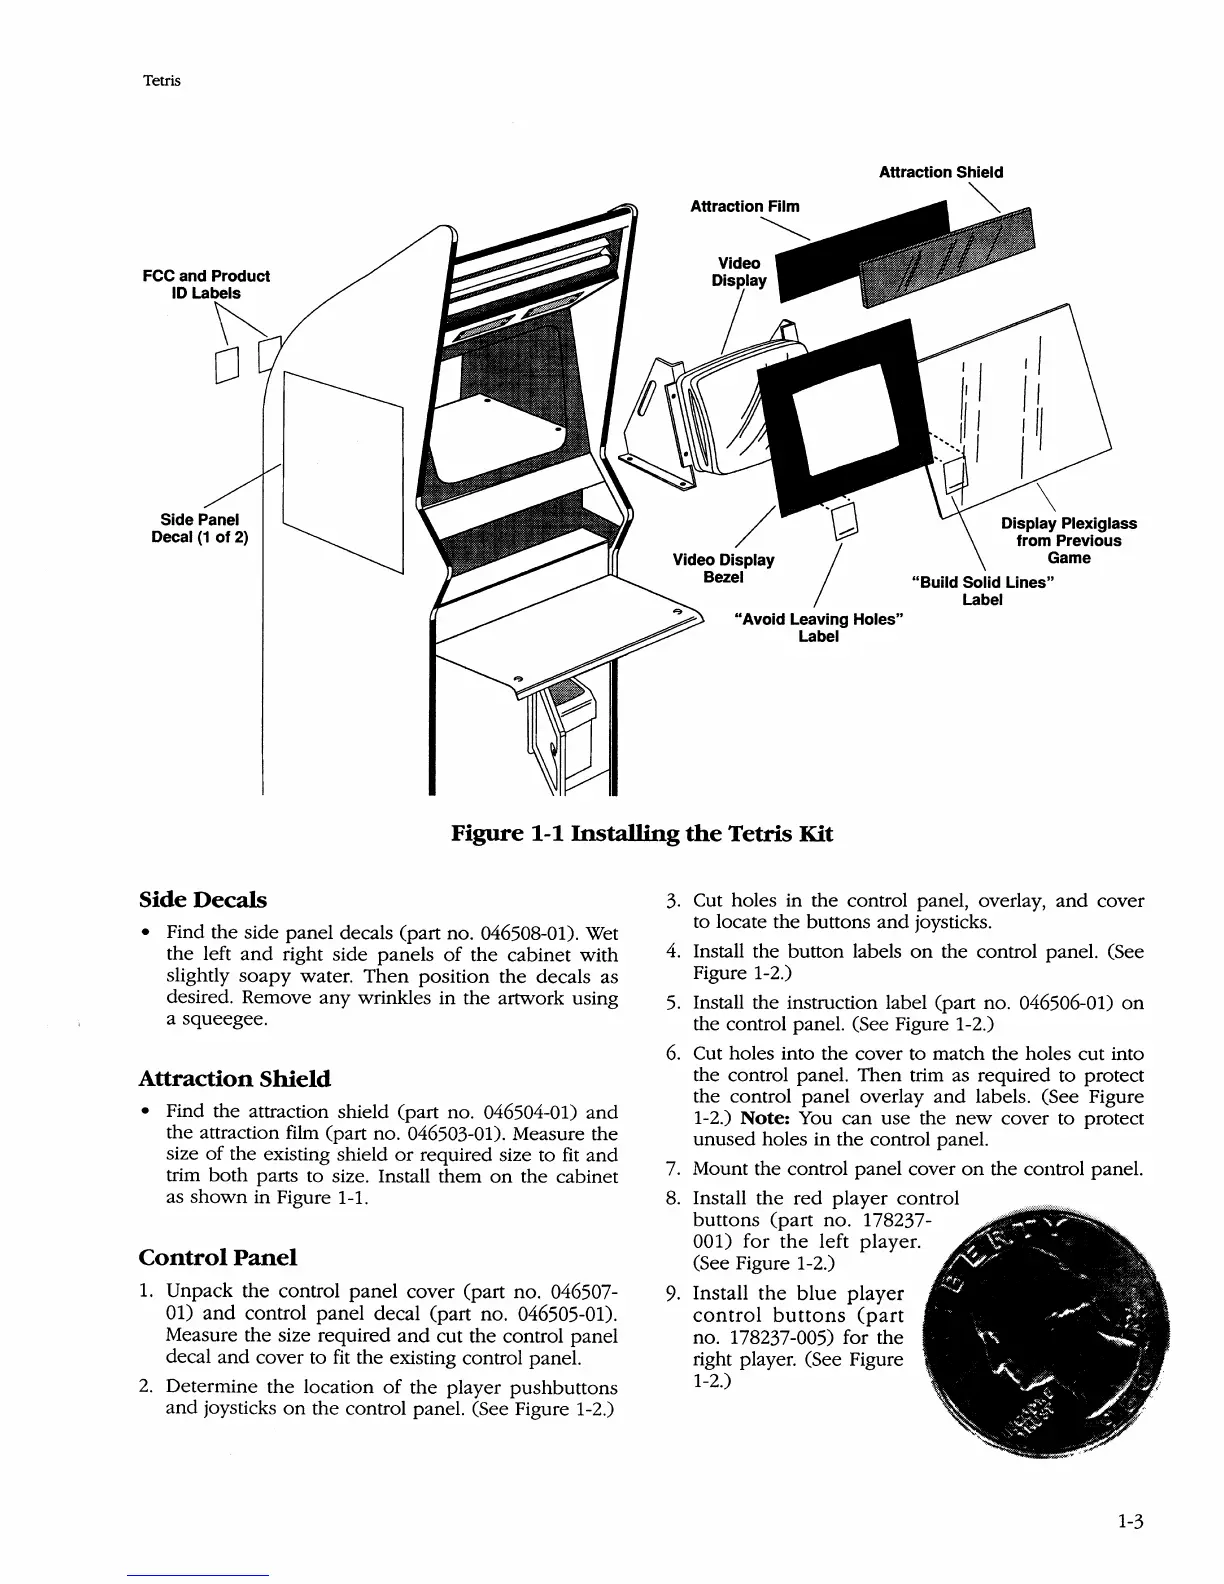
FCC and Product
10
Side Panel
Decal
(1
of 2)
Attraction Shield
Attraction Film
"Avoid Leaving Holes"
Label
Display Plexiglass
from Previous
Game
"Build Solid Lines"
Label
Figure
1-1
Installing
the
Tetris Kit
Side
Decals
• Find the side
panel
decals (part no. 046508-01). Wet
the
left
and
right side panels
of
the
cabinet with
slightly
soapy
water.
Then
position
the
decals as
desired. Remove
any
wrinkles in the artwork using
a squeegee.
Attraction
Shield
• Find the attraction shield (part no. 046504-01)
and
the attraction film (part no. 046503-01). Measure the
size
of
the existing shield
or
required size to fit
and
trim
both
parts to size. Install them
on
the cabinet
as
shown
in Figure 1-1.
Control
Panel
1.
Unpack
the
control
panel
cover (part no. 046507-
01)
and
control
panel
decal (part no. 046505-01).
Measure the size required
and
cut the control panel
decal
and
cover to
fit
the existing control panel.
2.
Determine
the
location
of
the
player
pushbuttons
and
joysticks
on
the
control panel. (See Figure 1-2.)
3.
Cut holes in
the
control panel, overlay,
and
cover
to locate the buttons
and
joysticks.
4.
Install the button labels
on
the control panel. (See
Figure 1-2.)
5.
Install the instruction label (part no. 046506-01)
on
the control panel. (See Figure 1-2.)
6.
Cut holes into the cover to match the holes cut into
the control panel. Then trim as reqUired to protect
the control
panel
overlay
and
labels. (See Figure
1-2.)
Note:
You
can
use the
new
cover to protect
unused
holes in the control panel.
7. Mount the control panel cover
on
the control panel.
8. Install
the
red
player
control
buttons
(part
no. 178237-
001) for
the
left player.
(See Figure 1-2.)
9.
Install
the
blue
player
control
buttons
(part
no. 178237-005) for
the
right player. (See Figure
1-2.)
1-3