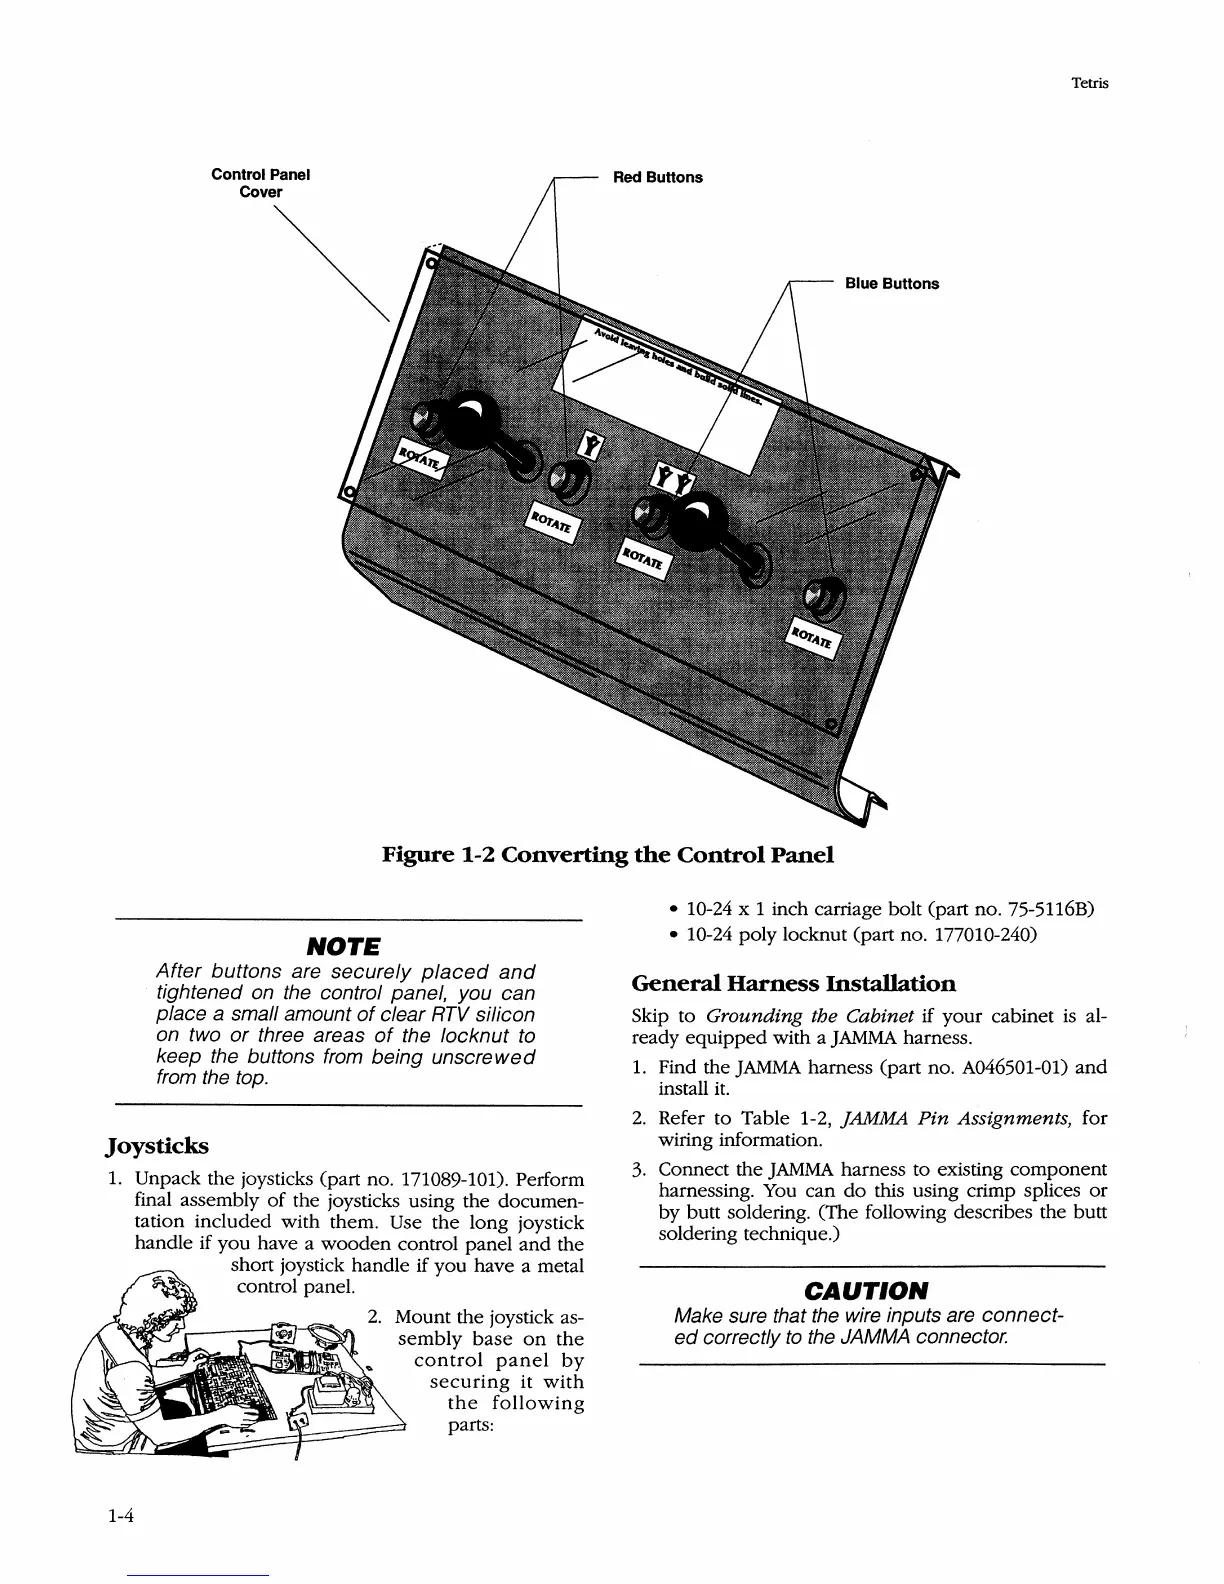
Control Panel
Cover
Red Buttons
Tetris
Figure 1-2
Converting
the
Control
Panel
NOTE
After buttons are securely
placed
and
tightened on
the
control panel, you can
place
a small amount
of
clear
RTV
silicon
on two
or
three areas
of
the locknut
to
keep
the
buttons
from
being unscrewed
from
the
top.
Joysticks
1.
Unpack
the
joysticks (part no. 171089-101). Perform
final assembly
of
the joysticks using the documen-
tation
included
with them. Use
the
long joystick
handle if
you
have a
wooden
control panel
and
the
1-4
short joystick handle if you have a metal
control panel.
Mount
the
joystick as-
sembly
base
on
the
control
panel
by
securing
it
with
the
following
parts:
• 10-24 x 1 inch carriage bolt (part no. 75-5116B)
• 10-24 poly locknut (part no. 177010-240)
General
Harness
Installation
Skip to
Grounding
the
Cabinet
if
your
cabinet is al-
ready
equipped
with a
JAMMA
harness.
1.
Find the
JAMMA
harness (part no. A046501-01)
and
install it.
2.
Refer to Table 1-2,
JAMMA
Pin
Assignments, for
wiring information.
3.
Connect the
JAMMA
harness to existing
component
harnessing. You can
do
this using crimp splices
or
by butt soldering. (The following describes the butt
soldering technique.)
CAUTION
Make sure that
the
wire
inputs are connect-
ed
correctly
to
the
JAMMA connector.