Using SuperSource
ATEM switcher models with 2 or more ME rows include a feature referred to as SuperSource
that will allow you to arrange multiple sources on the monitor at one time. This is useful as
there are occasions when you need to see more than one source on the monitor. It’sgreat to
know that the SuperSource processor appears on your ATEM Switcher as a single video input.
You can even select the Mix Effects 2 program or preview output as a box source for your
selected layout.
Setting up SuperSource
You can set up SuperSource using either the joystick on your ATEM panel or using the
ATEMSoftware Control Panel (GUI).
Viewing SuperSource
To set up SuperSource, first you need to be able to view it on your monitor. Do this by either
assigning SuperSource from the Settings tab in the GUI to a multiview window or by placing
SuperSource on the preview output of your monitor if using an ATEM panel.
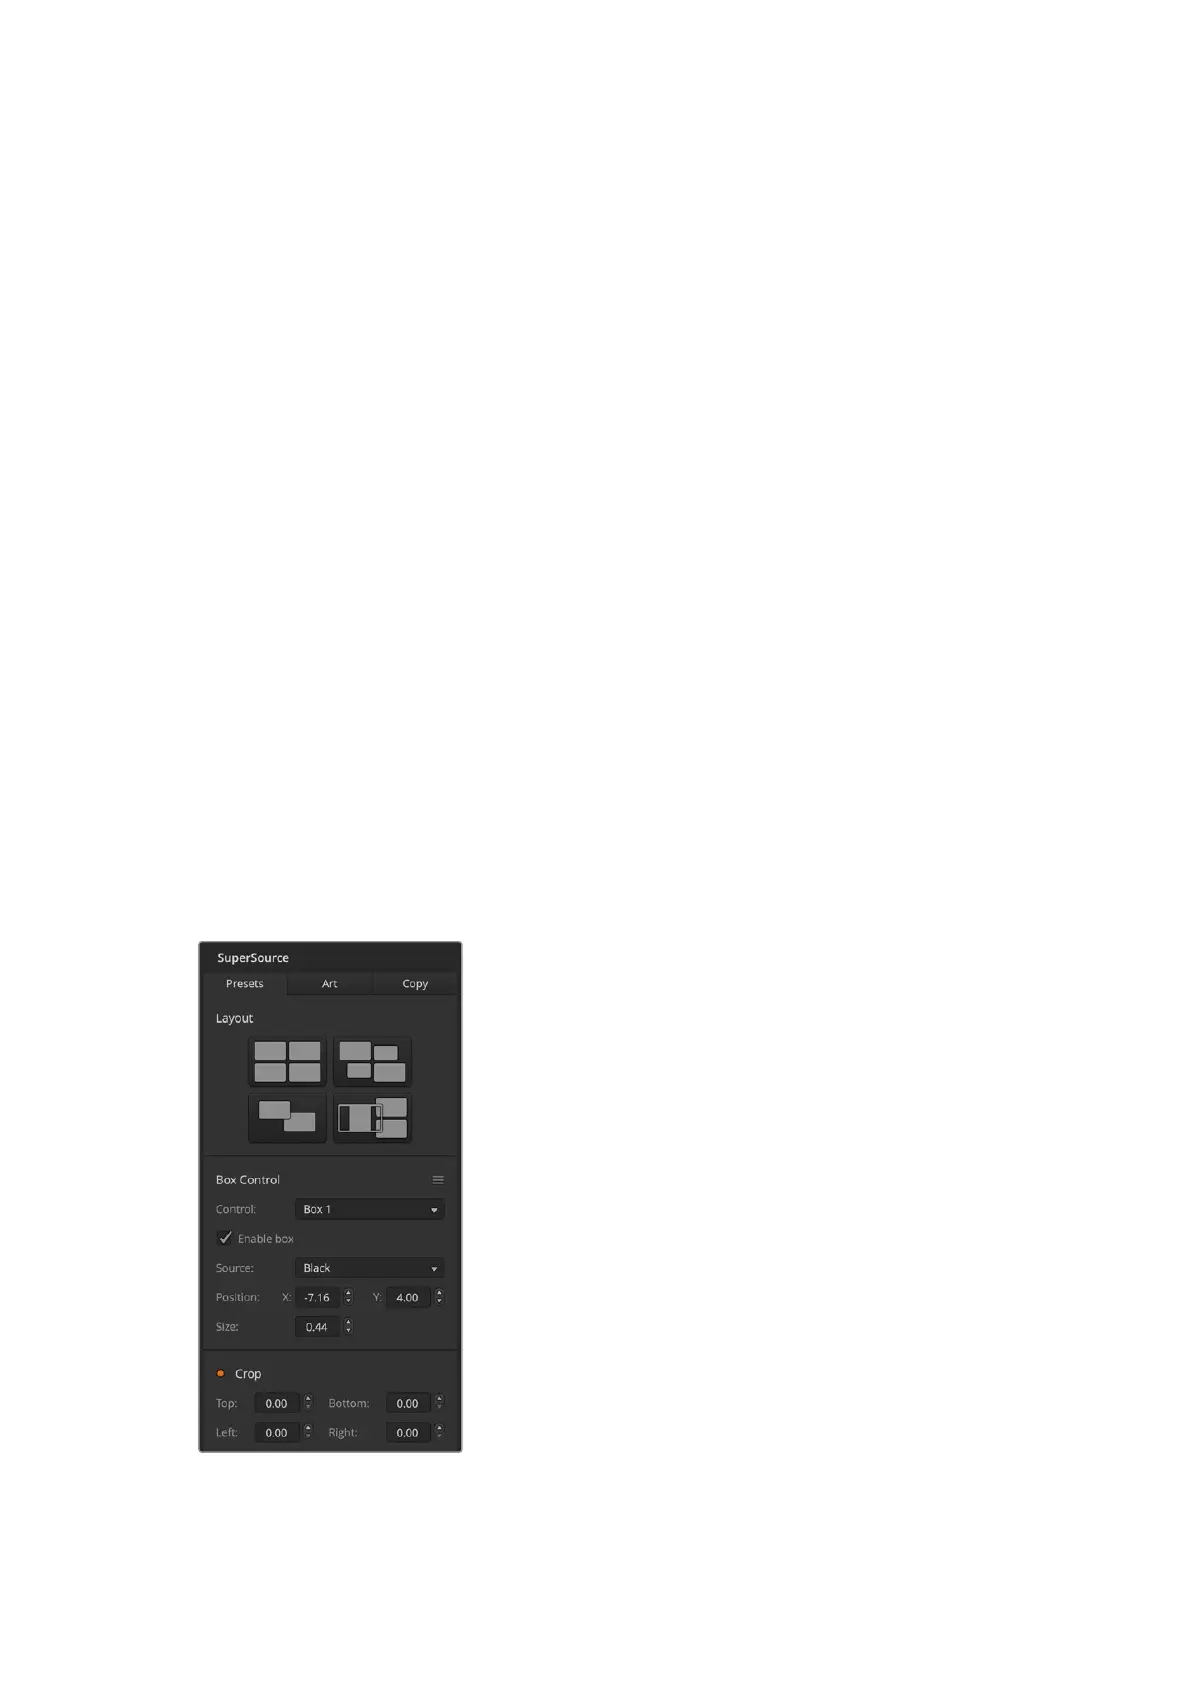
Positioning Sources
Using the GUI you can open the SuperSource palette and choose from one of the four preset
layouts. Click the one that is closest to the look you want, this will automatically arrange the
boxes into the preset positions indicated on the GUI. Make sure the box is enabled. You can
then change the position and size via the X Position, Y Position and Size fields. Ticking the
Enable Crop check box allows you to crop the image. The crop parameters are Top, Bottom,
Left and Right. You may then wish to alter the parameters of boxes 2 to 4 by doing similar steps.
If you make a mistake, click on the cog symbol on the RHS of the Box Control tab and you can
easily reset the parameters.
If you are using a Control Panel, in the Home Menu press the button marked SuperSource and
then choose Preset Menu. In this menu you can choose any of the four presets. Go back and
then select the individual box that you want to manipulate. Moving an image is fun and easy via
the panel’s joystick. You can select the box to be moved in one of the following 3 ways.
In the SuperSource menu, push the button marked with a
box number, in this case box 1 and the joystick will be auto
assigned to the box that you have selected. Easily select
more than one box at a time by holding down 2 or more of
these buttons!
Use the buttons next to the joystick itself. As an example,
a single tap will select box 1 on the lower right or a rapid
double tap will select box 3.
Finally, push a dedicated destination button on the 2 M/E
panel or select button on the 1 M/E panel.
When using the Control Panel, you can use the Enable
button to switch a particular box on or off. Choose the
source you wish to place in the box from the Source Select
bus. Press the dedicated Destination button followed by the
desired source. Then choose the Position and the Size either
via the window or the joystick. If you decide that you want
to use Crop, select the Crop Menu button and select the
crop button. Each box can be cropped individually and the
parameters are Top, Bottom, Left and Right. If you become
confused then crop can be reset via the crop reset button.
SuperSource settings
59Using Outputs
 Loading...