10
3) How to remove the mounting under the control box ?
As you wish, you can remove or retain the mounting, used to protect the control box when the
device is set on the ground prior to installa-
tion.
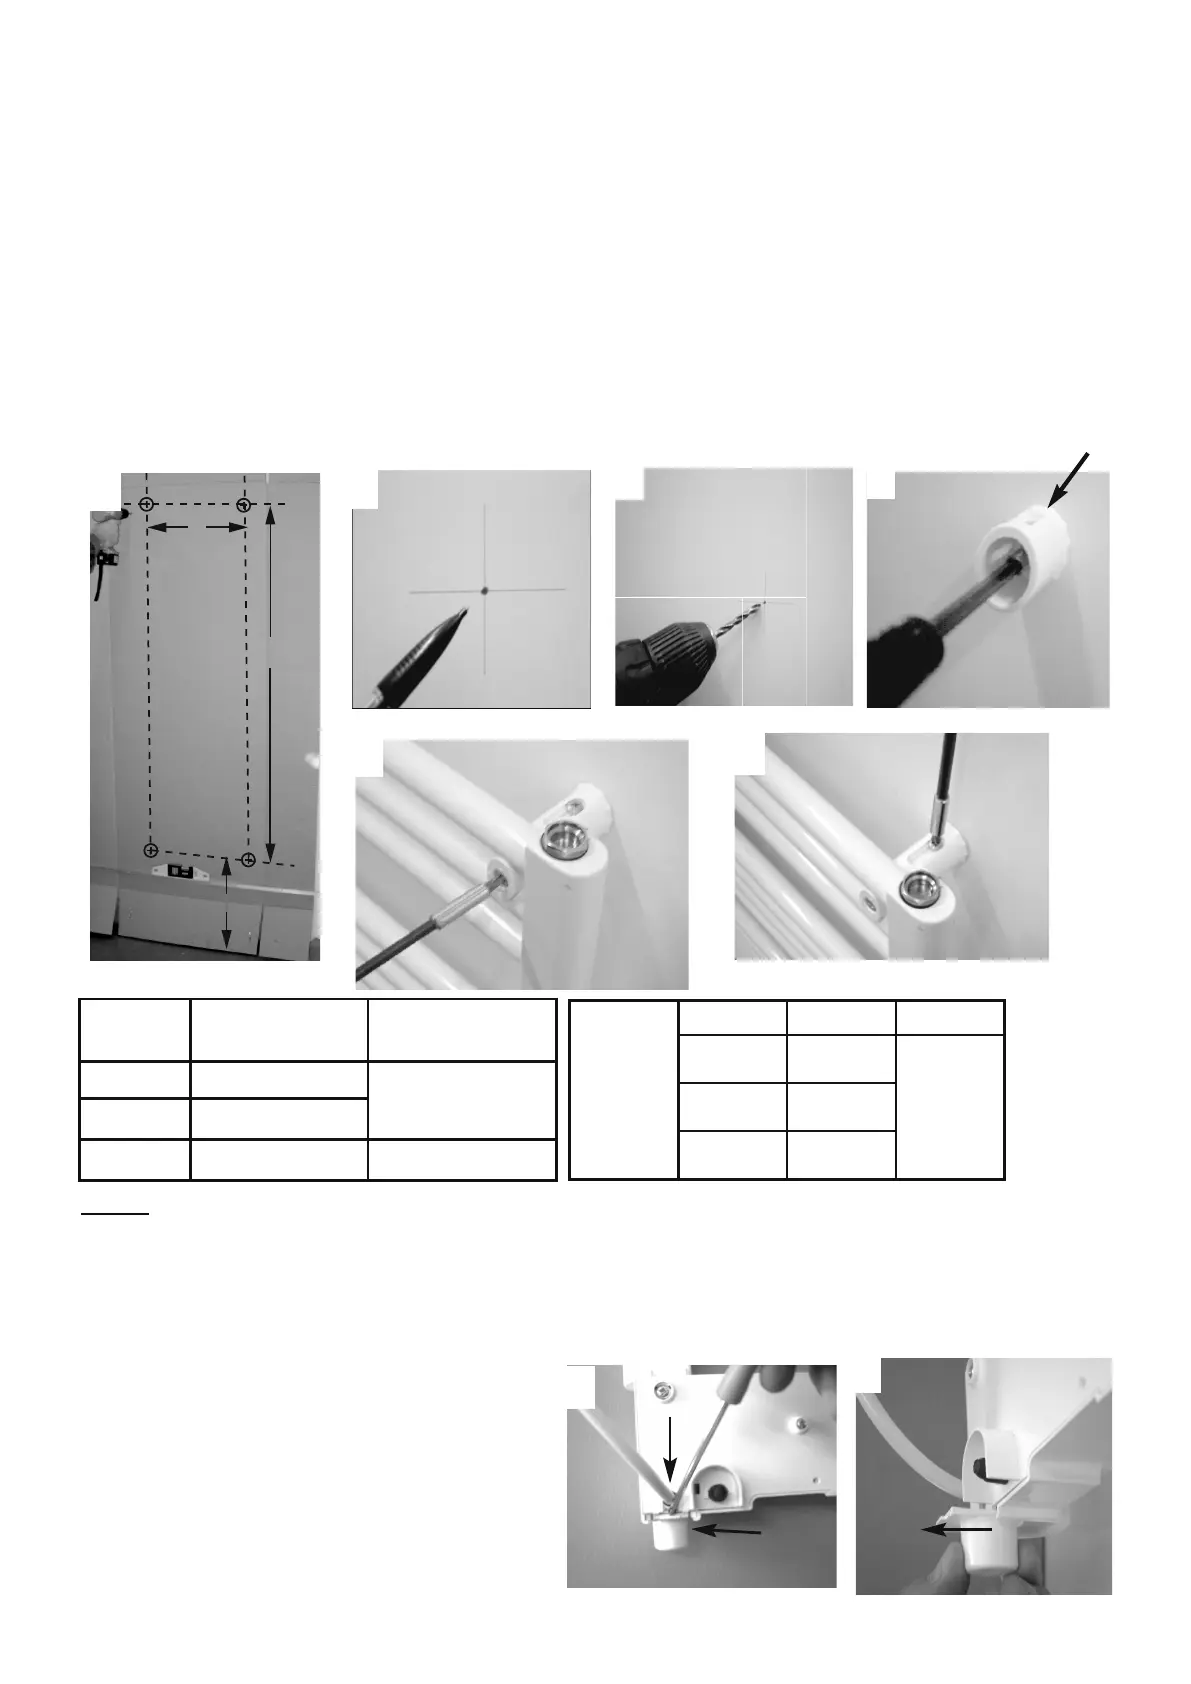
a) Push the tongue (1).
b)Pull the mounting towards you (2).
Power
Measurement (A)
for fitting lugs (mm)
Measurement (B)
for fitting lugs (mm)
500W 779
350
750W 1230
1000W 1599
400
2
3
1
5
6
Note: The pins supplied with the device are of the standard type. In case of a particular stand, use
appropriate pins.
2) How to install the device ?
1/ Unfasten the flaps on the lid and position it against the wall with the lower flap folded back and
placed on the floor or at the desired installation height. Mark off the 4 drill holes through the packa-
ging, without drilling them, and then remove the packaging.
2/ Carefully mark the 4 drilling points with a pencil (draw a cross, 2cm wide).
3/ Drill the 4 holes.
4/ Screw the sleeve in place. Fit the screws with the washers provided.
5/ Screw the pins on the tubes without locking them. Check they are correctly positioned by inser-
ting them in the sleeves, with the device. After finding the right position, tighten the screws on each
pin.
6/ Place the device on the wall, in the sleeves. Tighten all the locking screws. Fit the caps on the ends
of the pins.
4
1
2
The mounting
Model
width
400 mm
A B
300 W 574
270500 W 1025
750 W 1476