12
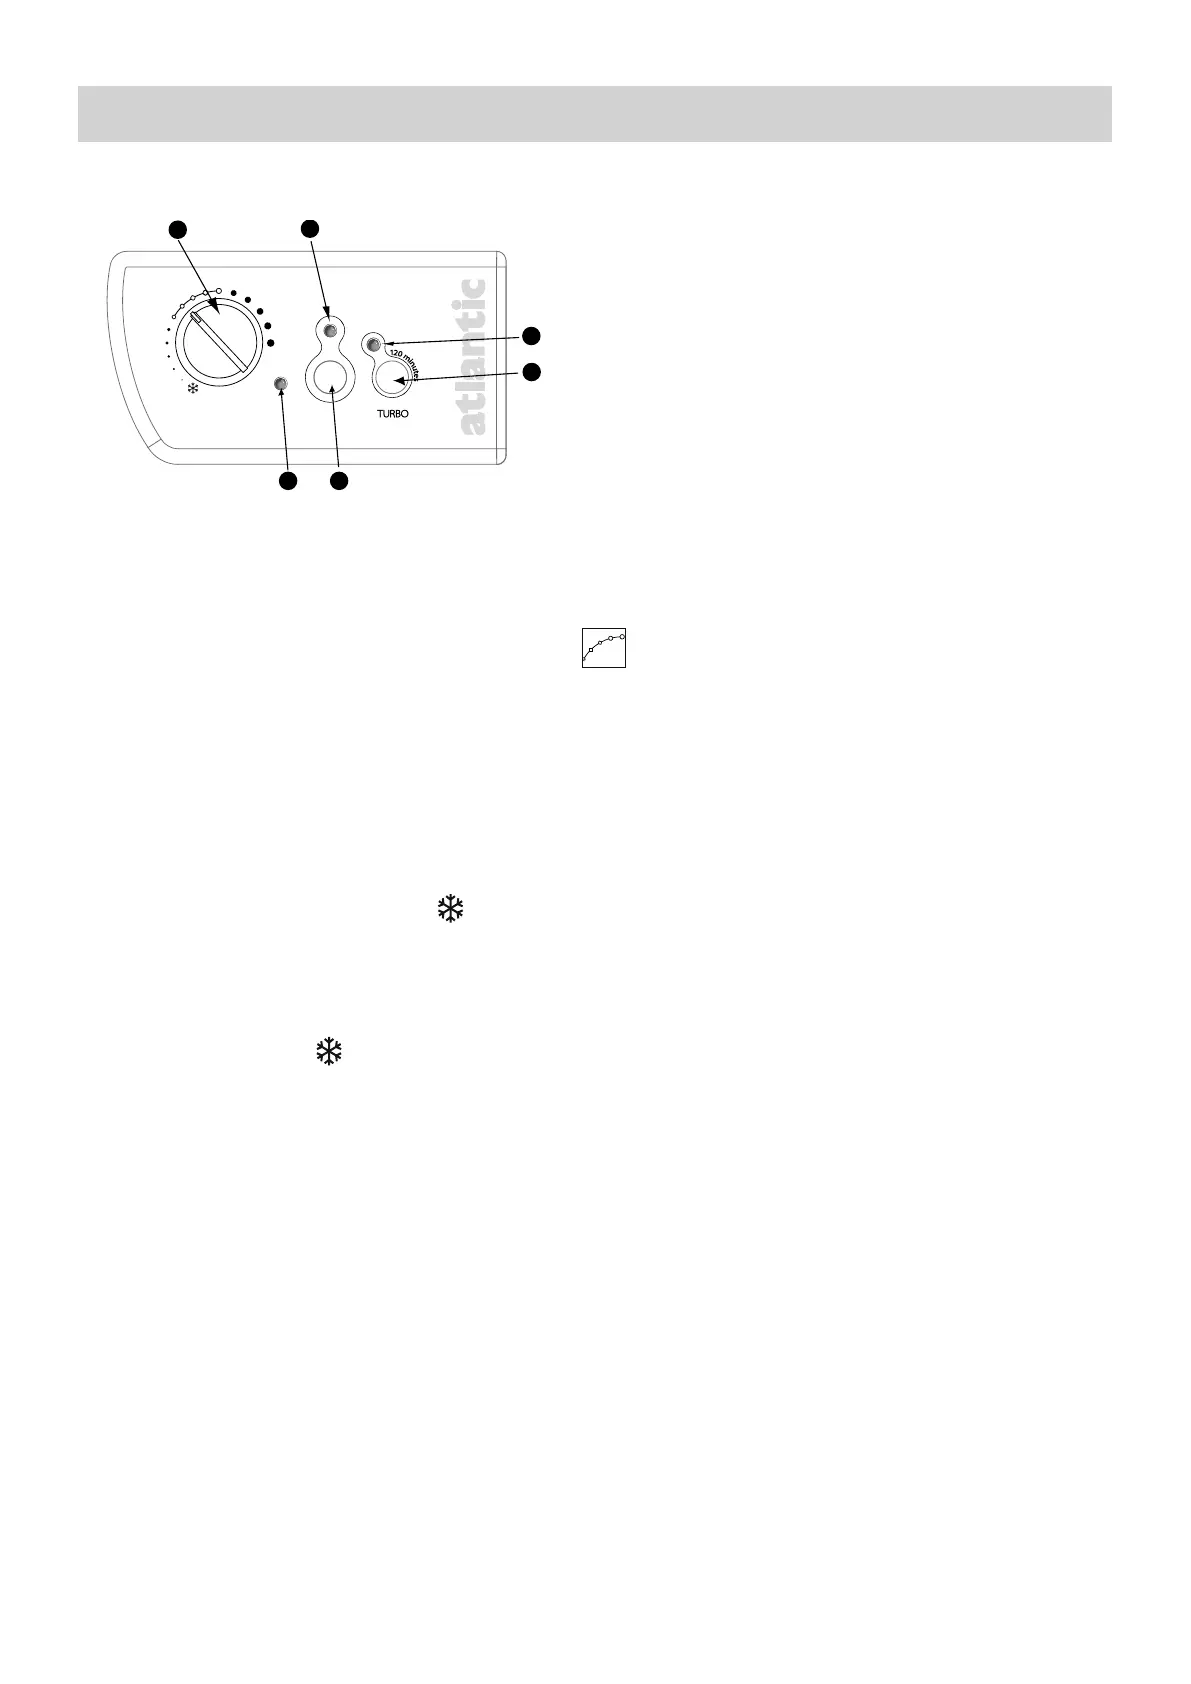
1) Description of the control panel
2) Setting the CONFORT temperature
It is the temperature desired when the room is occupied.
a) Set the switch to
to the ON position, the
indicator lights.
b)Align the toothed screw
with the marking : the indicator light illuminates if the tempe-
rature is less than desired.
Wait a few hours for the temperature to stabilise.
If the temperature setting does not suit you, adjust it using the adjusting screw
. Proceed step-
by-step using the notches (one notch at a time).
The thermostat’s cycle takes several minutes. It is possible that the heating indicator may not react
instantaneously, but instead only on the next thermostat cycle.
3) Standby (Hors Gel) Mode
It is the mode enabling to maintain a temperature of approximately 7°C in the room in case of pro-
longed absence from the house.
a) Leave switch
on the Marche position.
b)Set the knob
to .
4) Turbo mode
This is the mode that enables the appliance to be put into 2 hours of timed Forced Operation
(without any regulation) to increase the room’s temperature quickly.
a) Leave the switch
on the Marche position.
b)Press the command
, the indicator
and
lights.
The TURBO mode can be interrupted manually before the end of the time set. In order to do this,
press the command
again.
NB: On a piloted or independently programmed appliance, only the heating stop and Anti-frost ins-
tructions have priority when the TURBO mode is activated (the other instructions are ineffective).
USING THE DEVICE
Temperature setting knob with Hors Gel
position.
Operating indicator light
Forced operation indicator light (Turbo mode)
TURBO Switch: 2 hours of forced operation.
Heating ON/OFF switch
Heating indicator