Do you have a question about the Atlantic Alfea Extensa A.I. R32 WOYA060KLT and is the answer not in the manual?
Rules for appliance installation and maintenance by professionals.
Ensuring circuits are protected from dust, moisture, and foreign bodies.
Guidelines for connecting hydraulic systems, including seals and pipework.
Requirements for the electrical installation and power supply.
Details on connecting wires to terminals and controller boards.
Procedures for checking hydraulic and refrigeration circuits during maintenance.
Steps for verifying the electrical circuit's integrity during maintenance.
Procedures for emptying the hydraulic unit and maintaining the distribution valve.
Guidance on filling the installation with refrigerant gas.
Checklists and datasheets for initial startup and commissioning.
Guidelines for the safe dismantling and recycling of the appliance.
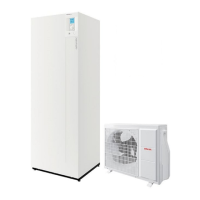
Contents of the packing and items included with the heat pump.
Key terms and the operational capabilities of the heat pump.
List of optional kits and accessories available for the heat pump.
Detailed technical data including heating output, power input, and electrical specifications.
Specifications for hydraulic circuits, pipe diameters, and refrigerant details.
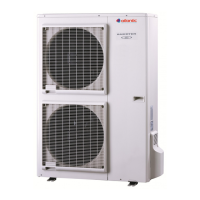
Dimensional drawings for outdoor units of models 3, 5, 6, and 8.
Dimensional drawings for the outdoor unit of model 10.
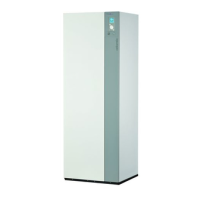
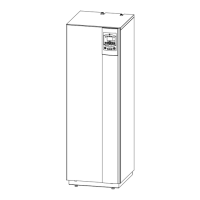
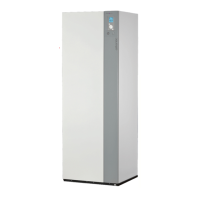
Dimensional drawings of the hydraulic unit.
Schematic showing the hydraulic pipe connections for the unit.
Identification and description of key components in outdoor units 3, 5, 6, and 8.
Identification and description of key components in the outdoor unit model 10.
Identification and description of the main components within the hydraulic unit.
Description of how the heat pump controls heating, cooling, and backup operations.
Overview of the safety features and protective mechanisms of the heat pump.
How the heat pump manages domestic hot water production and settings.
Features for preventing legionella bacteria and controlling fan convectors.
Instructions for shaping and preparing refrigeration pipes for connection.
Minimum and maximum lengths for refrigeration connections to ensure performance.
Safety and placement guidelines for installing the outdoor unit.
Minimum space requirements around the outdoor unit for ventilation and access.
Specific minimum installation clearances for the outdoor unit model 10.
Recommendations for placing the outdoor unit above ground level and securing it.
Instructions for installing the condensate drain pipe and preventing freezing.
Safety and placement considerations for installing the hydraulic unit.
Recommended space around the hydraulic unit for maintenance access.
Determining the required room volume based on refrigerant charge and connection length.
Guidelines for natural and mechanical ventilation based on room volume and refrigerant load.
Calculating minimum room surface area for heat pump installations.
Specifications for the size and placement of ventilation openings.
List of necessary tools and materials for making refrigeration connections.
Guidance on flared connections, brazing, and appropriate lubrication.
Instructions on pipe insulation, thermal resistance, and general connection practices.
Proper methods for bending refrigeration pipes to avoid damage.
Steps for creating secure flare connections on refrigeration pipes.
Table detailing pipe diameters and lengths for outdoor unit connections.
Procedures for checking gas and liquid connections for leaks and impurities.
Steps for charging the system with refrigerant and performing leak detection tests.
Method for calculating extra refrigerant needed based on connection length.
Step-by-step guide for filling the hydraulic unit with refrigerant.
Steps to safely collect refrigerant from the outdoor unit before maintenance.
Procedures for flushing the heating circuit and making pipe connections.
Connecting the DHW circuit and ensuring adequate heating system water volume.
Minimum water volume requirements for the heating system.
Guidelines for the DHW circuit and the filling/bleeding process.
Diagram illustrating the electrical wiring for a typical installation.
Recommended cable sizes and circuit breakers for power supplies.
Cable requirements for unit interconnection and electrical backup power.
How to access and make electrical connections to the outdoor unit.
Step-by-step instructions for installing the optional heating cable.
Connecting external controls, power limiters, and managing energy tariffs.
Options for boiler connection and handling external faults.
Configuring the heat pump for external control and mode switching.
How external signals influence heating and cooling modes.
Overview of the electrical components within the hydraulic unit's control box.
Diagram showing connections to terminal blocks and power relays.
Guidelines for correctly installing and connecting the outdoor temperature sensor.
Instructions for installing optional room sensors and the Typass ATL device.
Advice on using room sensors when fan convectors are installed.
Explanation of the user interface buttons and navigation methods.
Explanation of the various icons, numbers, and symbols shown on the controller display.
Steps to enter and navigate the installer-specific menu options.
Procedures for moving between different menu screens and options.
How to highlight, accept, and adjust various settings using the navigation knob.
Adjusting the heating circuit water temperature setpoint based on outdoor conditions.
How temperature graphs (gradient, offset) affect heating flow temperature.
Steps for initial power-up, safety checks, and configuring basic settings via Easy Start.
Configuring radiator types for zones and enabling cooling functions.
Reviewing all Easy Start settings before final validation and appliance initialisation.
A hierarchical view of the controller's menu structure and its main sections.
Configuring options like electrical backup, boiler connection, number of circuits, and cooling.
Setting up heating and cooling parameters for Area 1 of the hydraulic system.
Adjusting heating control using flow temperature setpoints and influences.
Modifying the heating curve gradient and off-set for optimal performance.
Configuring comfort optimisation, accelerated decrease, and anticipation times.
Setting limits for ECO mode based on outdoor temperature and defining comfort/ECO setpoints.
Setting daily heating and cooling schedules with multiple comfort periods.
Setting up DHW charge modes and electrical backup power.
Programming DHW periods and setting domestic hot water temperatures.
Configuring the anti-legionella cycle for DHW safety.
Adjusting compressor shutdown times, pump speed, and post-circulation.
Setting summer/winter switchover, cooling switchover, and circuit 2 parameters.
Setting up tariff inputs for power shedding, off-peak hours, and external control.
Configuring attenuation parameters and electrical backup authorization.
Viewing the status of active functions like heating, cooling, and emergency mode.
Checking the status of various functions and actuators via the control panel.
Reviewing past error codes and their occurrences for troubleshooting.
Displaying daily, monthly, and annual energy consumption data.
Configuring and operating the floor drying function for concrete slabs.
Testing the operation of various relays within the system.
Method for simulating outdoor temperature for testing purposes.
Procedure to reset all custom programs and return to factory default settings.
Adjusting the current date and time displayed on the controller.
Changing the display language of the controller interface.
Choosing between advanced and simplified display modes for menus and functions.
Adjusting temperatures directly when using the simplified menu display.
Renaming zones to personalize the system configuration.
Procedure for pairing and connecting room sensors to the system.
Resetting all sensor and device pairings to their default state.
Checking the software versions for the HMI and controller.
Initial configuration steps for language, date, and appliance power.
Configuring electrical backup options and setting up 2nd circuit kits for zones.
Selecting radiator types for zones and configuring cooling zones.
Reviewing all Easy Start settings before final validation and appliance initialisation.
How error numbers appear and how to get their designations from the controller.
Table listing hydraulic unit errors, probable causes, and proposed actions.
Interpreting the status of the HP circulator based on LED indicators.
A table detailing error codes and their designations for different outdoor unit models.
How to identify and interpret errors specifically for the outdoor unit model 10.
Procedures for checking the hydraulic circuit pressure and detecting leaks.
Steps for maintaining the DHW tank and cleaning the outdoor unit's exchanger.
Verifying the integrity of refrigeration connections and electrical circuits.
Procedures for emptying the hydraulic unit and managing the distribution valve.
Performing the ACI check and verifying its power supply voltage.
Essential precautions and methods for filling the system with refrigerant using a vacuum pump.
Detailed steps for the triple evacuation method for refrigerant system preparation.
Procedures for testing the refrigeration circuit for leaks using nitrogen.
Step-by-step guide for creating a vacuum in the refrigeration circuit.
Schematic layout of a single heating circuit with a key to components.
Schematic layout for two heating circuits with a component key.
Electrical wiring diagram for outdoor units models 3, 5, 6, and 8.
Electrical wiring diagram for the outdoor unit model 10.
Schematic showing electrical connections for the hydraulic unit and its accessories.
Checklist of essential tasks to perform before switching on the hydraulic unit.
Checks related to room installation, unit fixing, pipes, valves, and system pressure.
Verification steps for refrigeration connections, gas filling, and electrical wiring.
Procedures for starting the heat pump, including configuration and initial checks.
Performing operational checks on outdoor and hydraulic units after initial start-up.
Adjusting controller settings, programming heating periods, and setpoints.
Fields for recording site details, installer information, and unit serial numbers.
Sections for recording results of various checks and operating parameters.
Recording details of installed options, accessories, and final control settings.
Guidance on explaining system operation, room sensors, and program functions to the user.
Information on the proper dismantling and recycling of the appliance at its end of service life.