5
PAGE
Repair Instructions No.166.11/95
PHE 16 RL-N / PHE 20 N
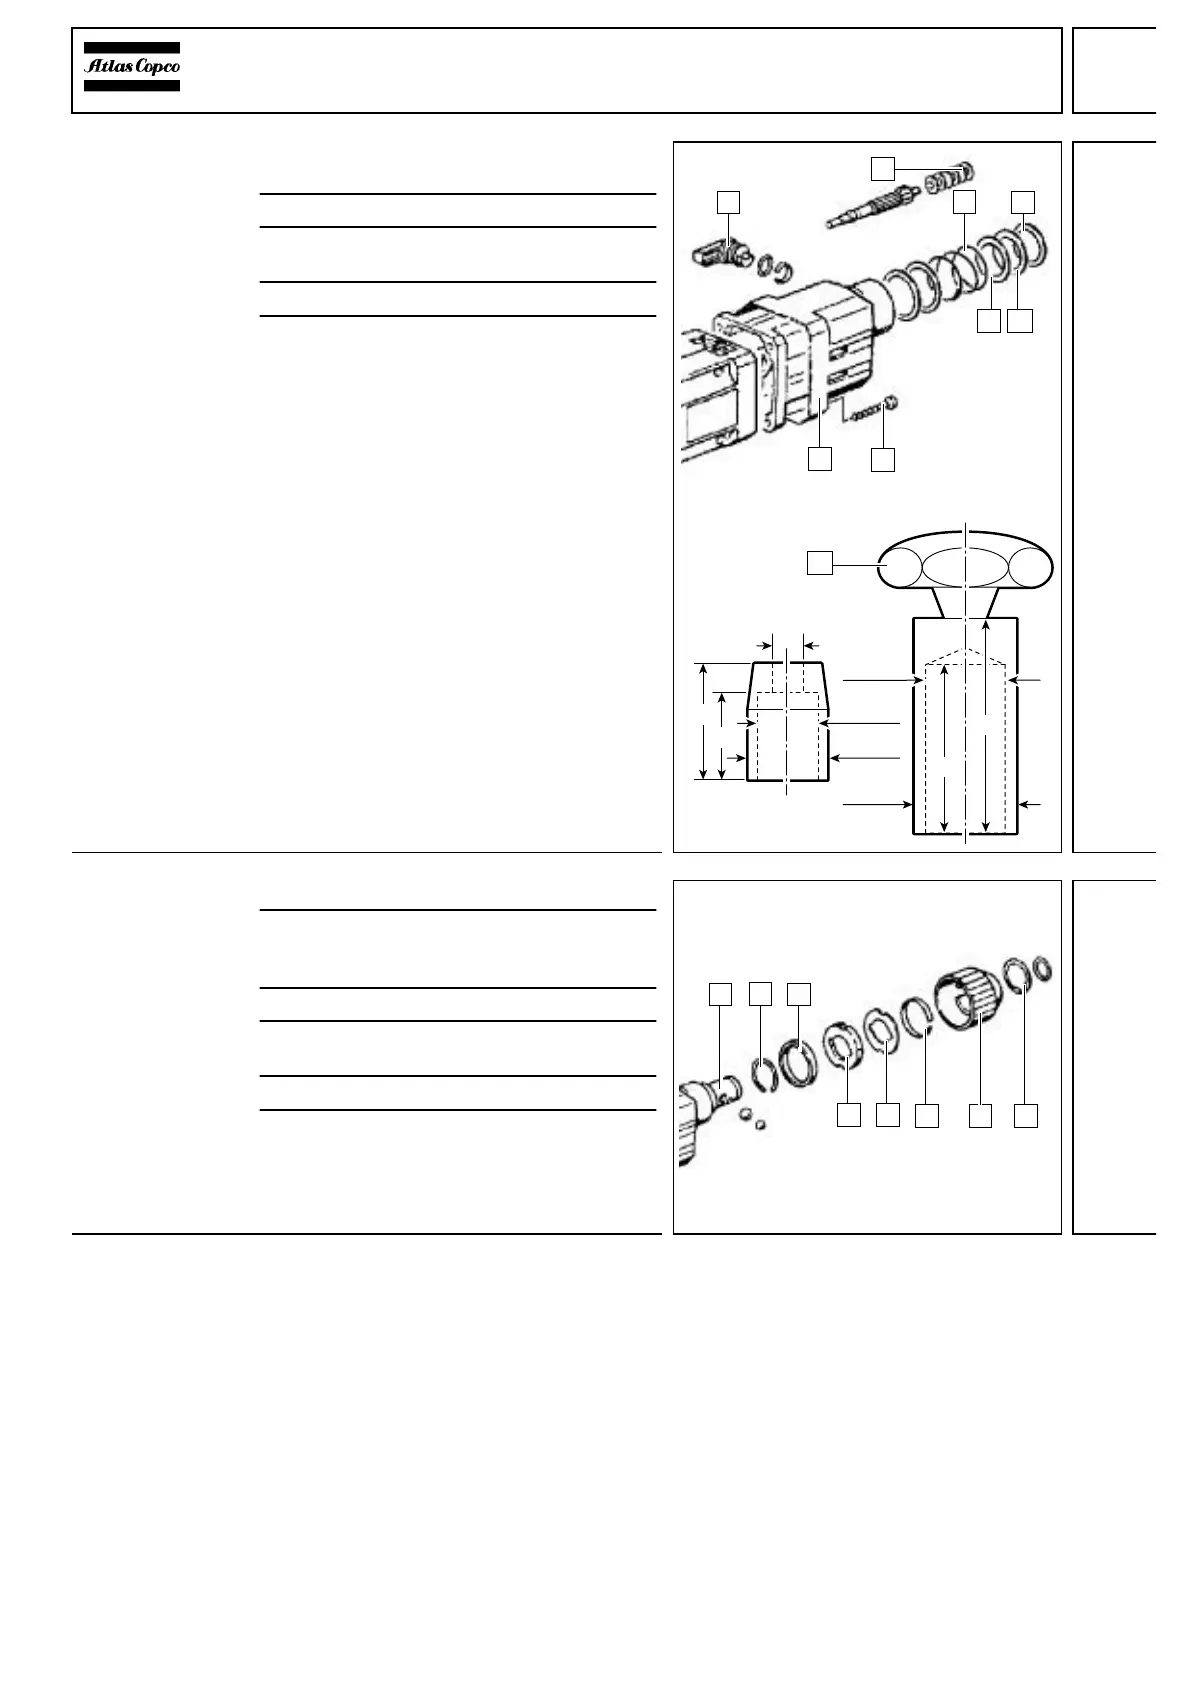
Mounting the
gear box
1
Mount the six disc springs (2) opposite
each other (see illustration).
2 Fasten the gear boy (7) with screws (6).
3 Move the hammer switch lever (1) to the
neutral position (30° before drill position).
4 Fit the mounting cone (8) (see illustration).
5 Insert the spring (3), the discs (4), the
teflon-coated disc (5), as well as the other
discs.
Assembling the
drill spindle
1 Mount the sleeve (2).
2 Fit the sealing ring (3) with aid of a
mounting cone. The locating distance
must be 3.5 ± 0.2 mm.
3 Insert two balls into the drill spindle (1).
4 Fit the jumper ring (7) and the spacer (8),
and mount the spring (6).
5 Mount the nosepiece.
6 Fit the sleeve (5). Mount the spring ring (4).
Test Run
Electrical Test
Check the direction of rotation!
Let the machine run-in.
Perform an electrical test on the machine (see chapter Electrical and Mechanical Test Instructions).
38
23
Ø22
Ø20
+0,2
Ø26
-0,1
55
Ø33,5
Ø26
+0,2
70
1
4
 Loading...