Page 7A&(%$*4.8"4,7%B'*#$"&8#C%/7*,#*%4,77%DEFFFEF>>E=G?G1Item 56936 56939
HIA6JKLM6NIJOLPQIOPJ6PIPR6 H6JSM
I##*5+7<%O8#$('4$"&8#
%N*,9%$.*%6PJON6%OQMLNJIPJ%HIA6JK%OPALNQIJOLP%#*4$"&8%,$%$.*%+*3"88"83%&2%$."#%
5,8',7%"847'9"83%,77%$*\$%'89*(%#'+.*,9"83#%$.*(*"8%+*2&(*%#*$%'/%&(%'#*%&2%$."#%/(&9'4$1
JL%MN6!6PJ%H6NOLSH%OPeSNK%ANLQ%IRROW6PJIV%LM6NIJOLP-%
N*7*,#*%J("33*(%&2%$.*%,//7",84*%+*2&(*%/*(2&(5"83%,8<%/(&4*9'(*%"8%$."#%#*4$"&81
P&$*- For additional information regarding the parts listed in the following pages,
refer to the Assembly Diagram near the end of this manual.
O8#$,77%U',(9
TINPOPUf%%JL%MN6!6PJ%H6NOLSH%OPeSNK%ANLQ%AVKOPU%W6;NOH-%
O8#$,77%$.*%3',(9%&87<%"8%$.*%&("*8$,$"&8%#.&)81
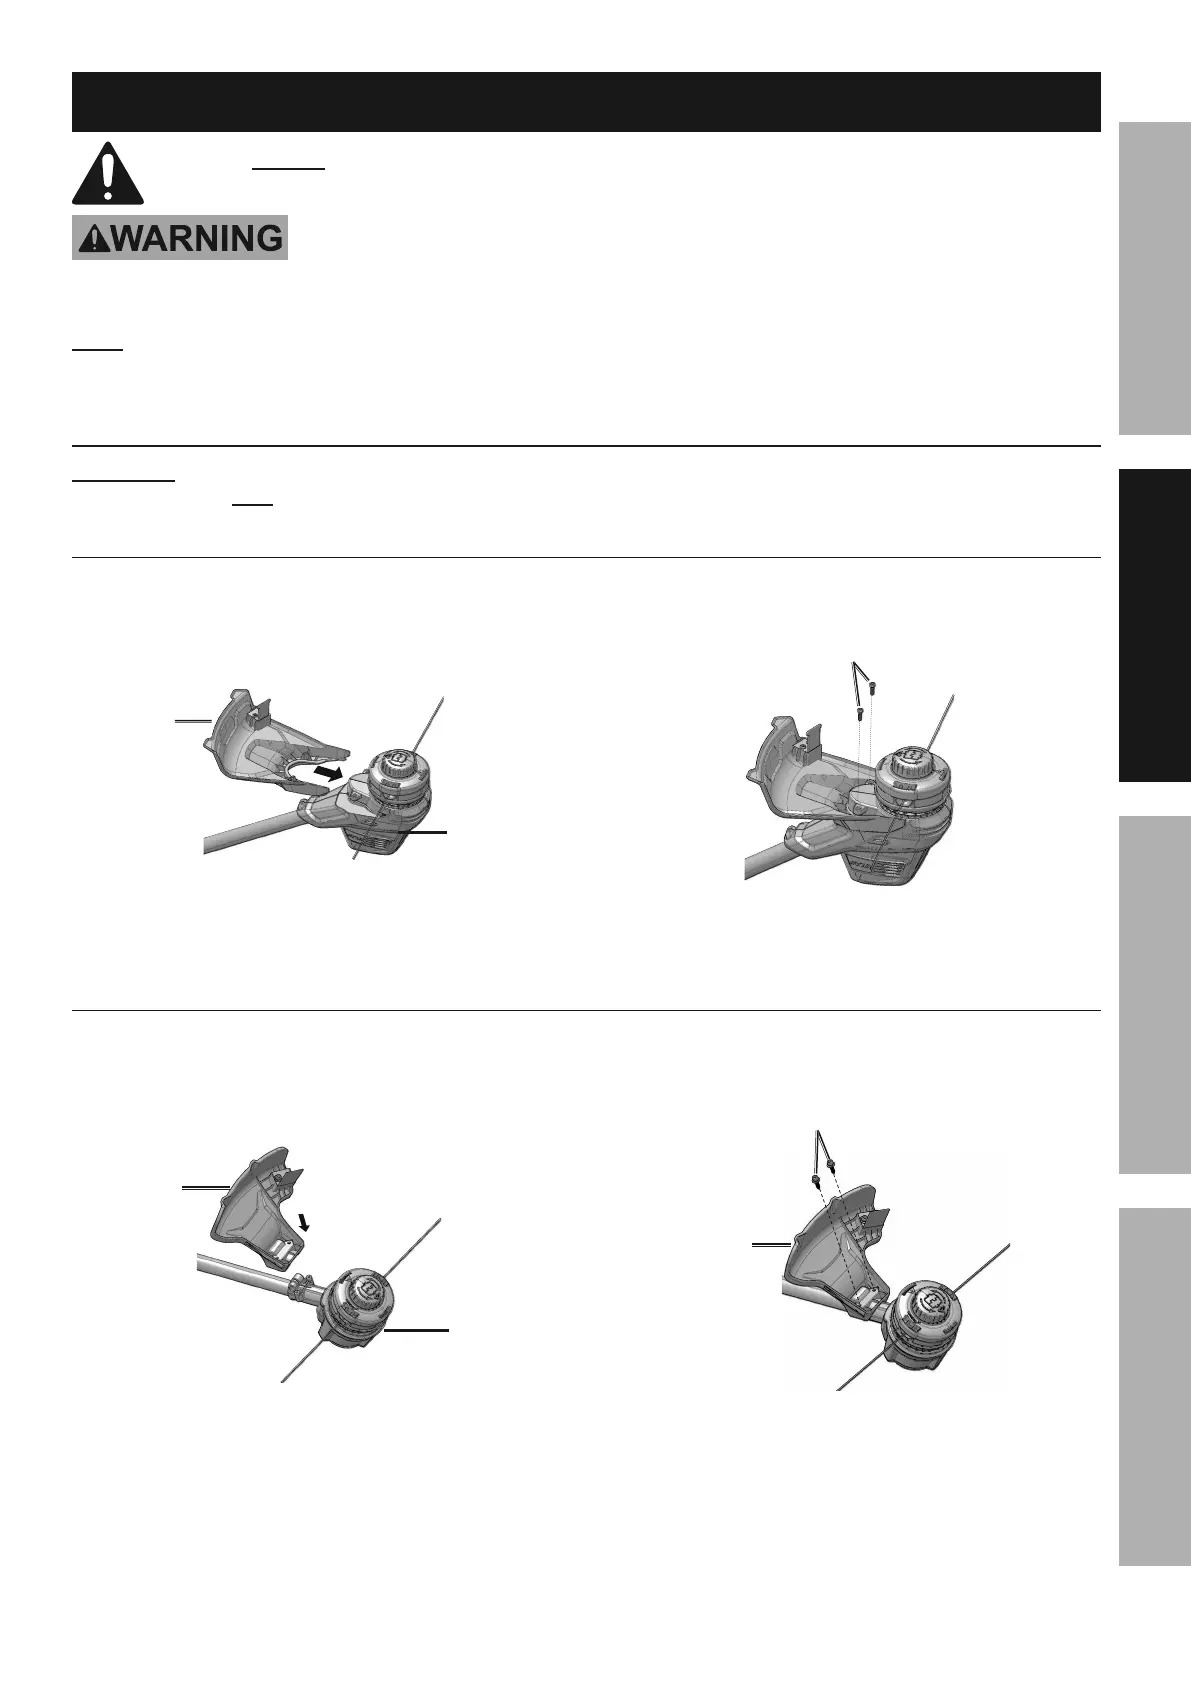
=>?@>%U',(9%I$$,4.5*8$-
1. Turn Trimmer Head upside down and
remove two Screws from head.
2. Place Guard onto Trimmer Head. See below.
U',(9
J("55*(%
^*,9
3. Align holes on the Guard with holes on Trimmer
Head and use Screws to secure together.
H4(*)#
4. Carefully remove the protective tape/
cover from the blade on the guard.
=>?@?%U',(9%I$$,4.5*8$-
1. Turn Trimmer Head upside down and remove
Screws, Washers, and Spacers from Head.
2. Place Guard onto Trimmer Head.
U',(9
J("55*(%
^*,9
3. Align holes on the Guard with holes on
Trimmer Head and use Screws, Washers,
and Spacers to secure together.
U',(9
H4(*)#
4. Carefully remove the protective tape/
cover from the blade on the guard.