50 51
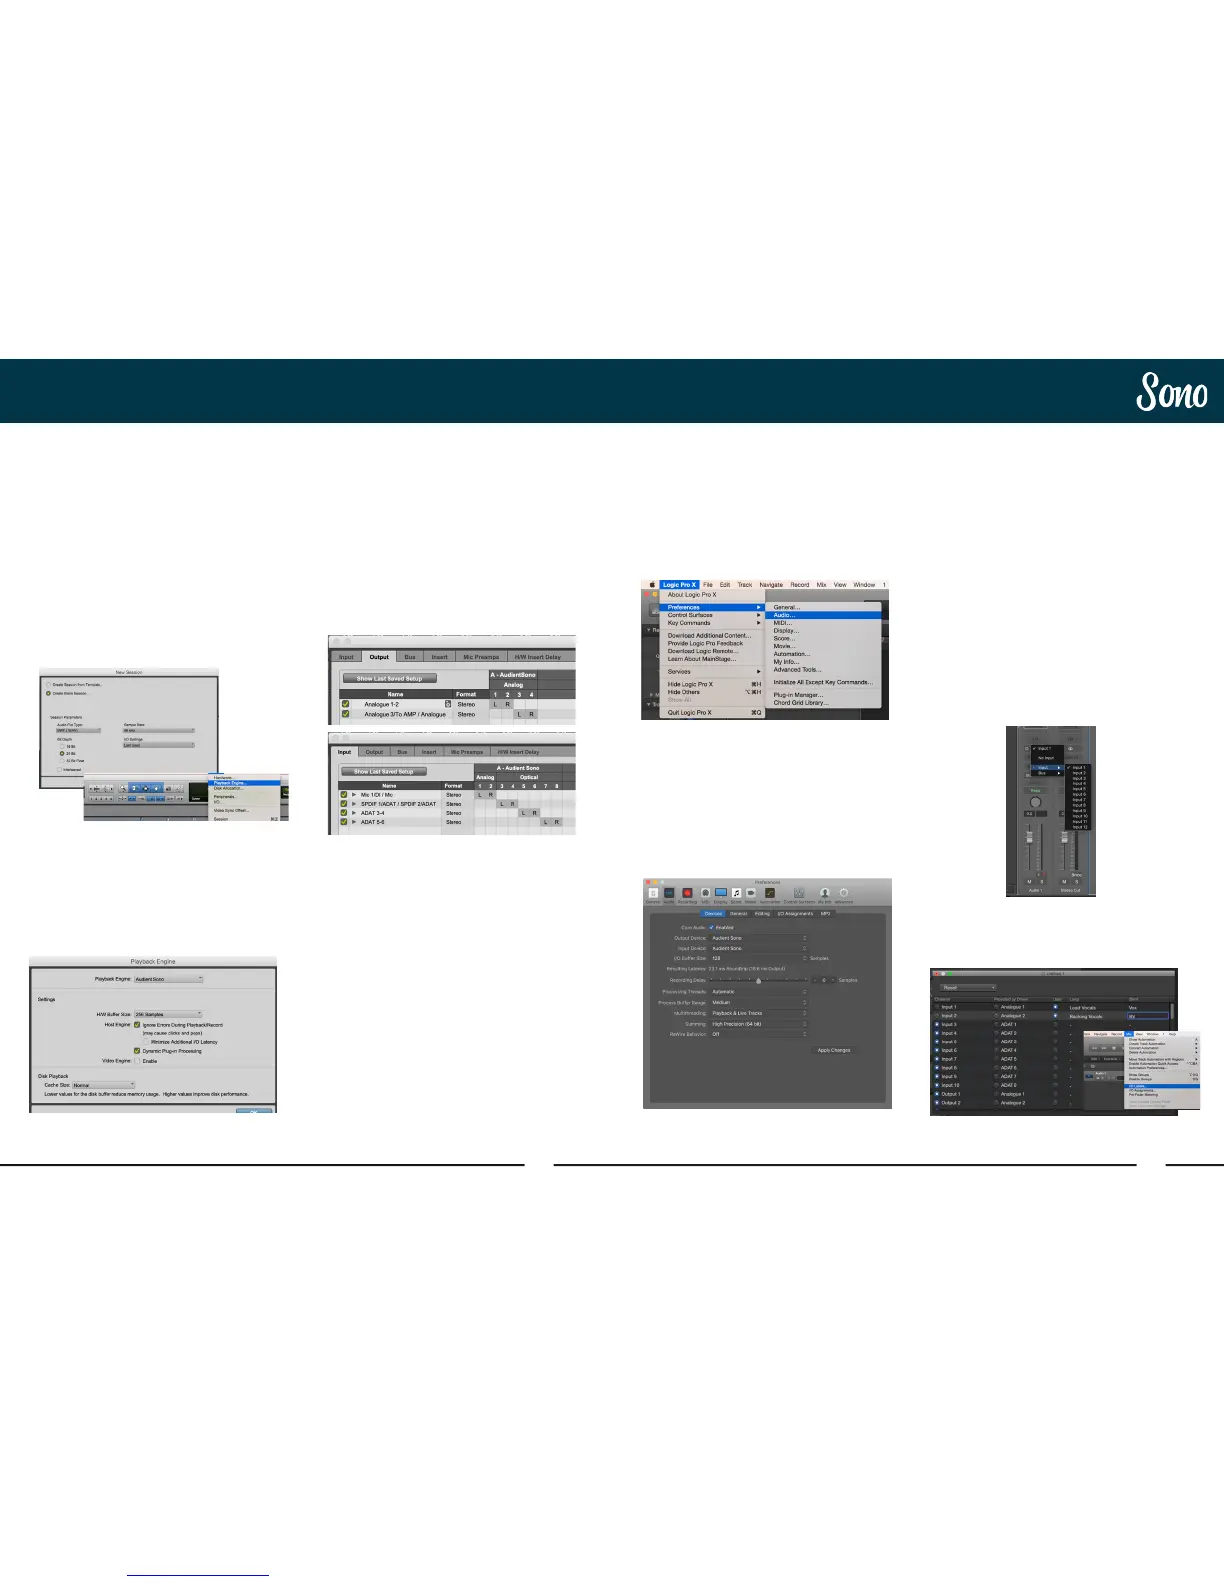
Logic Pro SetupPro Tools Setup
Operation with Pro Tools
Once Sono has been successfully installed
following the steps detailed in this manual,
launch Pro Tools and ensure that a new
session is created at the desired sample rate
(if clocking internally) or at the rate of the clock
source (if clocking externally).
If using Windows, make sure that you have set
the correct latency and buer size settings
in the Sono app before opening a project.
Changing these settings will result in Pro Tools
needing to restart.
Playback Engine
Go to Setup > Playback Engine and ensure
that Sono is set as the active playback device.
I/O Setup
Go to Setup > I/O to label your inputs and
outputs and ensure that Sono is correctly
reporting 11 inputs and 4 outputs to and from
Pro Tools.
Note that analogue outputs 1-4 are the DAW
playback channels in the Sono mixer and
can either be routed through the Sono mixer
or hard-wired directly from Pro Tools to the
physical outputs.
For more Pro Tools information consult your
Avid user manuals & documentation.
The No CAB input which bypasses the
Torpedo Processing comes in via channel
11. This can the be used to record a duplicate
clean signal for re-amping later on.
It is recommended that Input monitoring in
the DAW is turned o as monitoring of the
inputs can be done using Sono itself with
almost zero latency.
If you are using Sono’s zero latency monitoring
while recording, be sure to disable Logic’s
software monitoring to avoid phasing as the
same source will be heard twice with a short
delay between the low latency DSP signal and
the delayed software monitoring signal.
Assigning I/O
All of Sono’s input and output channels will be
available to Logic for routing. There are a total
of 12 inputs and 4 outputs reported from the
driver.
The No CAB input which bypasses the Torpedo
Processing comes in via channel 11. This can
the be used to record a duplicate clean signal
for re-amping later on.
You can rename input and output channels to
whatever you wish using the I/O label function
This is a great way to keep things organised.
Mix > I/O Labels
Operation with Logic Pro
Once Sono has been successfully installed
following the steps detailed earlier in this
manual, launch Logic Pro and check the
following:
Logic Pro > Preferences > Audio
Ensure that Sono is selected as the active
audio device and set the buer size (to aect
system latency). If you are experiencing issues
with playback stability and CPU loading, try
increasing the buer size. This appears with
“overload” errors and/or pops and clicks and
distortion in the audio.