19
ENGLISH
+12V REM
IN/OUT
GND
POWER
L
L
R
R
BRIDGED
PROTECT
SPEAKER
OUTPUT
POWER
INPUT
X-OVER
LP HP FULL
OFF VOX DC
LEVEL
INPUT
MIN
L R L R
MAX
AUTO
TURN-ON
INPUT OUTPUT
Q S–TWO
FUNCTIONAL INSTRUCTIONS
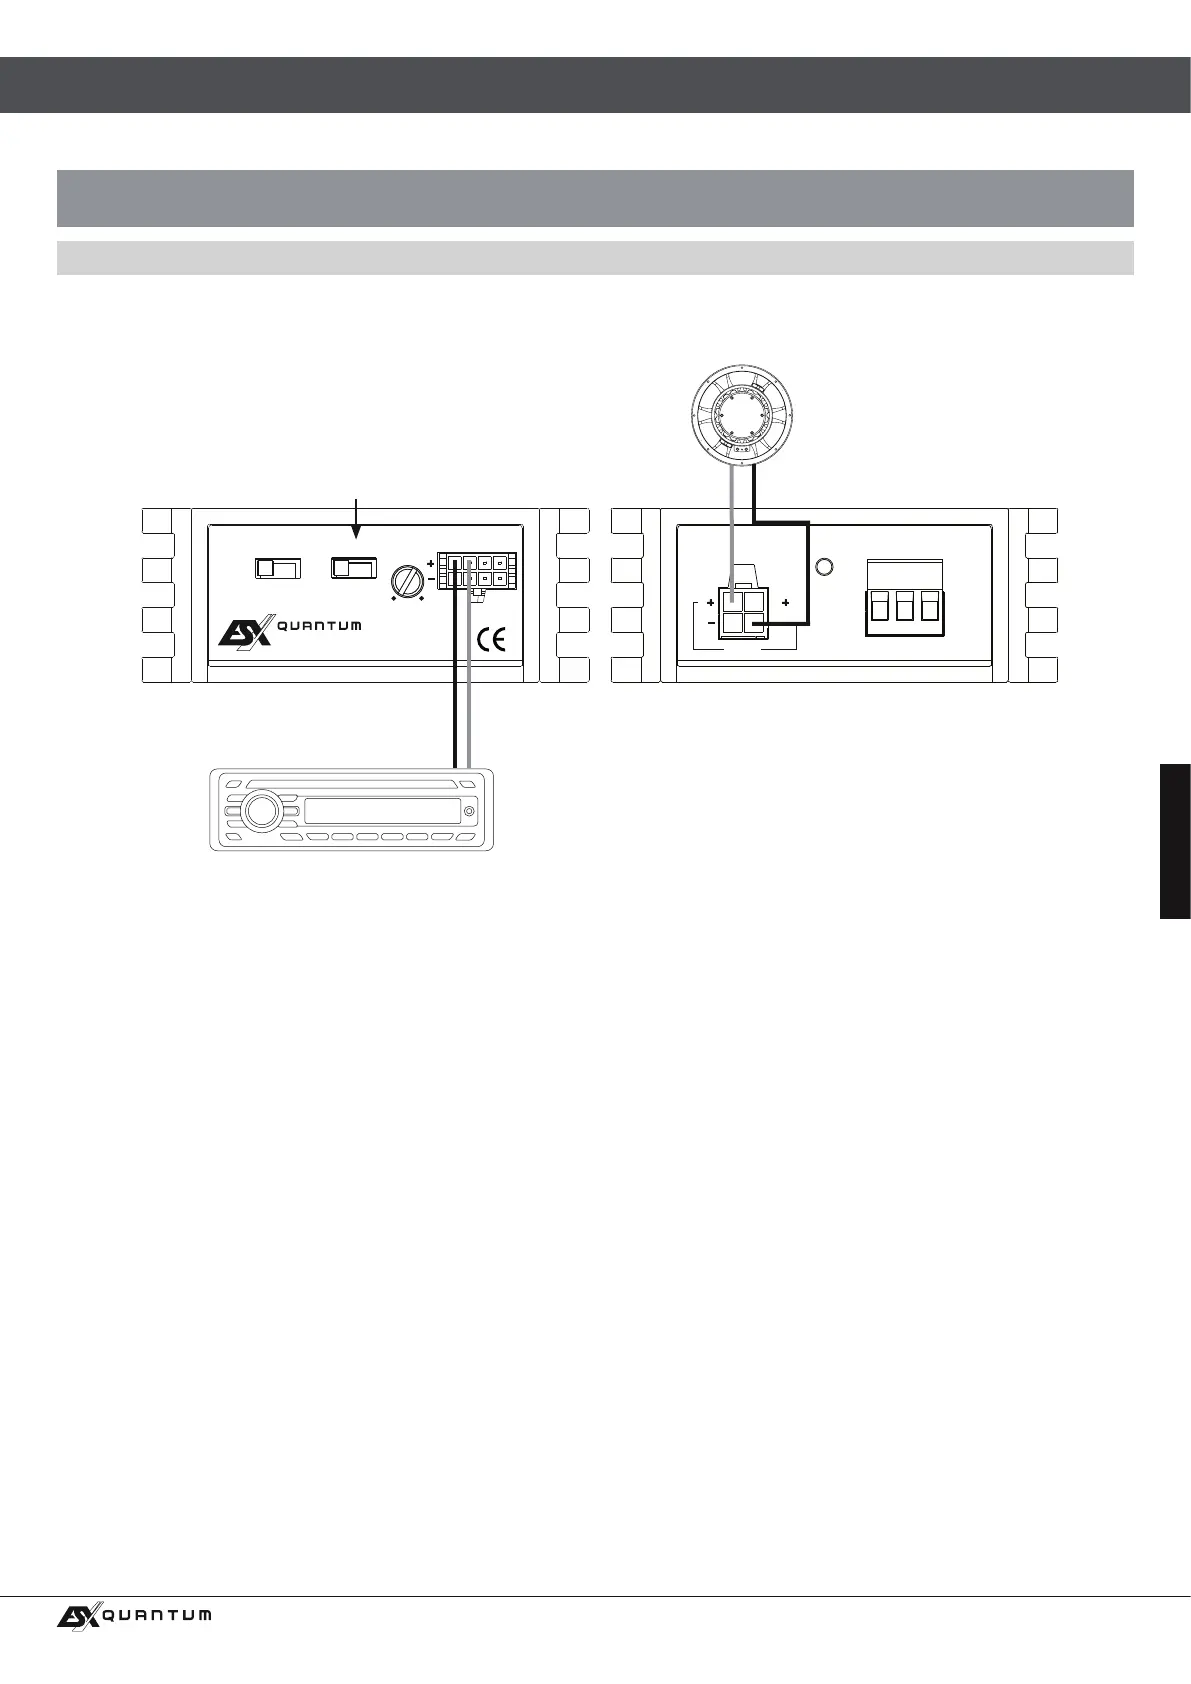
INTERCONNECTION EXAMPLE
1-channel-mode: 1 x Mono Subwoofer bridged
INTERCONNECTION
• Connect the RCA outputs of the head unit with the RCA jacks INPUT (L /R) of the amplier with appropriate high-value RCA cables
by using the included wire harness. If a separate SUB OUT from your head unit is available, use this as line output.
• Connect the subwoofer with the SPEAKER OUTPUTS by using the included wire harness.
• Always ensure that the total impedance load is not lower than 4 ohms.
Too low impedance cause high temperature and will shut down the amplier operation.
• Always ensure the correct polarity of the speakers. The interchange of plus and minus cause total loss of bass playback and could
damage the speakers.
CROSSOVER SETTINGS & BASS BOOST CONTROLLER
• The X-OVER switch must be in position LP. The cut-off frequency is xed at 80 Hz.
LEVEL CONTROLLER
• Turn the LEVEL INPUT controller of the amplier to the MIN position.
• Turn the volume controller of the head unit to 80 - 90% of its full setting.
• Turn the LEVEL INPUT controller clockwise until you hear some distortion.
• Then turn back the LEVEL INPUT controller slightly until you hear a cleaner sound.
Subwoofer
4 – 8 Ohms
LP
Connect stereo RCA output (L/R or SUB OUT)
of the head unit with INPUT (L/R) of the amplier