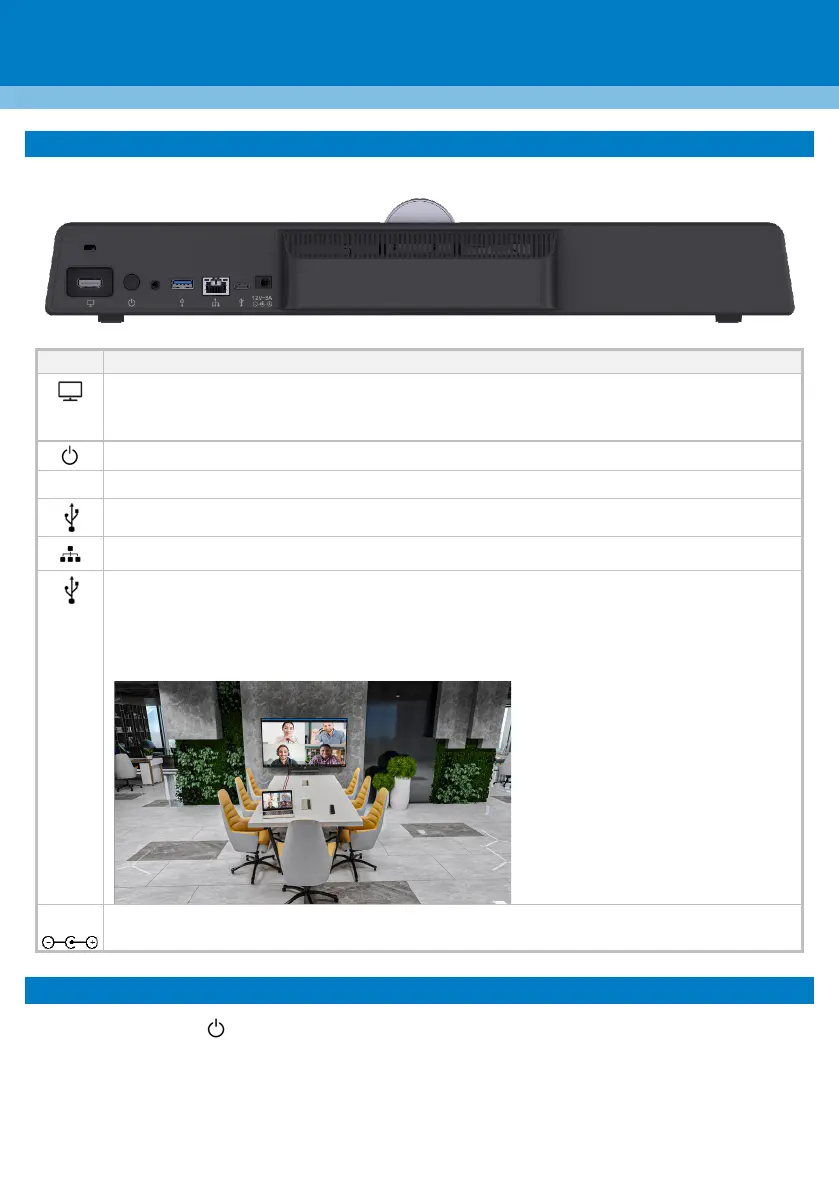
6. Cabling
The figure below shows the RXV81 rear panel’s connector ports.
Use the supplied HDMI Out cable to connect this port to a TV screen (standalone mode).
Applies to RXV81 as a standalone device (default). Video and sharing are displayed on the TV
screen. Meetings are controlled via the RC.
USB Type A port for touch LCD.
Ethernet LAN GbE port to connect RJ-45 terminals.
USB Type C to connect to a BYOD (Bring Your Own Device) (PC/laptop) running a UC client
for ad hoc or full peripheral mode. In peripheral mode, the BYOD displays meeting video and
content. Meetings are controlled via the BYOD (join, accept, manage participants).
Audio/video (camera ePTZ, mic mute) can be controlled via the UC client or the RC (camera
on / off, mute, volume). See figure below:
DC power input port for the 12V power supply.
7. Powering up
Press the power button or use the smart Bluetooth Remote Control (see next).

 Loading...