8
2.4 WALL-MOUNTED INSTALLATION
THE HEATERS MUST BE INSTALLED WITH THE MOUNTING BRACKETS PROVIDED IN THE BOX.
1. Take the heater out of the box and remove all
protective foam inserts and packaging.
2. Select the installation location on the wall by
identifying the studs or structural beams that will
allow the heater to be securely attached.
WARNING: Ensure minimum clearances outlined in
section 2.2 are met.
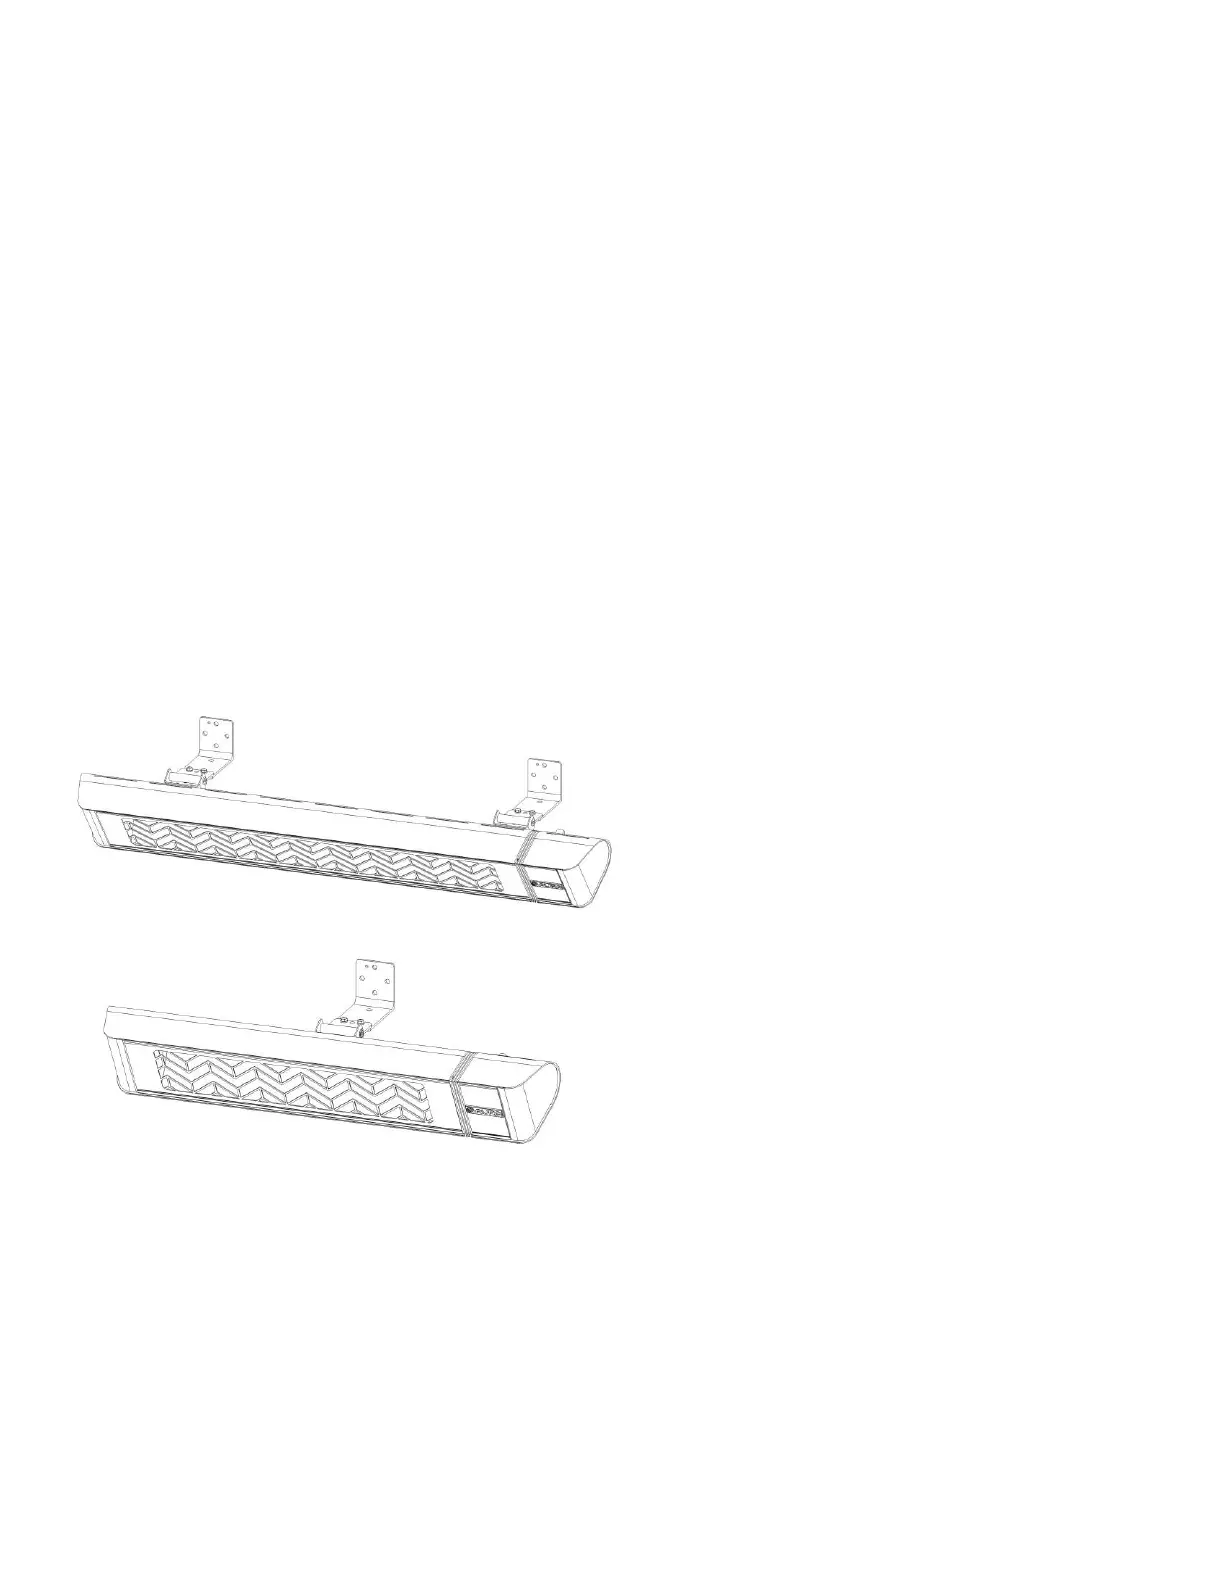
3. Securely fasten the L-shaped brackets to the
mounting surface using both fixing holes in the
short part of the bracket. Brackets should be
attached as shown below. 1500W heaters are
installed with a single center bracket. 3000W
heaters must be installed using two brackets.
The bracket should be installed with the bracket
mounting holes facing upwards.
NOTE: Wall bolts or anchors are not supplied.
Select an appropriate size to provide adequate
support for the weight of the unit and taking into
consideration any wind load conditions.
CAUTION: If there is any question regarding
security of the bolts and fixtures, contact a
professional contractor.
4. Mount the heater to the brackets with the
terminal box at the right side of the heater.
5. Adjust the heater to the desired directional
angle, then fix in this position by tightening the
fixing bolts on the brackets at the back of the
heater.
6. Secure the electrical supply cable so it does not
contact the heater body or obstruct the air vents.
Follow local and national electrical code
requirements. from the mounting wall