Using Every Battery Replacement
Use the batteries specially intended for the HA!
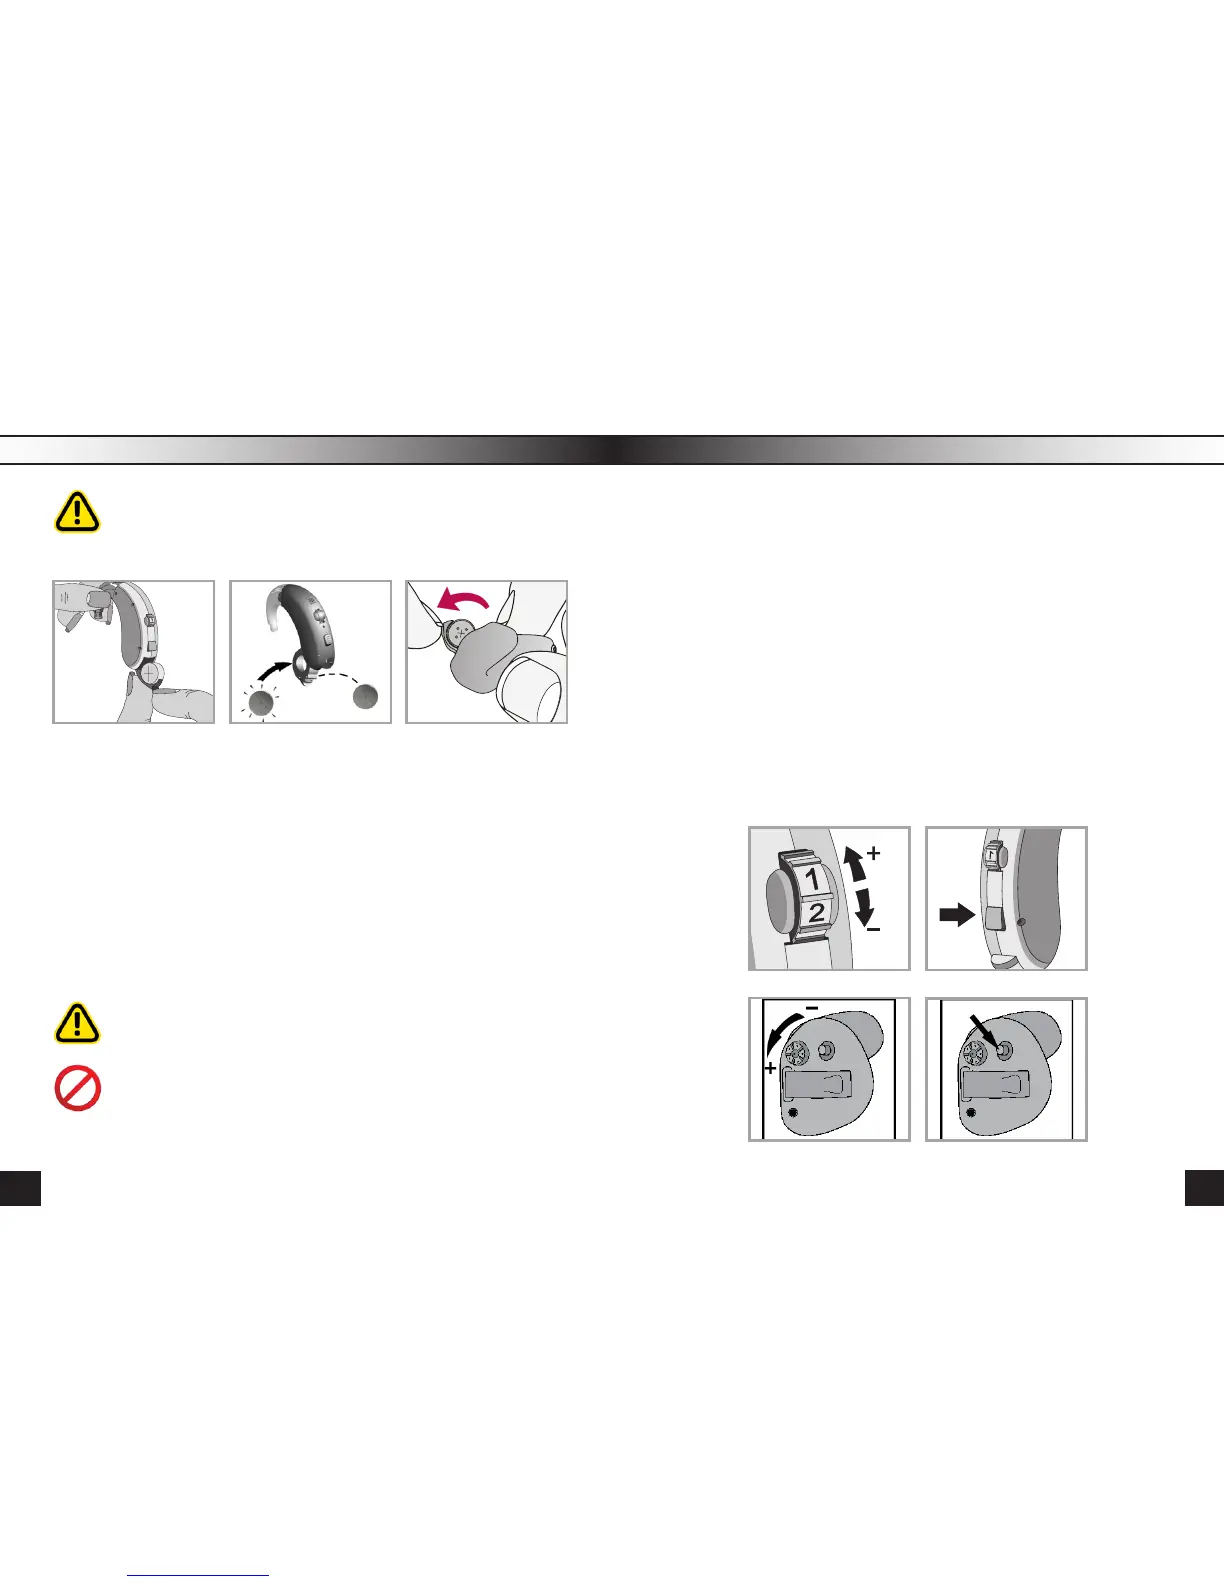
pic. 4a pic. 4b pic. 4c
Using wrong batteries (for watch etc.) can wreck the device.
In this case the warranty doesn’t cover the maintenance!
Gently swing out the battery door with your ngernail and then open it
completely (Pic.4a), take a new battery, take the tab off and wait 1 minute
so the battery could become saturated with oxygen to increase its energy
(Pic.4b). Insert the new battery into the battery compartment with plus(+)
sign on the battery facing the same way as the (+) sign on the edge of the
battery door. This will ensure that the battery door closes properly (Pic.4c).
Put the battery ONLY in the door of the battery compartment.
Note: If the battery is inserted incorrectly, the door will not close.
Never press too hard close the door of the battery compartment.
Lower amplication power and volume, or spontaneous shutdown
indicates a low battery.
Buying a hearing aid, bear in mind that it will take some time to get used to
new sounds and sensations. How much time this process will take depends
on the individual peculiarities of an organism, level of hearing loss, time
spent using the HA, etc. If you start feeling discomfort while using the HA ,
you need to lower the volume or turn it off and take a break.
While watching TV set the volume to a medium level. If you have a hard
time distinguishing sounds, turn the volume up using the volume comtrol.
However, you should remember that turning the volume up very high doesn’t
always improve your perception of speech, but can cause sudden fatigue
and provoke the deterioration of hearing.
In a noisy environment it’s pretty hard to distinguish certain words, so don’t
be embarrasswd to ask again.
The volume is adjusted with the volume adjuster - switching from position 1
(min volume) up to position 4 (max volume) (Pic. 5, 7).
pic. 5 pic. 6
pic. 7 pic. 8
11
10