10
QNix
®
5500
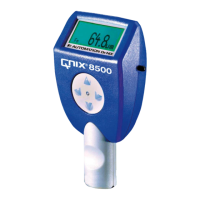
Connect the probe to the probe cable
• Screw the probe together with the cable.. For this purpose, always turn only the union nut
of the cable. A turning movement of the angled cable connection can lead to permanent
damage of the electrical contacts. This entails the loss of guarantee.
• For better probe guidance, insert the probe into the probe holder of the gauge.
The gauge is now ready for use. To remove a probe, follow the above steps in reverse order.
3.3. Adjustment (Zeroing)
The gauge needs to be adjusted before initially using it, after replacing the battery or for dierent
measurement jobs. Either use our reference plates or, ideally, a piece of uncoated material being tested.
Start the adjustment
• Please press the Q-Button. You then are requested to place the gauge on the
reference material.
• Place the gauge either on the material to be tested or on a reference plate.
The display shows the last measurement result.
• For control place the gauge once again on the material.
The display shows either 0,0 or a very low measurement result.
• In case the adjustment is started accidentally, the function can be quitted by pressing
the button again.
Probe cable
Probe
Probe holder
 Loading...