Do you have a question about the Autotrol 255/760 and is the answer not in the manual?
Method for calculating compensated hardness by adding iron levels to initial hardness.
Determining tank size and selecting the salt setting based on hardness.
Lubricating o-rings and attaching the Autotrol 255/760 valve and riser tube to the tank.
Programming tank size, time of day, and day of the week.
Setting salt level based on hardness and inputting the calculated hardness level.
Opening bypass, filling tank, and performing regeneration cycle to check for leaks.
This document is an installation guide for the Autotrol 255/760 Metered Water Softener, designed to provide quality water for less. It covers general reference, quick start instructions, detailed installation steps, programming, and initial system start-up.
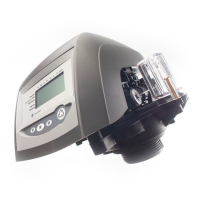
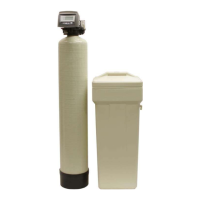
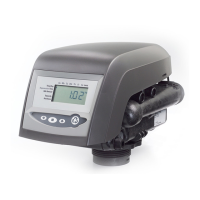
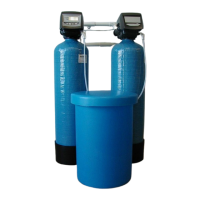
The Autotrol 255/760 Metered Water Softener is a system designed to remove hardness-causing minerals (like calcium and magnesium) and iron from water through an ion exchange process. It uses a metered control valve to track water usage and initiate regeneration cycles based on actual demand, optimizing salt consumption. The system includes a mineral tank, a brine tank, and the Autotrol 255/760 control valve, which manages the softening and regeneration processes.
The control valve features four main ports: BRINE, OUTLET, DRAIN, and INLET. It operates on a standard US plug, 120V 60Hz power source, and includes a 5 ft power cord. The system's capacity is measured in grains, and the tank size is expressed in cubic feet, calculated by dividing the grain capacity by 32,000 (e.g., 64,000 grains / 32,000 = 2.0 cubic feet).
Key programmable settings include:
The manual provides a detailed table for determining the appropriate brine tank grid (Plain Grid, Grid + 3" Legs, Grid + 6" Legs) and salt setting based on the system's grain capacity, cubic feet, and compensated hardness level. Brine tank sizes mentioned include 11x11", 15x17", 18x33", 18x40", 24x41", and 24x50" grids.
The system is designed for residential use, providing softened water to the entire home. The metered regeneration ensures that the system only regenerates when necessary, saving salt and water.
Initial Programming: Upon first plugging in the unit, the control will prompt for initial settings. Users navigate through settings using UP/DOWN buttons, enter edit mode with the SQUARE/SET button, adjust values with UP/DOWN buttons, and confirm with SQUARE/SET.
Editing Program Values: After initial programming, individual settings can be edited by highlighting the desired setting with UP/DOWN buttons, entering edit mode with SQUARE/SET, adjusting with UP/DOWN buttons, and confirming with SQUARE/SET.
Reprogramming: To entirely reprogram the unit, hold both the SQUARE/SET and DOWN buttons simultaneously for 5 seconds until the tank size appears, then hold only the SQUARE/SET button to proceed with reprogramming.
Water Hardness Calculation: The guide outlines a crucial process for calculating "Compensated Hardness," which accounts for both water hardness and iron levels.
Installation Steps:
Salt Level: Always keep the brine tank filled with pellet, solar, or block salt to at least above the water level. The manual states that new resin arrives at full softening capacity, so immediate regeneration after installation is not needed. The softener will automatically trigger regenerations based on water consumption.
Leak Checks: The installation guide emphasizes checking for leaks at multiple stages: after plumbing the system into the home and after each step of the short form regeneration process (backwash, regeneration draw, regenerant refill). If leaks are found, the user is directed to review the relevant installation steps.
System Longevity: Proper installation and maintenance, including keeping the softener plugged in and the brine tank filled, are highlighted as crucial for years of trouble-free softened water.
| Brand | Autotrol |
|---|---|
| Model | 255/760 |
| Category | Water Dispenser |
| Language | English |