EasyManua.ls Logo

Autotrol 268/760 - User Manual

Autotrol 268/760
13 pages
Print Icon
To Next Page IconTo Next Page
Loading...
v1.0
AUTOTROL 268/760
METERED WATER SOFTENER
InstallatIon GuIde
Question and Answer IconNeed help?

Do you have a question about the Autotrol 268/760 and is the answer not in the manual?

Summary

AUTOTROL 268;760 Metered Water Softener Installation Guide

General Reference and Quick Start

Meter Control Valve Ports Overview

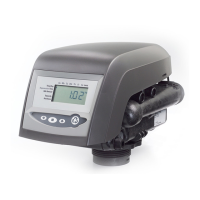
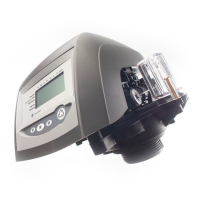
Identifies and explains the four main ports on the Autotrol 268/760 control valve.

Quick Start Programming Guide

Outlines initial programming steps, editing, and reprogramming procedures for the softener.

Water Hardness, Capacity, and Brine Fill Calculations

Water Test and Hardness Conversion

How to test water hardness and convert units (PPM, mg/L) to Grains per Gallon (gpg).

Compensated Hardness Calculation

Method to calculate compensated hardness by factoring in iron levels for softener programming.

Tank Size and Salt Setting Guide

Tank Size Determination

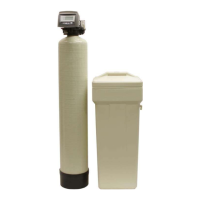
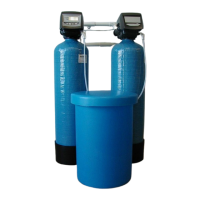
Guidance on selecting the correct tank size based on capacity or dimensions.

Salt Setting Selection

How to choose the optimal salt setting based on your water's hardness level.

Pre-Installation and Tank Placement

Installation Site Requirements

Specifies essential site conditions and locations for installing the water softener system.

Tank Placement and Filling

Instructions for positioning the softener tank and preparing it for valve installation.

Installing the Autotrol 268;760 Control Valve

Valve Preparation and O-ring Lubrication

Steps for preparing the valve, lubricating o-rings, and installing the top screen.

Attaching Valve to Tank

Procedure for securely mounting the control valve onto the softener tank.

Plumbing and Drain Connections

Drain Line Assembly

How to attach the drain barb fitting and connect the drain line tubing.

Bypass Assembly Installation

Steps for connecting the bypass assembly to the back of the Autotrol 268/760 valve.

Plumbing the System and Brine Tank Connection

Connecting Water Supply Lines

Instructions for plumbing the system's IN and OUT ports to the home's water supply.

Making the Brine Tank Connection

How to connect the brine tubing to the control valve and the brine tank.

Brine Tank and Float Assembly Setup

Preparing Brine Well and Float Assembly

Steps for removing the brine well cap and inserting the float assembly.

Connecting Brine Line Tubing

How to connect the brine line tubing to the float assembly and brine tank.

Programming the Autotrol 268;760 Valve

Power Connection and Initial Setup

Connecting the power pack and verifying the timer display.

Setting Tank Size and Time

Inputting the tank size and setting the current time of day.

Setting Day of the Week

Adjusting the timer to reflect the current day of the week.

Softener Programming Settings

Regeneration Time and Override

Setting the regeneration time and the calendar override days.

Salt Setting and Hardness Level

Selecting the salt setting and inputting the calculated hardness level.

Final Display Verification

Confirming the display shows time of day and remaining gallons.

Initial System Start-Up and Testing

Filling and Initial Bypass Operation

Process of filling the softener with water and using the bypass valve.

Regeneration Test for Leaks

Performing a short regeneration cycle to check for leaks and system integrity.

Adding Salt and System Completion

Instructions for adding salt and confirmation of successful installation.

Overview

The Autotrol 268/760 Metered Water Softener is a system designed to reduce water hardness, providing softened water for residential use. This installation guide provides comprehensive instructions for setting up, programming, and maintaining the softener, emphasizing proper installation to ensure optimal performance and longevity.

Function Description:

The Autotrol 268/760 operates as a metered water softener, meaning it tracks water consumption and initiates regeneration cycles based on the actual amount of water used, rather than a fixed time schedule. This metered approach helps optimize salt usage and water efficiency. The system removes hardness minerals (primarily calcium and magnesium) from water through an ion-exchange process, replacing them with sodium ions. The control valve, specifically the Autotrol 268/760, manages the various stages of the softening and regeneration cycles, including service, backwash, brine draw, slow rinse, rapid rinse, and brine tank refill. The system includes a mineral tank, which houses the resin media responsible for ion exchange, and a brine tank, which stores salt and creates a brine solution for regeneration.

Important Technical Specifications:

The manual highlights several key parameters that need to be configured for the softener to operate correctly:

  • Tank Size: This is determined by the system's grain capacity divided by 32,000. For example, a 64,000-grain capacity tank would be a 2.0 cubic foot tank. This value is crucial for the control valve to accurately calculate regeneration needs.
  • Hardness Level: Measured in Grains per Gallon (gpg), this is the most critical setting. The manual provides a method to calculate "Compensated Hardness" by factoring in both water hardness (PPM or mg/L converted to gpg) and iron levels (PPM or mg/L multiplied by 5 and added to the hardness). Accurate hardness input ensures the softener regenerates at the appropriate time, preventing premature or delayed regeneration.
  • Salt Setting: This parameter dictates the amount of salt used during each regeneration cycle. The manual includes a "Salt Grid Table" that helps users select the most efficient salt setting (Low, Standard, or High) based on their tank size and compensated hardness level. Lower hardness levels allow for more efficient salt consumption.
  • Regeneration Time: The default setting is 2:00 AM, allowing regeneration to occur during off-peak water usage hours.
  • Day Override: This feature ensures regeneration occurs after a set number of days (default 14 days) even if the metered water usage alone doesn't trigger it. This is a safeguard to prevent the resin from becoming completely exhausted.
  • Capacity: This value is automatically calculated by the control valve based on the chosen salt setting and should not be manually changed.
  • Power Source: The system requires a standard US plug, 120V 60Hz power source. A 5 ft power cord and plug are included.

Usage Features:

  • Initial Programming: Upon first plugging in the unit, the control valve prompts the user to enter essential values such as Tank Size, Time of Day, Day of the Week, Regeneration Time, Day Override, Salt Setting, and Hardness. The manual provides step-by-step instructions for navigating the control panel using UP/DOWN and SQUARE/SET buttons.
  • Editing Program Values: Individual settings can be adjusted after initial programming by highlighting the desired setting, entering edit mode, adjusting the value, and setting it.
  • Reprogramming: For a complete reset, holding both the SQUARE/SET and DOWN buttons simultaneously for 5 seconds, then holding just the SQUARE/SET button, allows for full reprogramming.
  • Metered Regeneration: The system automatically tracks water consumption and initiates regeneration when the resin capacity is depleted, optimizing salt and water usage.
  • Display: The control panel displays the time of day and the amount of gallons remaining, alternating between these values every 10 seconds. An "AM" or "PM" indicator differentiates between times.
  • Bypass Valve: The system includes a bypass assembly, allowing users to divert water around the softener for maintenance or if unsoftened water is desired for specific applications (e.g., outdoor spigots).

Maintenance Features:

  • Brine Tank Connection: The manual details the process of connecting the brine line from the control valve to the brine tank, including the installation of the 474 Brine Float Assembly, which regulates water levels in the brine tank.
  • Drain Line Connection: Instructions are provided for assembling the drain barb elbow fitting and connecting a rigid 1/2" I.D. drain line to a standpipe or floor drain, crucial for discharging wastewater during regeneration.
  • Salt Refill: Users are instructed to add 120-160 pounds of pellet, solar, or block salt to the brine tank and to always keep the brine tank filled with salt above the water level.
  • Short Form Regeneration (Leak Check): After installation, a short form regeneration is recommended to check for leaks in all connections. This involves adding water to the brine tank and manually cycling through the regeneration stages (Backwash, Regeneration Draw/Slow Rinse, Regenerant Refill) while observing for leaks.
  • Resin Media: The manual mentions that new resin arrives at full softening capacity, so immediate regeneration after installation is not necessary. Instructions are provided for filling the mineral tank with gravel (if applicable) and resin media.
  • Lubrication: Silicone lubricant is provided for the o-rings on the bottom of the control valve during installation to ensure a proper seal.

Autotrol 268/760 Specifications

General IconGeneral
BrandAutotrol
Model268/760
CategoryWater Dispenser
LanguageEnglish

Related product manuals