20
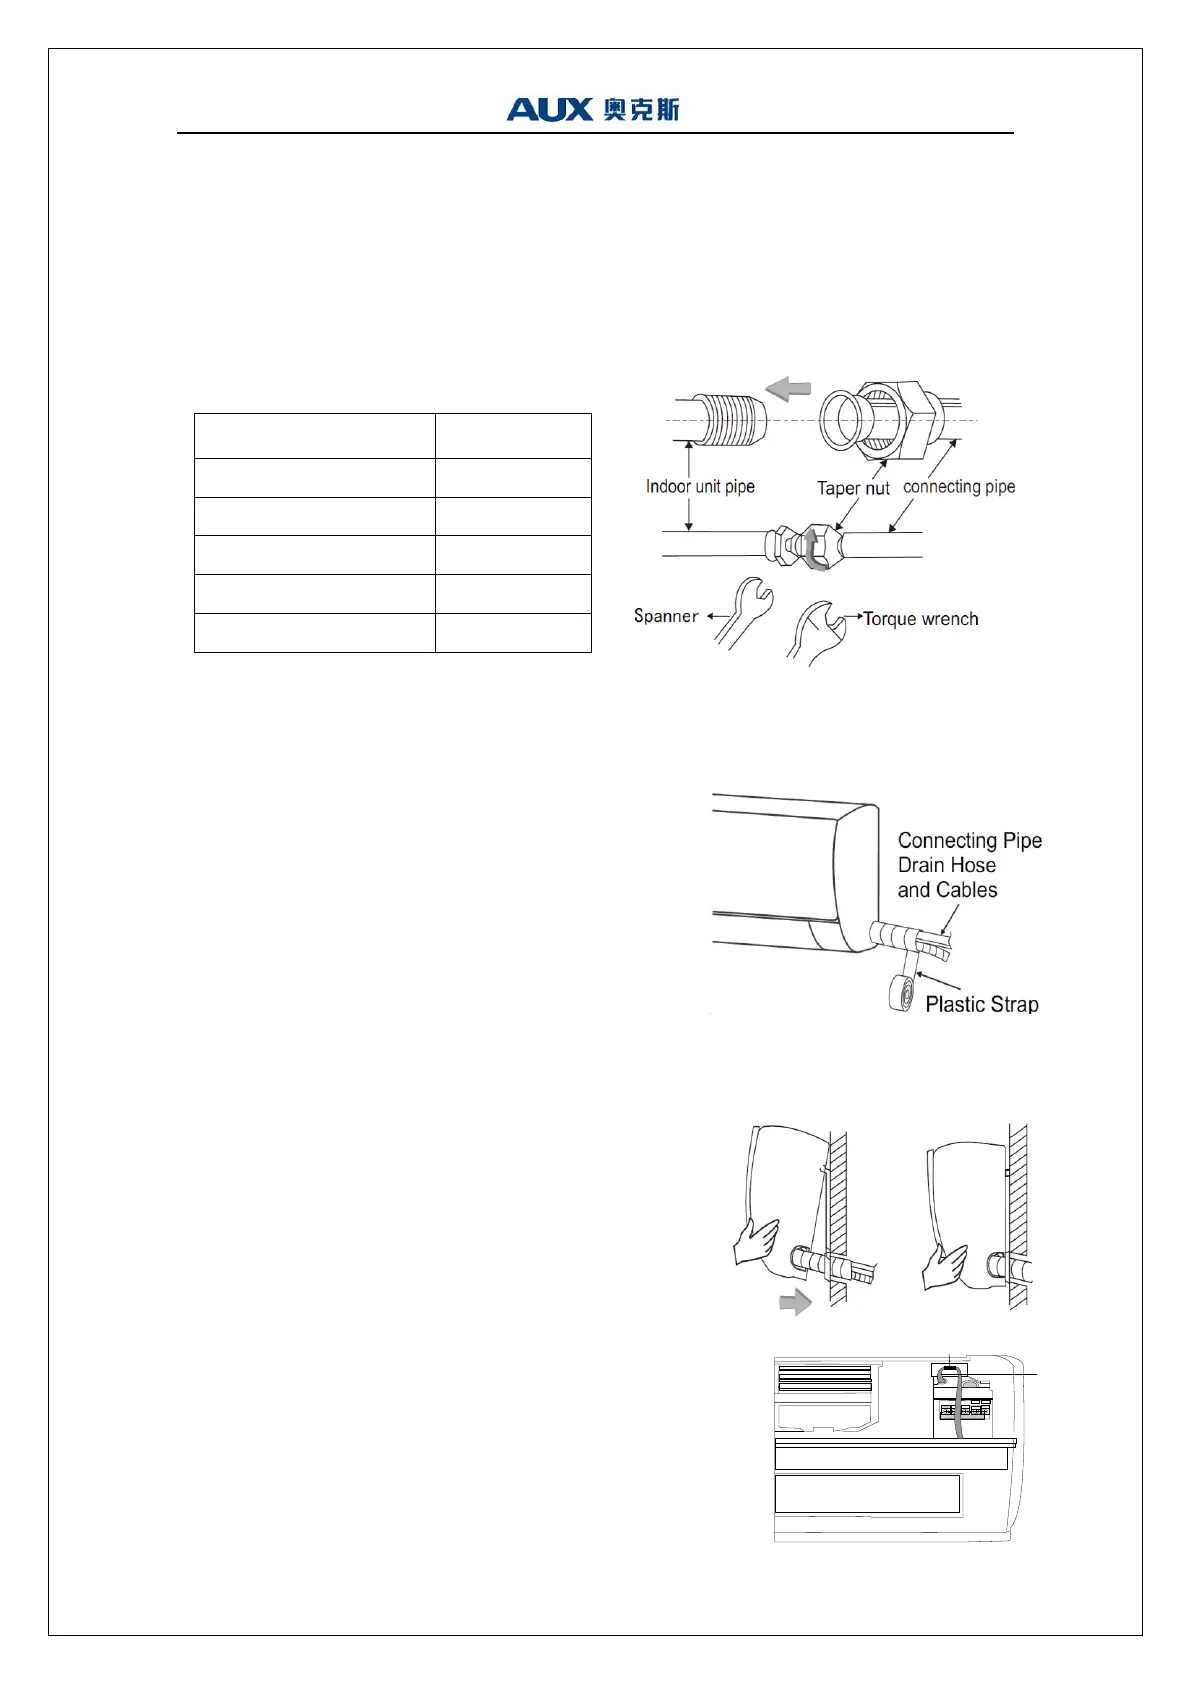
14 Drain pipe connection
Tightening torque table
15 Wrap the Piping
16 Fixing the Indoor Unit
17 Fixing the indoor unit
18 Electric Connection Requirement
● Loosen the screws and remove from the unit.
● Connect the cables respectively to the corresponding
terminals of the terminal board of the indoor unit (see the
wiring diagram), and if there are signals connected to the
plug, just conduct butt joint.
1. Remove the mountings and pull the indoor unit pipe out of the housing.
2. Connect the connecting pipe to the indoor unit:
Aim at the pipe center, tighten the Taper nut with fingers, and then tighten the T
nut with a torque wrench, and the direction
is shown in diagram on the right. The torque
used is shown in the following table.
1. Use the insulation sleeve to wrap the joint part the
indoor unit and the connection pipe, and then use
insulating material to pack and seal insulation pipe,
to prevent generation of condensate water on the
joint part.
2. Connect the water outlet with drain pipes, and
make the connection pipe, cables, and the drain hose
straight.
3. Use plastic cable ties to wrap the connecting
pipes, cables and drain hose. Run the pipe sloping
downward.
1. Hang the indoor unit on the peg board, and move
the unit from left to right to ensure that the hook is
properly positioned in the peg board.
2. Push toward the lower left side and the upper right
side of the unit toward the peg board, until the hook
is embedded in the slot and makes a "click" sound.
 Loading...