EasyManua.ls Logo

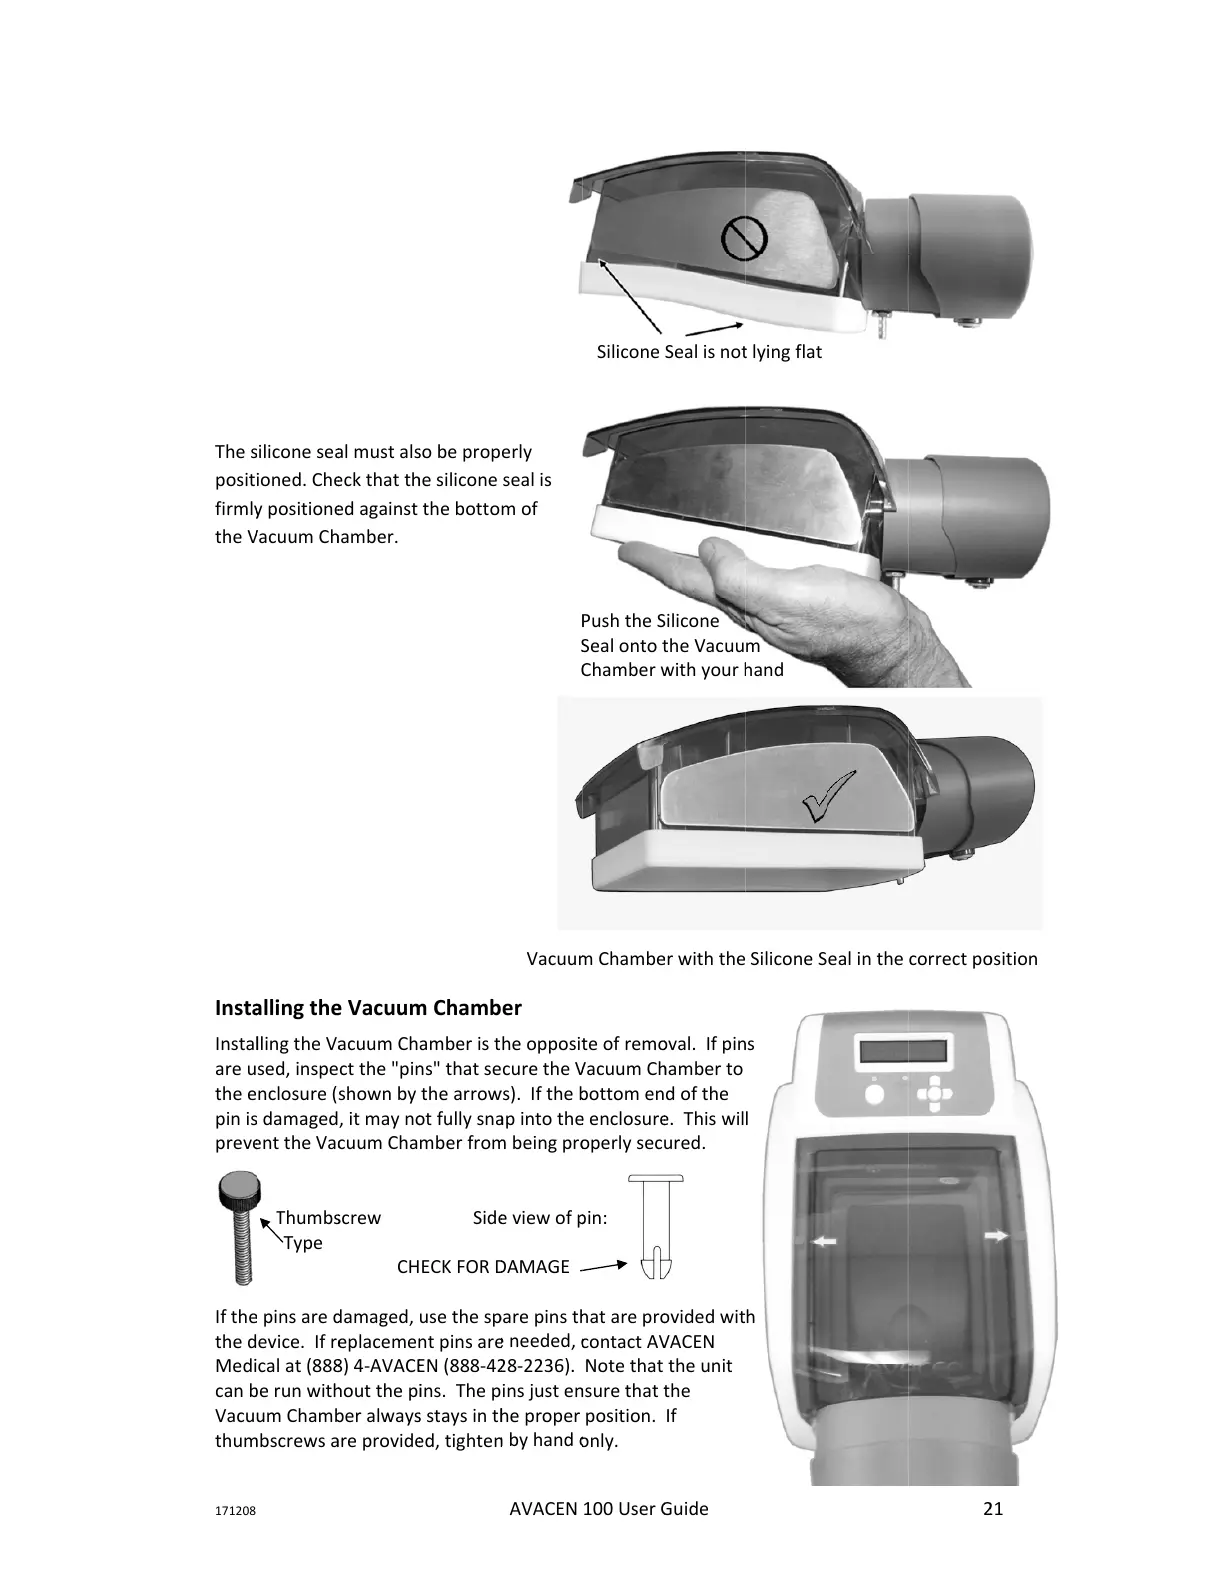
Avacen 100 - Installing the Vacuum Chamber

Avacen 100
32 pages
Print Icon
To Next Page IconTo Next Page
To Previous Page IconTo Previous Page
Loading...
171208
The
s
posit
firml
y
the
V
Inst
a
Insta
l
are u
the e
pin i
s
prev
e
If th
e
the d
Medi
can
b
Vacu
thu
m
s
ilicone se
a
ioned. Ch
e
y
position
e
V
acuum C
h
a
lling th
e
l
ling the V
a
sed, inspe
nclosure (
s
damaged
e
nt the Va
c
Thumb
s
Type
e
pins are
d
evice. If r
e
cal at (88
8
b
e run wit
h
um Cham
b
m
bscrews
a
a
l must al
s
e
ck that t
h
e
d against
h
amber.
e
Vacuu
m
a
cuum Ch
ct the "pi
n
shown by
, it may n
o
c
uum Cha
s
crew
CH
d
amaged,
eplaceme
n
8
) 4-AVAC
E
h
out the p
i
b
er alway
s
a
re provid
e
s
o be prop
h
e silicone
the botto
m
Chamb
amber is t
n
s" that se
the arro
w
o
t fully sn
a
mber fro
m
Sid
e
ECK FOR
D
use the s
p
n
t pins ar
e
E
N (888-4
2
i
ns. The p
s
stays in t
h
e
d, tighte
n
AVACEN
erly
seal is
m of
er
he opposi
t
cure the
V
w
s). If the
b
a
p into th
e
m
being pr
o
e
view of
p
D
AMAGE
p
are pins t
h
e
needed,
c
2
8-2236).
ins just e
n
h
e proper
n
by hand
o
Vacuu
m
P
S
C
100 User
G
t
e of rem
o
V
acuum C
h
b
ottom en
e
enclosur
e
o
perly sec
p
in:
h
at are pr
o
c
ontact A
V
Note that
n
sure that
t
position.
o
nly.
m
Chamb
e
P
ush the
S
S
eal onto
t
C
hamber
w
Silicone
G
uide
o
val. If pi
n
h
amber to
d of the
e
. This wil
ured.
o
vided wit
V
ACEN
the unit
t
he
If
e
r with the
S
ilicone
t
he Vacuu
w
ith your
h
Seal is no
t
s
l
h
Silicone S
m
h
and
t
lying flat
eal in the
2
correct p
o
2
1
o
sition
All manuals and user guides at all-guides.com

Table of Contents