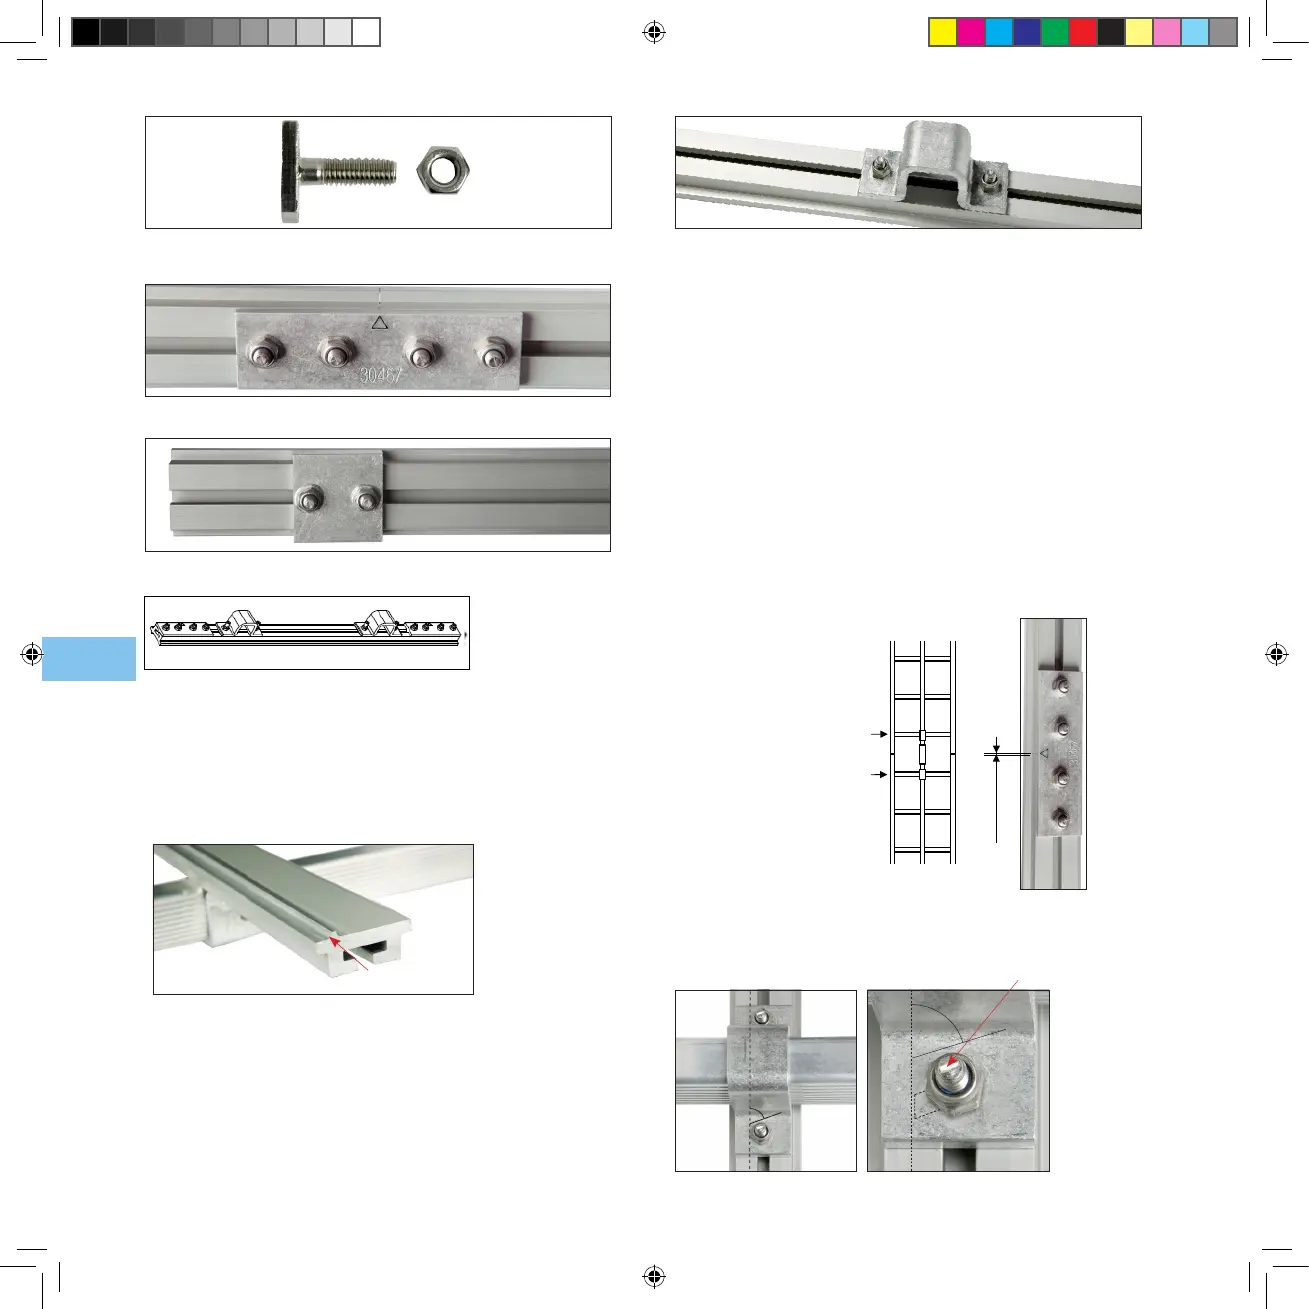
10
Hammerhead bolt with self-locking nut
Fish joint connector
Sample of rail-stop to be used at top and bottom of the rail installation
Flange connection kit
4.2 Installation of the rail system on the ladder
a) Place the safety rail on the centre and front side (the climber´s side)
of the ladder.
b) Place the safety rail so that the guide seat is situated on the left side.
c) Fix the safety rail to the ladder by means of the rung ttings.
d) Mount the rung ttings using hammerhead screws and self-locking
nuts, and following the instructions below.
Guide seat
The guide seat is meant to prevent incorrect orientation of the runner.
The guide seat must be situated on the left side.
A rung tting mounted on the rail
i. For each rail section, mount a rung tting on the rst (lowest) rung of the
ladder.
ii. For each rail section, mount a rung tting on the last (highest) rung of the
ladder. This is also necessary even if the second or third last rung of the
ladder are mounted with a rung tting.
iii. For each rail section, mount a rung tting at least every third rung, never
leaving more than 2 consecutive rungs without a rung tting.
iv. For each rail section, mount at least 4 rung ttings to the ladder. When
rail section is connected to another rail section, the sh joint can be also
considered as a rung tting connection.
e) Use a sh-joint to join 2 consecutive safety rail sections.
f) Use 4 screws to mount each sh-joint.
g) Leave a gap between 2 consecutive safety rail sections of at least 1 mm
and maximum 4 mm.
h) Place the hammerhead screws with the indicator marks in an angle of 70°.
i) Tighten all the self-locking nuts to 8 Nm and ensure that they sit with the
70º angle.
Angle of the indicator marks and of the self-locking nuts
Indicator mark
70°
70°
1 mm ≤ x ≤ 4 mm
Bottom rung of a
ladder section
Top rung of a
ladder section