25
OPERATION
BAND AID INTRODUCTION AND SETUP
The PSA-37XP has a built in feature for viewing down-converted KU-Band. Normally, the KU-Band fre-
quencies are stepped down to L-Band frequencies and displayed on the analyzer. With the BAND AID
Function, you will be able to view the frequencies on the frequency counter as they truly are. The PSA -
37XP has implemented this feature to aid in the field installation processes utilizing th eAVCOM portable
spectrum analyzers.
SETUP PROCEDURE
1. Place the BAND SELECT knob in the BAND 2 position (950—2150MHz). The Band Aid feature is dis-
abled in all other BAND positions.
2. Adjust the VERTICLE POSITION, SPAN WIDTH, RESOLUTION BANDWIDTH, REFERENCE LEVEL,
and TUNING KNOBS to view the desired signal.
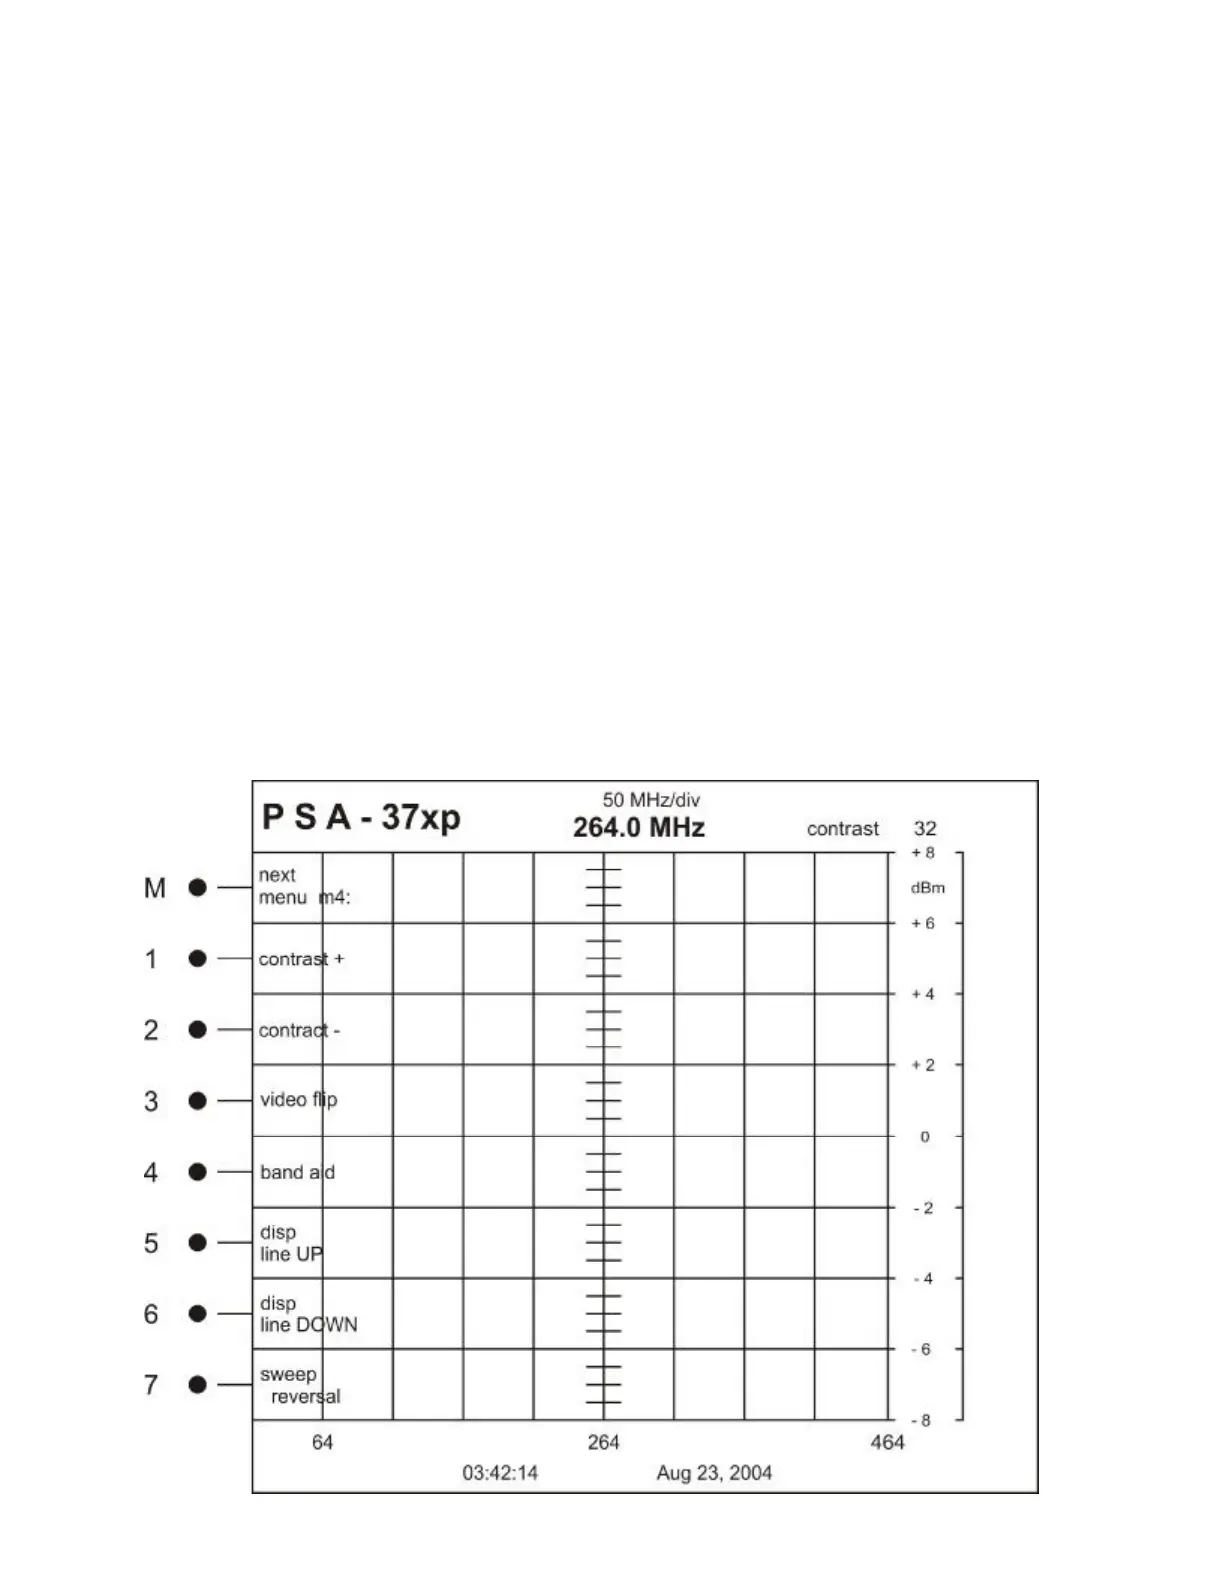
3. Press the M button and navigate to MENU M4.
4. Press the M4 Button to initialize BAND AID.
4.1 Pressing the M4 Button once adds the 11700 + offset to the shown frequency.
4.2 Pressing the M4 Button again will add the 11300 + offset to the shown frequency.
4.3 Pressing the M4 Button again will add the 10750 + offset to the shown frequency.
4.4 Pressing the M4 Button again will allow you to set a custom offset to the shown frequency.
5. View the changes to the frequency counter with the offset inserted.
6. These values are non-volatile and will be lost when the PSA-37XP is turned off.