US
8 9
WARNING: The GFCI plug must be tested before each use.
Do not use if GFCI test fails and see chapter 6.1.
3.1. Site selection
Place in a clean environment Ensure its levelUse a sun cover
WARNING : Before proceed to installation your spa, please make sure that the
selected location meets the following conditions :
• A level place in order to avoid any defect, hernia or leakage.
• Wide enough to support the spa and its pump unit.
• Able to support more than 500 kg/m².
• Sheltered from the sun and bad weather.
• Clean and free from sharp objects.
• Devoid of aggressive vegetation on the ground.
Failure to comply with these rules may result in property damage or personal injury.
3. INSTALLATION
1. Insert the plug into the power outlet.
2. Press the <<RESET>>button,the indicator light turns red.
3. Press the <<TEST>>button,the indicator light turns off.
4. Press the <<RESET>>button,the indicator light turns red.
The GFCI works properly.
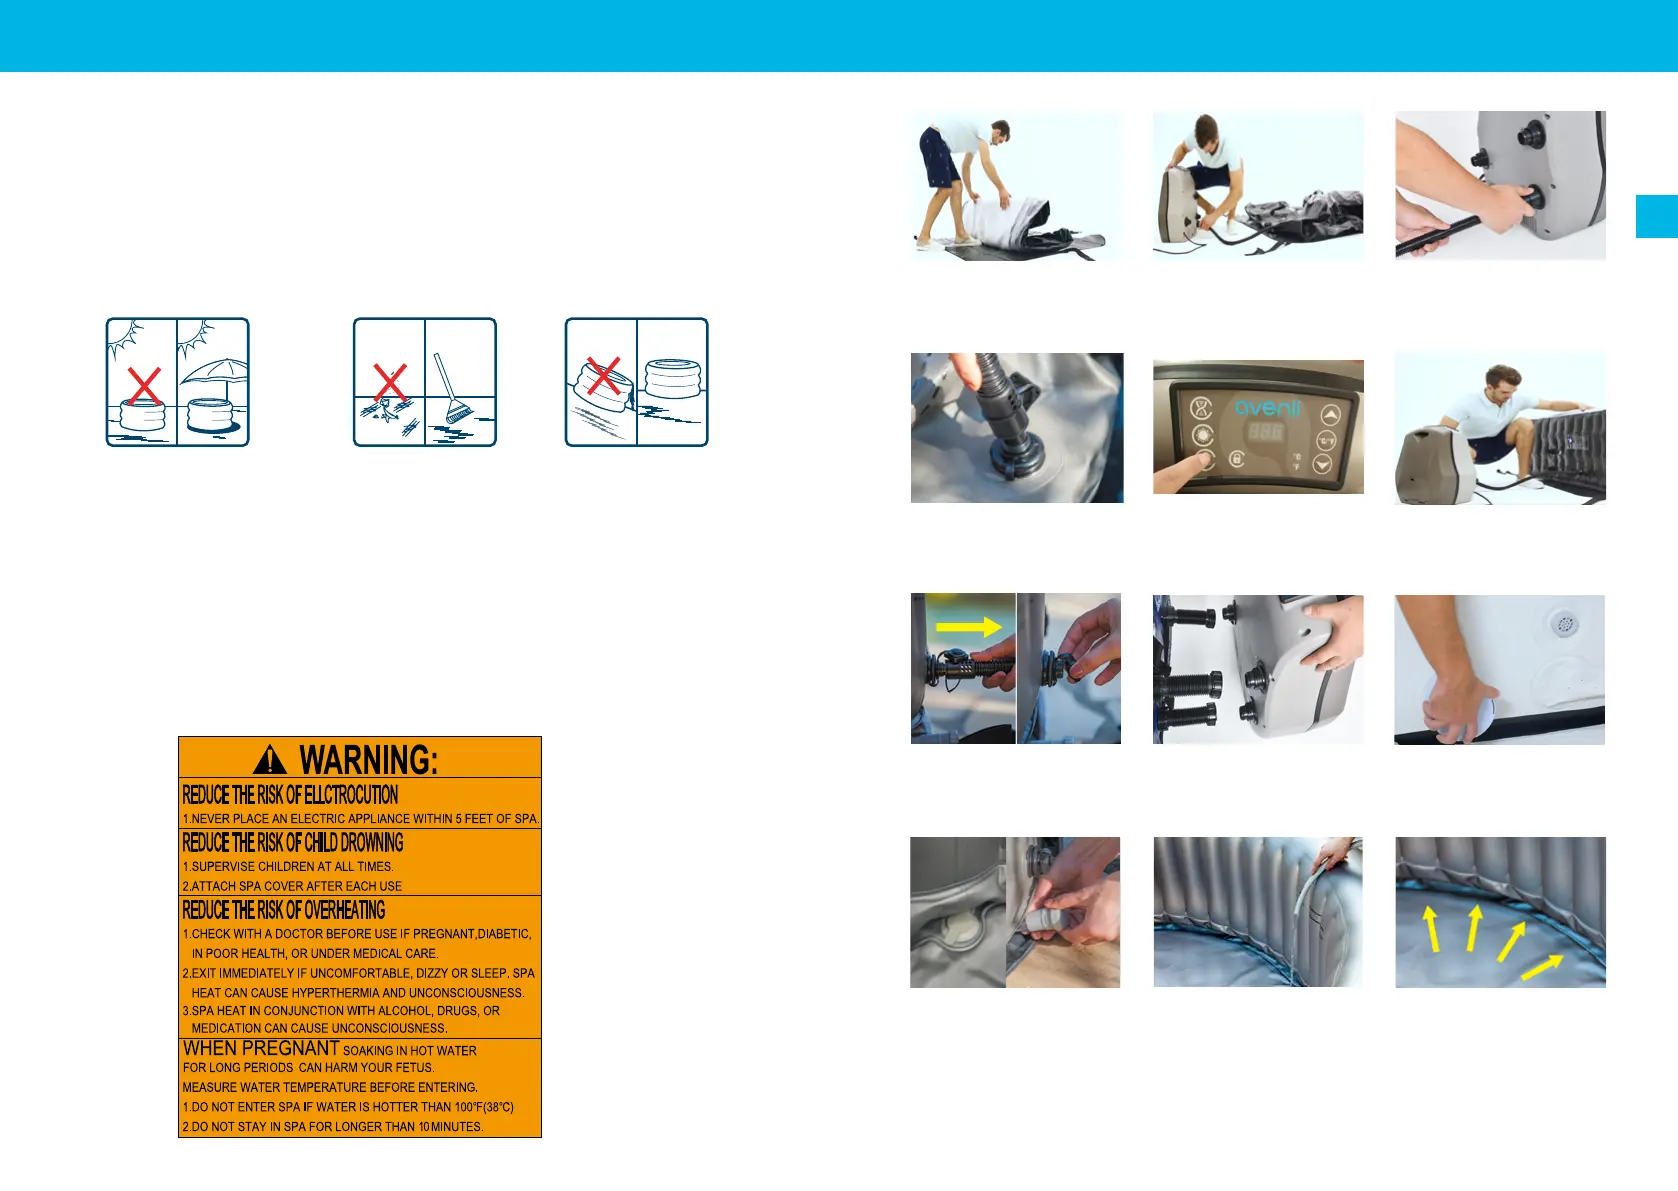
ASSEMBLY:THE PROVIDED WARNING LABEL
3.3. Assembling
1) Unfold the inatable spa over the
base protector.-IMPORTANT
2) Bring the pump unit to the inatable
spa.
3) Connect the ination hose to the
pump on the socket .
6) Inate the inatable spa for about
10 minutes. Ensure that the spa is
rmly inated.
10) Ensure that the drain caps are
properly closed before before lling
the spa
7) Remove the ination hose and
screw the cap rmly in place.
11) Fill the SPA with 10 cm of water.
8) Connect the unit pump to the spa
using the 3 connectors to screw.
Ensure the icons on the pump and the
spa match up
9) Attach the lter cartridge in the SPA,
it can be pressed and screwed in place.
Ensure lter is in lter hosing.
12) Smooth wrinkles out of the bottom
of the spa, then ll the spa to the level
indicated. Your spa is ready.
4) Insert the ination hose into the
inatable spa
5) Connect the pump unit then press
the button to inate the spa.
The air ow valve prevents your spa
from over-inating.